
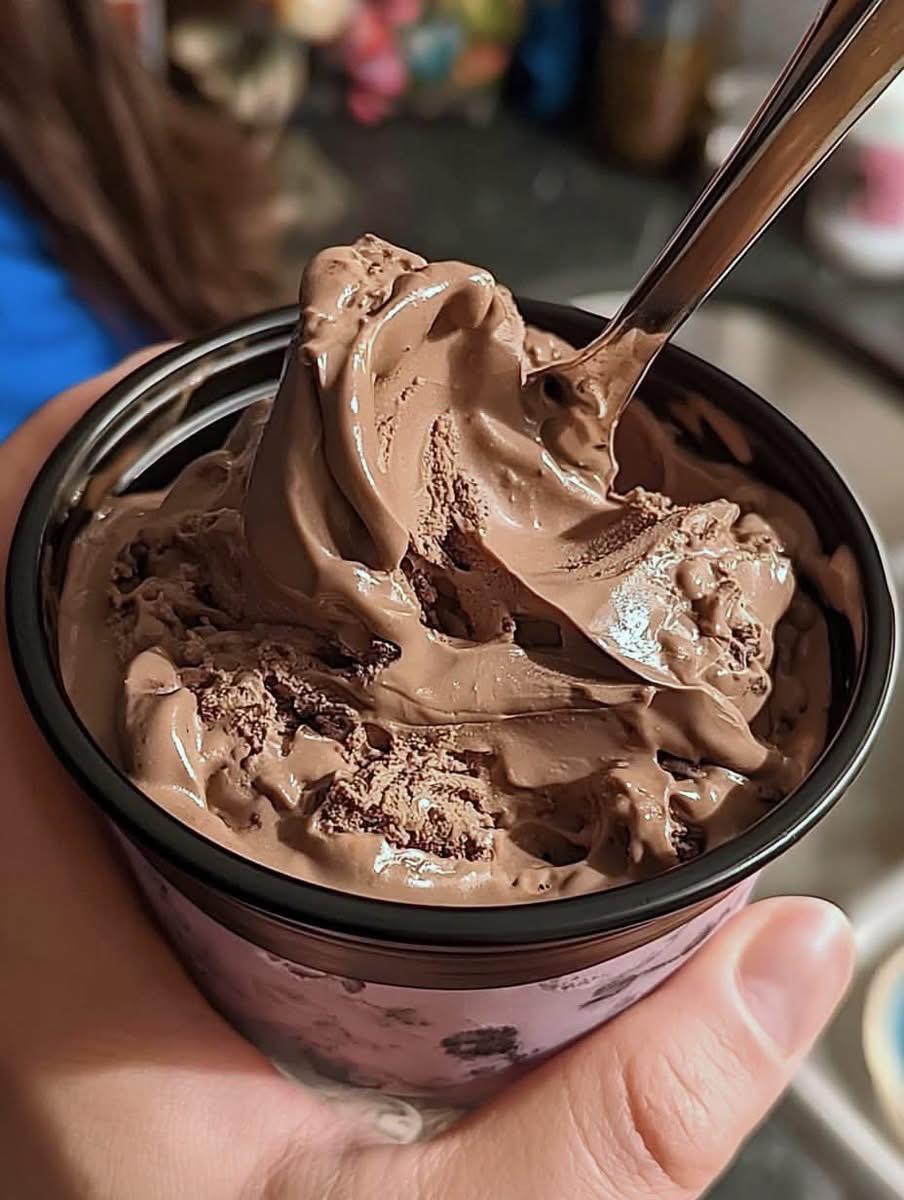
If you love rich, thick, velvety chocolate ice cream, this homemade recipe is going to be a favorite. It has an intense chocolate flavor, a luxurious creamy texture, and a beautifully smooth consistency that makes every spoonful incredibly satisfying.
A small amount of softened cream cheese helps give the ice cream body and a dense, scoopable texture. The result is a homemade chocolate ice cream that feels wonderfully indulgent without requiring a complicated ingredient list.
Recipe Overview
| Prep Time | Freeze Time | Churning Time | Yield | Category |
| 10 minutes | 24 hours | 5–10 minutes | About 1 pint | Dessert |
Cuisine: American-inspired
Method: Ninja Creami or ice cream maker
Difficulty: Easy
Why You’ll Love This Recipe
This chocolate ice cream is incredibly easy to prepare and uses everyday ingredients that come together into a rich, creamy frozen dessert.
The combination of whole milk and heavy cream creates a smooth, luxurious base, while unsweetened cocoa powder provides a deep chocolate flavor.
The recipe is especially convenient for the Ninja Creami, where the frozen base can be transformed into an exceptionally thick and creamy dessert in just minutes.
Ingredients
| Ingredient | Exact Quantity |
| Cream cheese, softened | 1 tablespoon (15 g) |
| Granulated sugar | ⅓ cup (67 g) |
| Unsweetened cocoa powder | 2 tablespoons (10–12 g) |
| Whole milk | 1 cup (240 ml) |
| Heavy whipping cream | ¾ cup (180 ml) |
| Pure vanilla extract | 1 teaspoon |
| Fine sea salt | Small pinch |
Choosing the Ingredients
For the richest flavor, use a good-quality unsweetened cocoa powder.
Full-fat cream cheese and whole milk provide the best creamy texture.
Pure vanilla extract enhances the chocolate flavor without making the ice cream taste strongly of vanilla.
Step-by-Step Instructions
1. Soften the Cream Cheese
Place the cream cheese in a medium mixing bowl.
Allow it to soften at room temperature for about 15–20 minutes.
Soft cream cheese will blend much more easily and help prevent lumps.
2. Make the Chocolate Paste
Add the granulated sugar and unsweetened cocoa powder to the softened cream cheese.
Whisk vigorously until the ingredients form a thick, smooth chocolate paste.
This step is important because it helps disperse the cocoa powder before the liquid ingredients are added.
3. Add the Milk
Slowly pour the whole milk into the chocolate mixture while whisking continuously.
Continue whisking until the mixture becomes smooth and the sugar is mostly dissolved.
4. Add the Cream
Pour in the heavy whipping cream.
Add the vanilla extract and a small pinch of sea salt.
Stir gently until everything is thoroughly combined.
Avoid whipping the mixture excessively because you want a smooth liquid base rather than a heavily aerated mixture.
5. Freeze the Base
Pour the chocolate mixture into a Ninja Creami pint container or another freezer-safe container appropriate for your ice cream maker.
Make sure the container is placed on a level surface.
Freeze for at least 24 hours, or until completely solid.
For the Ninja Creami, the base needs to be frozen completely solid before processing.
6. Process in the Ninja Creami
Remove the frozen pint from the freezer.
Place it into the Ninja Creami outer bowl according to the manufacturer’s instructions.
Select the Ice Cream program and allow the machine to process the pint.
7. Re-Spin for Extra Creaminess
After the first cycle, check the texture.
If the ice cream looks powdery, crumbly, or slightly dry, make a small hole in the center and add approximately 1 tablespoon of milk.
Run the Re-Spin program.
The mixture should transform into a thick, smooth, creamy consistency.
If necessary, a second Re-Spin can be used, but avoid adding too much liquid.
8. Serve
For the softest texture, serve immediately after processing.
Scoop the chocolate ice cream into bowls or cones.
For a firmer, traditional scoop, transfer the processed ice cream to an airtight freezer-safe container and freeze for approximately 30–60 minutes before serving.
Traditional Ice Cream Maker Method
If you don’t have a Ninja Creami, you can still make this chocolate ice cream.
Prepare the base exactly as described above.
Cover and refrigerate the mixture for approximately 2 hours until thoroughly chilled.
Pour the chilled mixture into your ice cream maker and churn according to the manufacturer’s instructions, usually for approximately 20–30 minutes.
Once the ice cream reaches a soft-serve consistency, transfer it to an airtight freezer-safe container.
Freeze for 2–4 hours for a firmer texture.
Best Tips
Use softened cream cheese rather than cold cream cheese. This makes it much easier to create a completely smooth chocolate paste.
Whisk the cocoa powder with the cream cheese and sugar before adding the milk. This helps prevent stubborn cocoa lumps.
Don’t skip the small pinch of salt. It helps balance the sweetness and intensifies the chocolate flavor.
For Ninja Creami preparation, freeze the base for a full 24 hours whenever possible.
If the first spin looks crumbly, don’t worry. A small splash of milk followed by a Re-Spin usually creates a much smoother texture.
Recipe Variations
Double Chocolate Ice Cream
Add 2 tablespoons of mini chocolate chips after processing and use the Mix-In function if your machine has one.
Chocolate Brownie Ice Cream
Add small pieces of cooled brownie after processing for a rich brownie-inspired dessert.
Chocolate Peanut Butter
Add 1–2 tablespoons of smooth peanut butter to the base before freezing.
Mint Chocolate
Add ¼ teaspoon of peppermint extract along with the vanilla for a refreshing chocolate-mint flavor.
Mocha Chocolate
Add ½ teaspoon of instant espresso powder to intensify the chocolate flavor and create a delicious mocha profile.
Chocolate Cookie Ice Cream
Mix crushed chocolate sandwich cookies into the finished ice cream before serving.
Topping Ideas
Turn this simple chocolate ice cream into an indulgent dessert with your favorite toppings.
Try:
- Chocolate syrup
- Mini chocolate chips
- Chopped toasted nuts
- Whipped cream
- Chocolate shavings
- Crushed cookies
- Caramel sauce
- Fresh strawberries
- Brownie pieces
Make-Ahead Instructions
The chocolate ice cream base can be prepared and frozen up to 1 week in advance before processing in a Ninja Creami.
For a traditional ice cream maker, prepare the base ahead and keep it refrigerated for up to 24 hours before churning.
Once processed, the ice cream can also be stored in the freezer for later enjoyment.
Storage
Transfer leftover ice cream to an airtight freezer-safe container.
Press a piece of parchment paper or plastic wrap directly against the surface before sealing if you want to help minimize ice crystals.
For the best texture and flavor, enjoy within approximately 1–2 weeks.
It can remain frozen longer, but the texture may gradually become harder or more icy.
Reheating / Softening
Ice cream should never be reheated.
If the ice cream becomes too hard after extended freezing, allow it to sit at room temperature for approximately 5–10 minutes before scooping.
Avoid repeatedly thawing and refreezing the entire container because this can create larger ice crystals and negatively affect the texture.
Freezing
The unfrozen chocolate base must be frozen completely solid before processing in a Ninja Creami.
Freeze it for at least 24 hours on a level surface.
After processing, store any leftovers in a tightly sealed freezer-safe container.
Common Mistakes to Avoid
Using cold cream cheese: Cold cream cheese can create lumps in the base.
Adding cocoa powder directly to the milk: This can make the cocoa difficult to incorporate smoothly. Making the chocolate paste first produces a more consistent base.
Not freezing the Ninja Creami pint long enough: A partially frozen base will not process correctly.
Adding too much milk during Re-Spin: Start with only about 1 tablespoon. Too much liquid can make the finished ice cream softer than desired.
Overprocessing: Process only as needed to achieve a smooth texture.
Leaving the ice cream uncovered: Air exposure can cause freezer burn and ice crystals.
Nutrition Estimate
Approximate values per serving, assuming 4 servings:
| Nutritional Content | Amount |
| Calories | 300 kcal |
| Total Fat | 21 g |
| Saturated Fat | 13 g |
| Carbohydrates | 27 g |
| Protein | 4 g |
| Sugars | 24 g |
| Sodium | 100 mg |
Nutrition information is an estimate and will vary depending on the brands and exact ingredients used.
Frequently Asked Questions
Can I make this without a Ninja Creami?
Yes. You can use a traditional ice cream maker. Chill the prepared base thoroughly and churn it according to your machine’s instructions.
Can I make it without an ice cream maker?
Yes, although the texture will be different. Pour the prepared mixture into a shallow freezer-safe container and freeze. Stir or whisk it thoroughly every 30–45 minutes during the first few hours to help reduce ice crystals.
Why is my Ninja Creami ice cream crumbly?
This is common with some homemade frozen bases. Add approximately 1 tablespoon of milk and run the Re-Spin function.
Can I use low-fat milk?
You can, but whole milk produces a richer and creamier result. Low-fat milk may create a lighter and icier texture.
Can I use chocolate milk?
It is possible, but the sweetness and chocolate intensity will change. Whole milk combined with unsweetened cocoa powder gives you better control over the final flavor.
Can I make this dairy-free?
Yes, you can experiment with full-fat coconut milk or another dairy-free milk and dairy-free cream cheese. Keep in mind that the flavor and texture will change.
How long does homemade chocolate ice cream last?
For the best texture, enjoy it within approximately 1–2 weeks when stored properly in an airtight freezer-safe container.
Final Thoughts
This Ultra-Creamy Chocolate Ice Cream is an easy way to create a rich, decadent frozen dessert at home.
With a handful of ingredients, a little preparation, and a Ninja Creami or ice cream maker, you can create a wonderfully thick chocolate treat with a smooth, velvety consistency.
Serve it plain for an intensely chocolatey dessert, or add chocolate chips, brownie pieces, whipped cream, or your favorite sauce for an extra-indulgent treat.
One spoonful is all it takes to understand why homemade chocolate ice cream is so irresistible!