
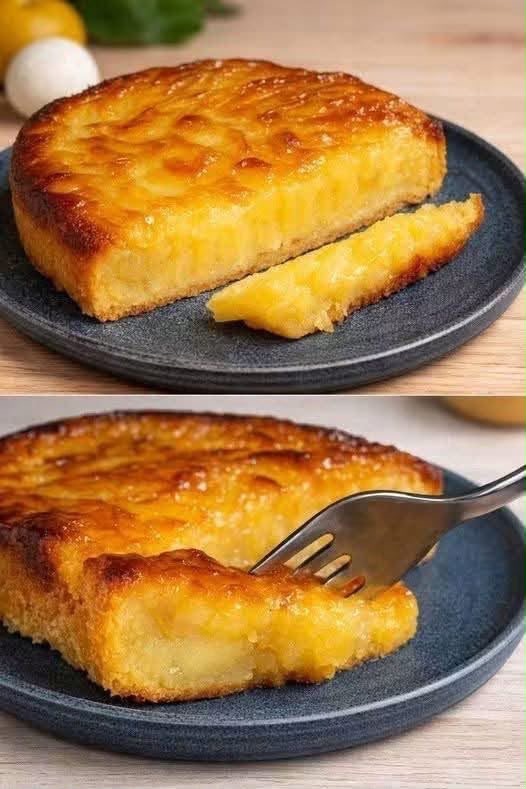
This French-inspired Invisible Apple Cake is incredibly soft, moist, and packed with thin layers of tender apples. The batter is light and delicate, allowing the apple slices to become the star of the dessert.
With its beautiful layered texture and naturally sweet apple flavor, this easy apple cake makes a wonderful dessert for family gatherings, afternoon tea, or a cozy weekend treat.
Recipe Overview
| Details | Information |
| Prep Time | 20 minutes |
| Cook Time | 35–40 minutes |
| Total Time | About 1 hour |
| Servings | 6–8 |
| Baking Temperature | 190°C / 375°F |
| Pan Size | 20 cm / 8-inch round cake pan |
| Difficulty | Easy |
Ingredients
For the Apple Cake
| Ingredient | Amount |
| Apples, preferably Golden or Gala | 4–5 |
| Eggs | 2 |
| Granulated sugar | 50 g |
| Melted butter | 20 g |
| Milk | 100 ml |
| All-purpose flour | 70 g |
| Vanilla extract | 1 teaspoon |
| Baking powder | 1 sachet, about 11 g |
| Salt | 1 pinch |
Step-by-Step Instructions
1. Prepare the Oven and Pan
Preheat your oven to 190°C / 375°F.
Grease a 20 cm / 8-inch round cake pan with butter and line the bottom with parchment paper. This will make the cake easier to remove after baking.
2. Whisk the Eggs and Sugar
In a large mixing bowl, whisk the eggs and granulated sugar until the mixture becomes lighter in color and slightly fluffy.
You do not need to whip it as much as you would for a sponge cake. The goal is simply to combine the eggs and sugar well.
3. Add the Wet Ingredients
Pour in the melted butter, milk, and vanilla extract.
Whisk gently until everything is evenly combined.
4. Add the Dry Ingredients
Sift the flour and baking powder into the bowl.
Add a pinch of salt, then mix gently until you have a smooth, fairly thin batter similar to a thick pancake batter.
Avoid overmixing once the flour has been incorporated.
5. Prepare the Apples
Peel and core the apples.
Slice them extremely thinly, preferably using a mandoline. Very thin slices are essential for creating the characteristic layered texture of an invisible apple cake.
As you slice the apples, add them directly to the batter to help prevent them from browning.
6. Coat the Apple Slices
Gently toss the apple slices through the batter, making sure each slice is lightly coated.
The amount of batter may seem small compared with the amount of apples. This is completely normal. The batter is designed to coat the fruit rather than completely surround it.
7. Fill the Cake Pan
Transfer the apple and batter mixture into the prepared pan.
Arrange the slices as evenly as possible and gently press the top with the back of a spoon or spatula.
Smooth the surface so the cake bakes evenly.
8. Bake
Place the cake in the preheated oven and bake for approximately 35–40 minutes.
The top should become nicely golden, while the apples should be tender.
If the top begins browning too quickly, loosely cover the cake with aluminum foil for the remaining baking time.
9. Cool Completely
Remove the cake from the oven and allow it to cool completely in the pan.
Cooling is important because the thin layers of apples need time to set. Trying to remove or slice the cake while it is still hot can cause it to fall apart.
Once completely cool, carefully remove it from the pan and slice.
Best Tips
Slice the apples as thinly and evenly as possible. A mandoline makes this much easier and helps create the delicate layered appearance.
Choose apples that hold their shape reasonably well during baking. Golden or Gala apples work particularly well, but other sweet or mildly tart baking apples can also be used.
Do not worry if the batter looks insufficient at first. The defining feature of this cake is the large amount of thinly sliced apples compared with the small amount of batter.
Allow the cake to cool completely before cutting it. This gives the layers time to firm up and makes cleaner slices.
For an especially neat presentation, refrigerate the cooled cake for a few hours before slicing.
Best Ingredient Options
Golden and Gala apples provide a naturally sweet flavor and become tender without completely losing their structure.
For a slightly more pronounced apple flavor, you can combine sweet apples with a mildly tart variety.
Whole milk gives the batter a richer texture, but lower-fat milk can also be used.
Unsalted butter is ideal because it allows you to control the amount of salt in the recipe.
Recipe Variations
For a warm autumn flavor, add ½ teaspoon of ground cinnamon to the batter.
A small amount of lemon zest can brighten the apple flavor and add a fresh citrus aroma.
For extra crunch, sprinkle a few sliced almonds over the top before baking.
You can also add a light dusting of powdered sugar after the cake has completely cooled.
What to Serve With
This apple cake is delicious on its own with a cup of coffee or tea.
For a more indulgent dessert, serve each slice with a spoonful of whipped cream.
A little vanilla ice cream also pairs beautifully with the warm apple flavor.
For a simple presentation, dust the cooled cake with powdered sugar just before serving.
Make-Ahead Instructions
This cake can be prepared a day in advance.
Allow it to cool completely, then cover it and store it in the refrigerator. The texture becomes even more set after resting, making it easier to slice neatly.
Storage
Store leftover cake in an airtight container in the refrigerator for up to 3 days.
Because the cake contains a high proportion of fresh apples, refrigeration is recommended for longer storage.
Reheating
For a warm serving, place an individual slice in the microwave for approximately 15–20 seconds.
You can also warm slices gently in a low oven until heated through.
Freezing
The cake can be frozen, although the texture of the apples may become slightly softer after thawing.
Wrap individual portions tightly in plastic wrap and place them in a freezer-safe container.
Thaw overnight in the refrigerator before serving.
Common Mistakes to Avoid
Do not cut the apples into thick slices. Thick pieces will not create the delicate layered texture that makes this cake special.
Do not use too much flour. The batter should remain relatively thin so it can coat the apple slices without becoming a thick cake batter.
Do not skip the cooling stage. The cake needs time to set before it can be sliced cleanly.
Do not overmix the batter after adding the flour. Mix only until the ingredients are combined.
Do not overcrowd the apple slices unevenly in the pan. Distribute them as evenly as possible for consistent baking.
Nutrition Estimate
Nutrition will vary depending on the exact apples, milk, butter, and sugar used.
| Nutrient | Approx. per serving |
| Calories | 150–180 kcal |
| Carbohydrates | 25–30 g |
| Protein | 3–4 g |
| Fat | 5–6 g |
| Sugar | 15–18 g |
| Fiber | 2–3 g |
Frequently Asked Questions
Why is it called Invisible Apple Cake?
It is called “invisible” because the batter is very light and thin compared with the large amount of finely sliced apples. Once baked, the apples form delicate layers with only a small amount of visible cake batter.
Can I use a different type of apple?
Yes. Golden and Gala apples are excellent choices, but you can use other baking apples depending on your preferred sweetness and texture.
Can I make this cake without a mandoline?
Yes. A sharp knife works perfectly well. Try to make the apple slices as thin and uniform as possible.
Why is my cake difficult to slice?
The most common reason is cutting it while it is still warm. Allow the cake to cool completely before slicing. Chilling it for a few hours can make slicing even easier.
Can I reduce the sugar?
Yes. If you are using naturally sweet apples, you can slightly reduce the sugar. Keep in mind that the cake will be less sweet.
Can I add cinnamon?
Absolutely. Cinnamon pairs beautifully with apples. Add about ½ teaspoon to the batter for a warm, aromatic flavor.
Final Thoughts
This Invisible Apple Cake is a simple yet elegant dessert that transforms a handful of everyday ingredients into beautiful layers of tender apples.
The key to success is thinly slicing the apples, using just enough batter to coat them, and allowing the finished cake to cool completely before serving.
Serve it with powdered sugar, whipped cream, or vanilla ice cream for an easy homemade dessert that looks just as beautiful as it tastes.