
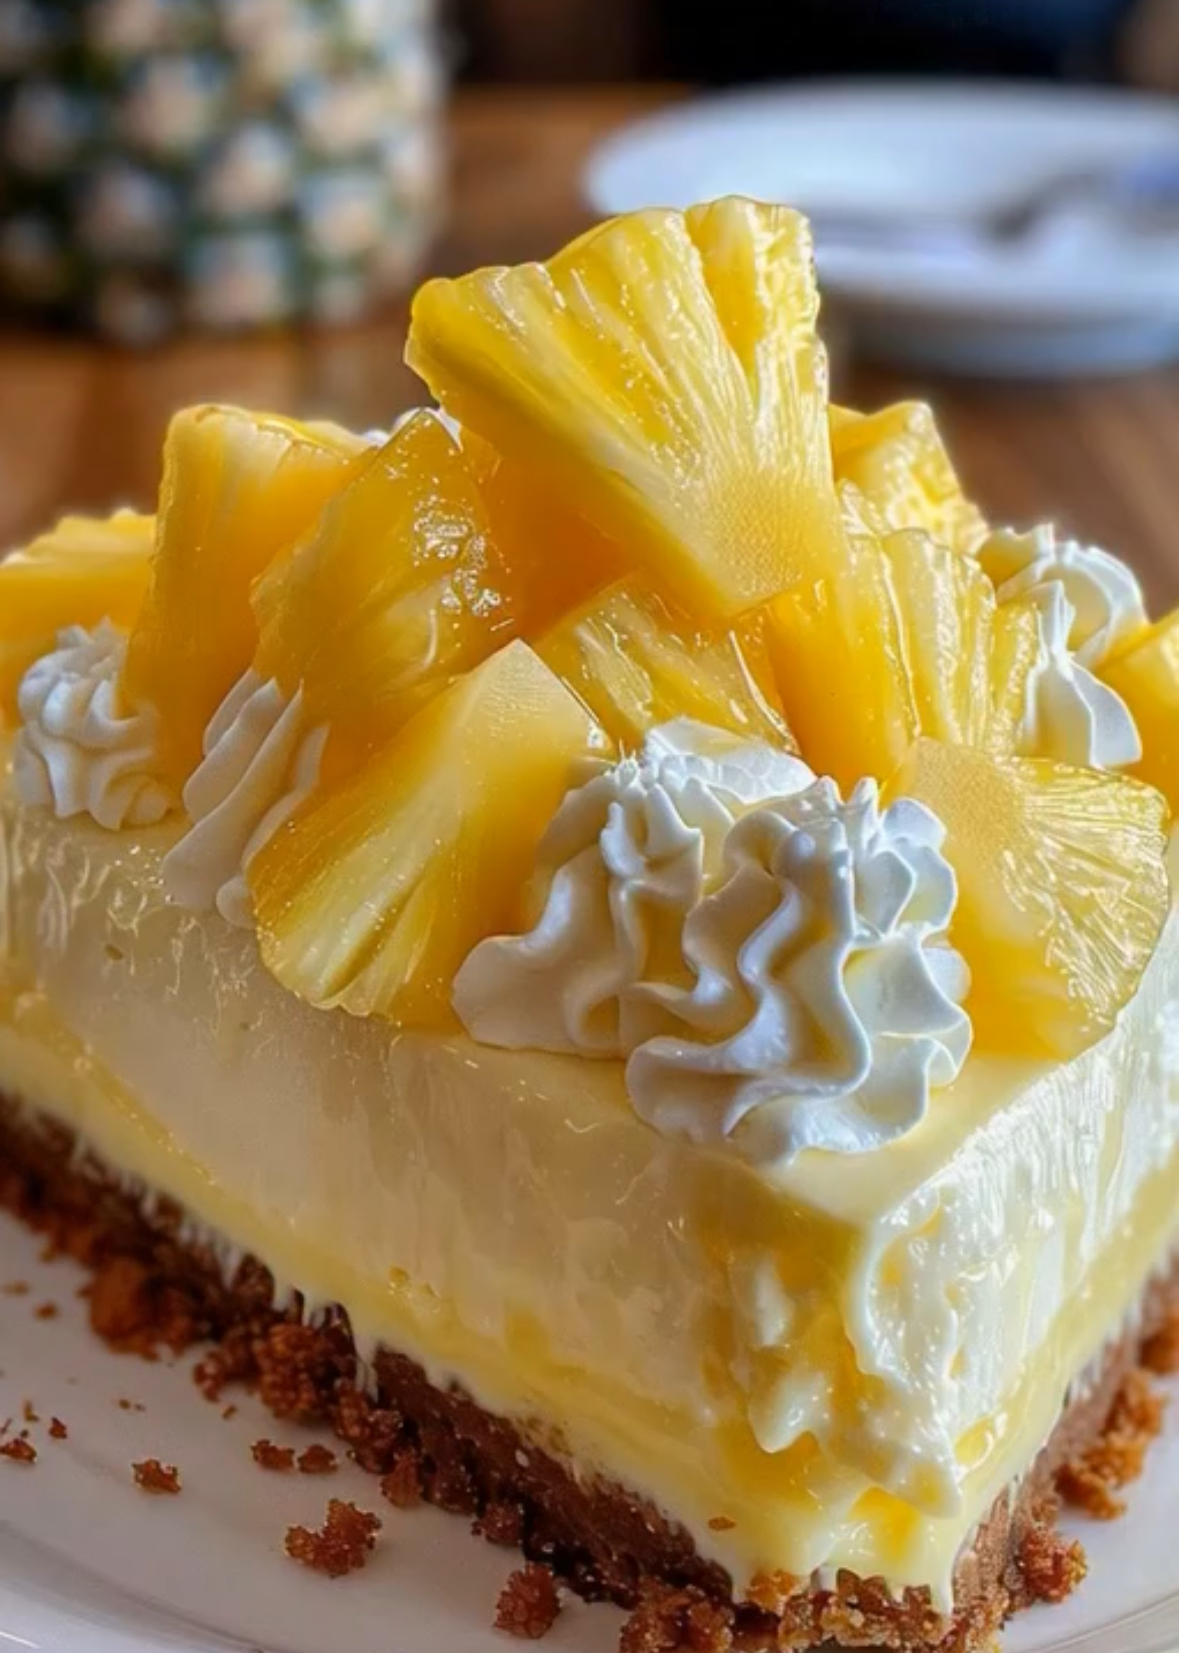
These No-Bake Creamy Pineapple Cheesecake Bars are a deliciously refreshing dessert made with a buttery biscuit crust, a smooth and creamy pineapple cheesecake filling, and a beautiful fresh pineapple topping.
They require no oven and are incredibly easy to prepare. Simply assemble the layers, chill until firm, decorate, and slice. The combination of tangy cream cheese, sweet pineapple, and a crisp buttery crust makes these cheesecake bars perfect for summer gatherings, family desserts, parties, or special occasions.
Recipe Overview
| Details | Information |
| Prep Time | 20 minutes |
| Chill Time | 4 hours, preferably overnight |
| Total Time | About 4 hours 20 minutes |
| Servings | 9–12 bars |
| Difficulty | Easy |
| Method | No-Bake |
| Dish Size | 8×8-inch or 9×9-inch |
Why You’ll Love This Recipe
These pineapple cheesecake bars are completely no-bake, making them ideal when you want a delicious homemade dessert without turning on the oven.
The creamy cheesecake layer has a light, smooth texture with little pieces of juicy pineapple throughout.
The buttery biscuit crust adds a delicious contrast to the soft filling.
Fresh pineapple on top gives every slice a bright, tropical flavor and a beautiful presentation.
This dessert can also be prepared the day before, making it convenient for parties, holidays, and family gatherings.
Ingredients
For the Biscuit Crust
| Ingredient | Amount |
| Graham cracker crumbs or crushed digestive biscuits | 1½ cups |
| Unsalted butter, melted | 6 tbsp (85 g) |
| Granulated sugar | 2 tbsp |
| Salt | Pinch |
For the Creamy Pineapple Cheesecake Layer
| Ingredient | Amount |
| Cream cheese, softened | 16 oz (450 g) |
| Powdered sugar | ¾ cup |
| Heavy whipping cream, cold | 1 cup |
| Vanilla extract | 1 tsp |
| Crushed pineapple or finely chopped pineapple | 1 cup, thoroughly drained |
For the Topping
| Ingredient | Amount |
| Heavy whipping cream | 1 cup |
| Powdered sugar | 2 tbsp |
| Fresh pineapple | 1½ cups, cut into thick triangular pieces |
| Pineapple jam or reduced pineapple juice | 2 tbsp, optional |
Step-by-Step Instructions
Step 1: Prepare the Crust
Place the graham cracker crumbs or crushed digestive biscuits in a mixing bowl.
Add the melted butter, sugar, and a small pinch of salt.
Mix everything together until the crumbs are evenly coated and the mixture resembles wet sand.
Line an 8×8-inch or 9×9-inch square baking dish with parchment paper, leaving some paper hanging over the sides. These handles will make it easier to remove the cheesecake later.
Transfer the crumb mixture to the prepared dish.
Firmly press it into an even layer using the flat bottom of a glass or measuring cup.
Place the crust in the freezer for about 15 minutes while you prepare the filling.
Step 2: Make the Creamy Cheesecake Filling
Make sure the cream cheese is softened to room temperature.
Place the cream cheese and powdered sugar in a large mixing bowl.
Beat with a hand mixer or stand mixer until completely smooth and creamy. Scrape down the sides of the bowl as needed to remove any lumps.
In a separate cold bowl, add the cold heavy whipping cream and vanilla extract.
Whip until stiff peaks form. Be careful not to over-whip the cream.
Using a spatula, gently fold the whipped cream into the cream cheese mixture.
Fold slowly until the mixture is smooth, light, and evenly combined.
Finally, gently fold in the thoroughly drained crushed pineapple.
Step 3: Assemble the Cheesecake
Remove the chilled crust from the freezer.
Pour the pineapple cheesecake filling over the crust.
Use an offset spatula or the back of a spoon to spread the filling into an even layer.
Smooth the surface as much as possible.
Cover the dish tightly with plastic wrap.
Refrigerate for at least 4 hours, although chilling overnight will give you the firmest and cleanest slices.
Step 4: Prepare the Whipped Cream Topping
Place 1 cup of cold heavy whipping cream in a chilled mixing bowl.
Add 2 tablespoons of powdered sugar.
Whip until stiff peaks form.
Transfer the whipped cream to a piping bag fitted with a star tip.
Step 5: Decorate
Once the cheesecake has completely set, carefully lift it from the baking dish using the parchment-paper handles.
Place it on a cutting board.
Pipe decorative swirls or rows of whipped cream across the top.
Arrange the fresh pineapple pieces generously over the whipped cream.
For an optional glossy finish, gently warm 2 tablespoons of pineapple jam or use reduced pineapple juice.
Lightly brush the pineapple pieces with the glaze.
Step 6: Slice and Serve
Use a sharp knife to cut the cheesecake into 9–12 bars, depending on the size you prefer.
For the cleanest cuts, wipe the knife between slices.
Serve the cheesecake bars cold and enjoy! 🍍✨
Best Tips
The most important step is thoroughly draining the pineapple. Excess liquid can make the cheesecake filling too soft and prevent it from setting properly.
For canned pineapple, place it in a fine-mesh strainer and press gently to remove excess liquid. You can also pat the pineapple dry with paper towels.
Use full-fat cream cheese for the richest and creamiest texture.
Make sure the heavy cream is very cold before whipping. A cold bowl can also help the cream whip more efficiently.
Do not skip the chilling time. The cheesecake needs several hours in the refrigerator to become firm enough to slice neatly.
For the cleanest presentation, chill the cheesecake overnight before decorating and cutting.
Best Ingredient Options
Graham crackers: Graham cracker crumbs create a classic cheesecake crust. Digestive biscuits are an excellent alternative and work particularly well if graham crackers are unavailable.
Cream cheese: Use full-fat block-style cream cheese when possible. Avoid very soft spreadable cream cheese if you want a firm cheesecake texture.
Pineapple: Canned crushed pineapple is convenient and consistent, while fresh pineapple provides a brighter flavor. Whichever you choose, drain it very well.
Heavy cream: Use cold heavy whipping cream with enough fat to whip into stiff peaks.
Recipe Variations
For a coconut-pineapple version, mix a few tablespoons of unsweetened shredded coconut into the cheesecake filling or sprinkle toasted coconut over the top.
For a tropical cheesecake, add a small amount of finely diced mango or passion fruit to the topping.
For extra citrus flavor, add a little finely grated lime zest to the cream cheese mixture.
For individual desserts, prepare the cheesecake in small glasses or individual dessert cups instead of a square baking dish.
For a more decorative finish, pipe small whipped cream rosettes around the edges and place a small pineapple piece on each rosette.
What to Serve With
These pineapple cheesecake bars are delicious served on their own because the tropical pineapple flavor is already bright and refreshing.
For a special dessert table, serve them alongside fresh berries, sliced mango, or other tropical fruit.
A cup of hot coffee or tea also pairs beautifully with the creamy cheesecake.
For warm-weather gatherings, serve the bars straight from the refrigerator for a cool and refreshing dessert.
Make-Ahead Instructions
This dessert is perfect for making ahead.
Prepare the cheesecake the day before serving and allow it to chill overnight.
For the best appearance, you can decorate it a few hours before serving.
Keep the finished cheesecake refrigerated until you are ready to serve.
Storage
Store leftover cheesecake bars in an airtight container or cover the baking dish tightly with plastic wrap.
Keep refrigerated for up to 3–4 days.
Because the recipe contains cream cheese, whipped cream, and fresh pineapple, it should not be left at room temperature for extended periods.
Reheating
There is no need to reheat these cheesecake bars.
They are designed to be served cold directly from the refrigerator.
Freezing
The undecorated cheesecake can be frozen for longer storage.
Wrap the cheesecake tightly and place it in a freezer-safe container.
Freeze for up to 1 month for the best quality.
Thaw overnight in the refrigerator before adding the whipped cream and fresh pineapple topping.
Freezing the fresh pineapple decoration is not recommended because it may become watery after thawing.
Common Mistakes to Avoid
Not draining the pineapple: Excess liquid can make the filling too soft.
Using warm cream: Warm heavy cream does not whip as effectively, which can result in a loose filling.
Overmixing the whipped cream: Over-whipping can make the cream grainy and eventually turn it into butter.
Skipping the chilling time: The cheesecake needs enough time to firm up before slicing.
Cutting it too soon: If the filling has not completely set, the bars may lose their shape.
Using too much pineapple juice: Extra liquid can affect the structure and texture of the cheesecake layer.
Nutrition Estimate
Nutrition will vary depending on the specific ingredients and serving size.
| Nutrient | Approximate Amount Per Serving |
| Calories | 350–450 kcal |
| Carbohydrates | 30–40 g |
| Protein | 4–7 g |
| Fat | 23–30 g |
| Saturated Fat | 14–18 g |
| Sugar | 20–30 g |
| Fiber | 1–2 g |
| Sodium | 180–300 mg |
Frequently Asked Questions
Can I use canned pineapple?
Yes. Canned pineapple works very well in this recipe. The most important thing is to drain it thoroughly before adding it to the cheesecake filling.
Can I use fresh pineapple?
Yes. Fresh pineapple can be used, but chop it very finely for the filling and remove as much moisture as possible before mixing it into the cream cheese layer.
How long does the cheesecake need to chill?
It needs at least 4 hours in the refrigerator. For the firmest texture and cleanest slices, chilling overnight is recommended.
Can I make these cheesecake bars the day before?
Absolutely. In fact, making them the day before is recommended because the extra chilling time allows the filling to become firm and easier to slice.
Why is my cheesecake filling too soft?
The most common reasons are insufficient chilling, excess liquid from the pineapple, or whipped cream that was not whipped to stiff peaks.
Can I use digestive biscuits instead of graham crackers?
Yes. Crushed digestive biscuits are an excellent substitute for graham crackers and make a delicious buttery crust.
Can I freeze these cheesecake bars?
Yes, preferably without the whipped cream and fresh pineapple topping. Wrap the cheesecake well and freeze for up to about one month for the best quality.
How should I get clean slices?
Make sure the cheesecake is thoroughly chilled. Use a sharp knife and wipe it clean between each cut for neat, professional-looking bars.
Final Thoughts
These No-Bake Creamy Pineapple Cheesecake Bars are an easy, refreshing dessert that combines everything you want in a tropical cheesecake: a buttery biscuit crust, a smooth cream cheese filling, sweet pineapple, and fluffy whipped cream.
Because there is no baking involved, they are especially convenient for warm days when you want a homemade dessert without turning on the oven.
Prepare them ahead of time, let them chill until perfectly firm, decorate with fresh pineapple, and serve cold for a creamy, tropical treat that everyone will love. 🍍🍰✨
⚠️ This recipe may not be suitable for everyone, so it is advisable to consult a doctor if you have specific dietary restrictions, allergies, or medical concerns.