
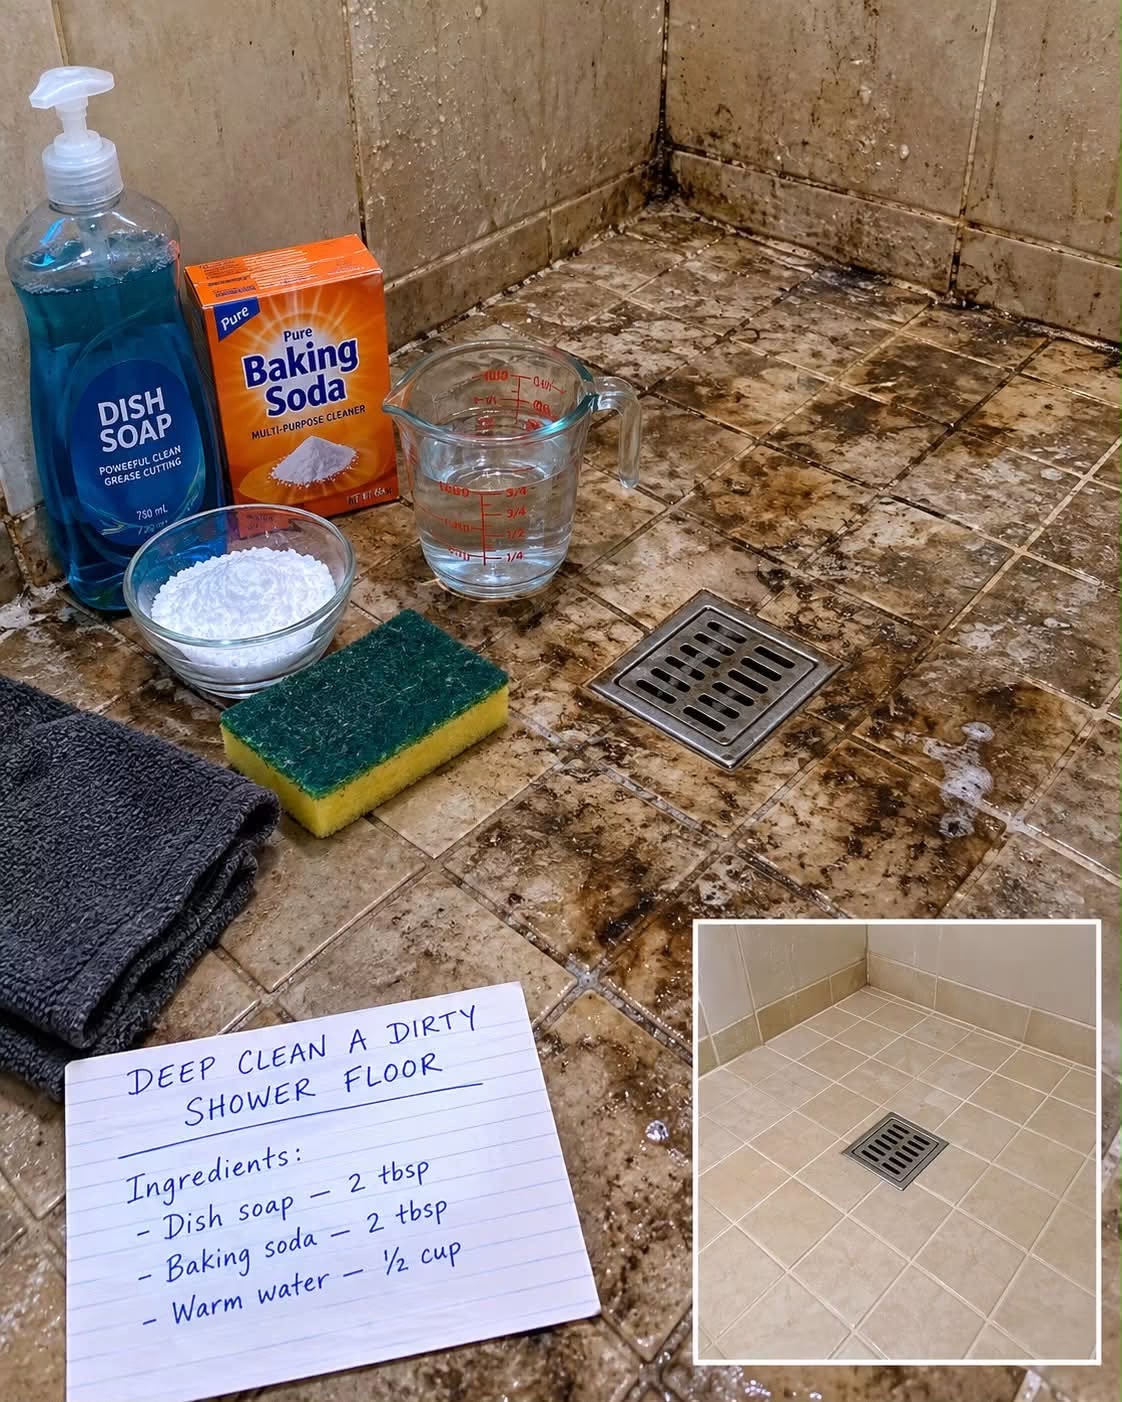
A dirty shower floor can quickly develop soap scum, grime, and stubborn residue that make the bathroom look dull and unclean. Fortunately, you can tackle everyday buildup with a simple homemade cleaning mixture made from dish soap, baking soda, and warm water.
This easy DIY shower floor cleaner is quick to prepare and requires only a few common household ingredients. It can help loosen greasy residue, remove everyday dirt, and make suitable shower surfaces easier to scrub clean.
Whether you’re refreshing your shower floor or cleaning dirty grout lines, this simple method can help restore a cleaner appearance without requiring an expensive collection of cleaning products.
Recipe Overview
| Detail | Information |
| Preparation Time | 5 minutes |
| Application Time | 10–15 minutes |
| Scrubbing Time | 5–10 minutes |
| Total Time | Approximately 20–30 minutes |
| Yield | Approximately 3/4 cup of cleaning mixture |
| Difficulty | Easy |
| Best For | Everyday grime and soap residue |
| Cleaning Method | Manual scrubbing and rinsing |
Why You’ll Love This DIY Shower Cleaner
This homemade cleaner uses three inexpensive ingredients that are easy to find in most households.
Dish soap helps loosen oily residue and soap scum, while baking soda provides mild abrasion to assist with scrubbing. Warm water helps distribute the mixture across the surface.
The recipe is simple to prepare, requires minimal equipment, and can be used as part of a regular bathroom cleaning routine.
It is particularly useful for suitable ceramic or porcelain shower tiles that have accumulated dirt and everyday residue.
However, this mixture is not a guaranteed solution for heavy mineral deposits or mold. Stubborn limescale may require a suitable dedicated descaler, while persistent mold may need a different treatment.
Ingredients
For the Homemade Shower Floor Cleaner
| Ingredient | Quantity | Purpose |
| Dish soap | 2 tablespoons | Helps loosen grease and soap residue |
| Baking soda | 2 tablespoons | Provides mild scrubbing action |
| Warm water | 1/2 cup | Helps dilute and spread the mixture |
Equipment Needed
A small mixing bowl is useful for combining the ingredients.
Use a soft sponge, a non-scratch cleaning pad, or a soft-bristled brush for scrubbing the shower floor and grout.
Keep a clean microfiber cloth or towel nearby for drying the surface.
Step-by-Step Cleaning Instructions
Step 1: Prepare the Cleaning Mixture
Add 2 tablespoons of baking soda and 2 tablespoons of dish soap to a small bowl.
Mix the ingredients together until they form a smooth paste.
Gradually add 1/2 cup of warm water while stirring. Continue mixing until the solution is evenly combined.
The final mixture will be relatively thin rather than a thick paste. Stir it again before application if the ingredients begin to separate.
Step 2: Wet the Shower Floor
Remove shampoo bottles, soap containers, and other items from the shower area.
Rinse the floor with warm water to loosen surface dirt and prepare it for cleaning.
Make sure the bathroom is adequately ventilated, especially if you are cleaning a small, enclosed shower.
Step 3: Apply the Cleaning Mixture
Spread the mixture over the dirty areas of the shower floor.
Pay particular attention to areas where soap residue, body oils, and everyday grime tend to accumulate.
For grout lines, apply the mixture carefully using a sponge or soft-bristled brush.
Leave it in place for approximately 5–10 minutes, following the surface manufacturer’s care instructions. Do not allow the mixture to dry completely on the surface.
Important: Test the mixture on a small, inconspicuous area first. Avoid abrasive scrubbing on delicate finishes and do not use baking soda on natural stone such as marble or limestone unless the manufacturer confirms it is suitable.
Step 4: Scrub the Shower Floor
Use a soft sponge or non-scratch brush to scrub the surface in small circular motions.
Apply gentle, even pressure to loosen the dirt without scratching the finish.
For grout lines, use a soft grout brush and work along the joints rather than using a harsh scouring pad.
If certain areas remain dirty, repeat the gentle scrubbing process instead of applying excessive force.
Step 5: Rinse Thoroughly
Rinse the entire shower floor with plenty of clean water.
Remove all traces of the cleaning mixture, paying special attention to corners, grout lines, and areas around the drain.
Leftover dish soap can make the floor slippery, so continue rinsing until the surface no longer feels soapy.
Step 6: Dry and Inspect the Surface
Wipe the shower floor with a clean microfiber cloth or towel.
Drying the surface helps remove remaining water and makes it easier to identify any areas that need additional attention.
If residue remains, repeat the cleaning process where the surface material permits.
Allow the shower floor to dry completely before using the shower again.
Best Tips for a Cleaner Shower Floor
Clean regularly. Cleaning the shower floor once or twice a week, depending on use, can help prevent heavy buildup.
Use the right brush. A soft-bristled brush is often effective for grout without causing unnecessary abrasion.
Rinse thoroughly. Removing all traces of dish soap is essential to help prevent a slippery surface.
Address hard-water deposits separately. Baking soda and dish soap are not reliable descalers for heavy mineral deposits. Choose a compatible limescale remover according to the surface manufacturer’s instructions.
Keep the shower ventilated. Good ventilation helps the floor and surrounding surfaces dry more quickly, reducing persistent dampness.
Use a squeegee after showering. Removing excess water can help reduce water spots and mineral residue on suitable surfaces.
Best Ingredient Options
Dish soap: A standard dishwashing liquid is suitable for everyday grease and soap residue. Avoid products that leave a heavy conditioning or polishing film.
Baking soda: This ingredient offers mild abrasive action, but it can dull or scratch certain delicate finishes. Test first and avoid using it on sensitive natural stone.
Warm water: Warm water helps spread the mixture and loosen ordinary residue. Very hot water is unnecessary.
Microfiber cloth: A clean microfiber cloth is useful for removing residue and drying compatible surfaces without aggressive scrubbing.
Cleaning Variations
For Everyday Soap Scum: Use the baking soda and dish soap mixture on compatible tile surfaces, scrub gently, and rinse thoroughly.
For Stubborn Grout Dirt: Apply the mixture carefully to suitable grout lines and scrub with a soft grout brush. Persistent staining may require a grout-specific cleaner.
For Hard-Water Deposits: Use a commercially available descaler specifically labeled as safe for your shower surface. Follow the label directions and rinse as instructed.
For Mold and Mildew: Use a product labeled for the affected surface and the specific problem. Persistent mold, recurring growth, or mold affecting porous materials may require professional assessment.
For Natural Stone Showers: Choose a pH-neutral cleaner specifically designed for natural stone. Avoid homemade abrasive mixtures and acidic descalers unless the stone manufacturer explicitly approves them.
Common Mistakes to Avoid
Using too much cleaning mixture: Excessive dish soap can leave a slippery film and make rinsing more difficult.
Scrubbing too aggressively: Rough pads and hard brushes can scratch tile finishes or damage grout.
Leaving the mixture on too long: Allowing cleaning products to dry on a surface can leave residue or damage certain finishes.
Expecting baking soda to dissolve heavy limescale: Baking soda and dish soap are better suited to everyday dirt and greasy residue than substantial mineral deposits.
Ignoring the surface material: Ceramic, porcelain, natural stone, acrylic, and fiberglass can have different cleaning requirements.
Mixing cleaning chemicals: Never combine this mixture with bleach, ammonia, vinegar, acidic descalers, or other cleaning products. Rinse thoroughly before switching products, and follow each product’s label instructions.
Forgetting to rinse: Soap residue can make the shower floor slippery, creating a potential fall hazard.
Safety Precautions
Wear cleaning gloves if you have sensitive skin, and keep the bathroom well ventilated.
Never mix cleaning products together unless their labels explicitly confirm that doing so is safe.
Keep the cleaning mixture away from children and pets, and rinse the floor thoroughly before allowing anyone to use the shower.
If you experience irritation while cleaning, stop, rinse any affected skin with water, and follow the product’s safety instructions.
Frequently Asked Questions
1. Does baking soda and dish soap remove limescale?
This mixture may help remove ordinary dirt and soap residue, but it is not a dependable treatment for heavy limescale. A compatible descaling product is generally more effective for mineral deposits.
2. How long should I leave the mixture on the shower floor?
Start with 5–10 minutes on a compatible surface. Follow the manufacturer’s care instructions and do not allow the mixture to dry.
3. Can I use this mixture on grout?
It may be suitable for many cement-based grout lines, provided you scrub gently and rinse thoroughly. Test a small area first and avoid abrasive treatment on delicate or damaged grout.
4. Can I use this cleaner on marble?
It is best to avoid this baking soda mixture on marble and other sensitive natural stone. Use a pH-neutral cleaner specifically designed for the stone.
5. Will this mixture remove black mold?
It should not be relied upon as a mold treatment. Use an appropriate product labeled for the affected surface, and seek professional help if mold is widespread or keeps returning.
6. How often should I clean my shower floor?
For most households, a light weekly cleaning is a practical starting point. More frequent cleaning may be needed in heavily used bathrooms or areas with hard water.
7. Can I prepare this mixture in advance?
It is best to mix only the amount you need for one cleaning session. This keeps the preparation simple and avoids storing a homemade mixture that has not been tested for long-term stability.
8. Do I need to wear gloves?
Gloves are a sensible precaution, particularly if you have sensitive skin or will be scrubbing for an extended period.
Final Thoughts
This simple DIY shower floor cleaner combines dish soap, baking soda, and warm water to help loosen everyday dirt and soap residue using common household ingredients.
For the best results, apply the mixture to a compatible surface, scrub gently, and rinse thoroughly. Regular cleaning and good bathroom ventilation can also help prevent stubborn buildup.
Remember that heavy limescale, persistent mold, and stains on delicate materials may require specialized products rather than a homemade cleaning mixture.
A little regular maintenance can help keep your shower floor cleaner, fresher, and easier to care for without unnecessary effort.