
Introduction
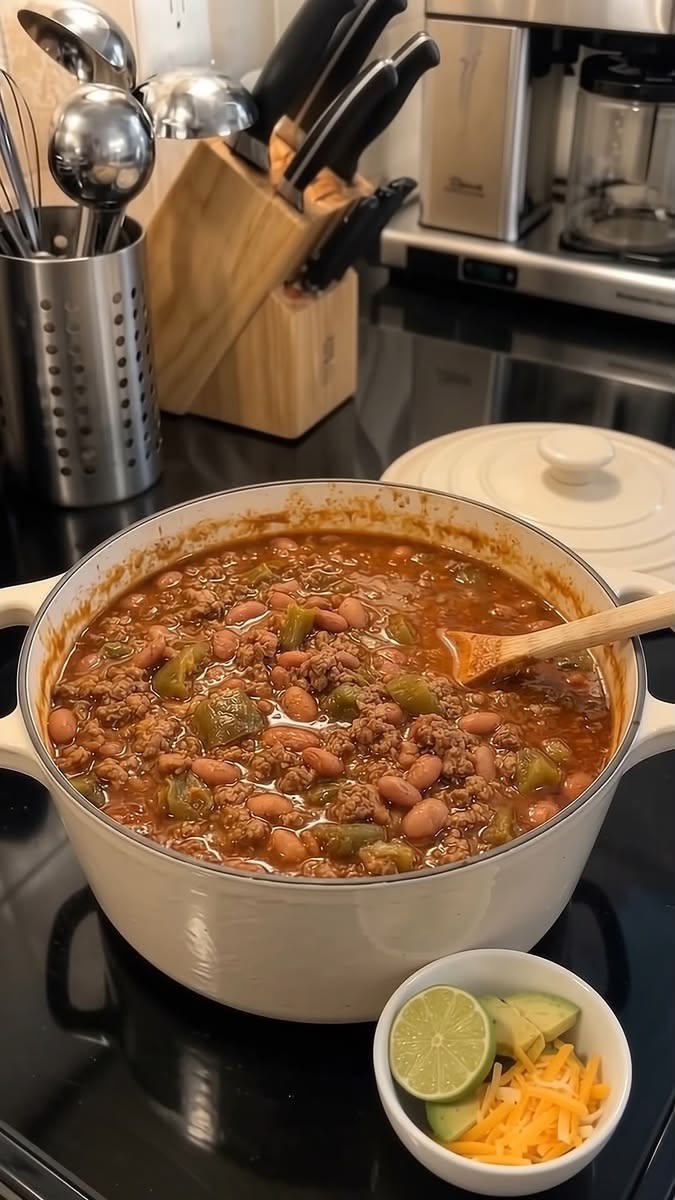
If you’re looking for a comforting, satisfying dinner packed with bold flavors, this Homemade Chili con Carne is the perfect recipe to add to your weekly meal rotation. Made with ground beef, tender kidney beans, tomatoes, bell peppers, and a delicious blend of warm spices, this classic dish is hearty, nutritious, and easy to prepare.
This easy beef chili comes together in one pot, making it perfect for busy weeknights, family dinners, meal prep, or casual gatherings. As the chili simmers, the tomatoes, beef broth, and spices blend together to create a rich, thick sauce that coats every bite.
Serve your homemade chili con carne with shredded cheddar cheese, creamy avocado, fresh lime juice, or a side of warm cornbread for a delicious meal everyone will love.
Recipe Overview
| Detail | Information |
| Recipe Name | Homemade Chili con Carne |
| Prep Time | 15 minutes |
| Cook Time | 30–40 minutes |
| Total Time | 45–55 minutes |
| Servings | 4 |
| Cuisine | Tex-Mex-inspired |
| Cooking Method | Stovetop |
| Difficulty | Easy |
| Main Ingredients | Ground beef, kidney beans, tomatoes, and spices |
| Best For | Family dinners, meal prep, and gatherings |
Why You’ll Love This Recipe
Rich and Hearty Flavor: Ground beef, tomatoes, beans, and smoky spices create a delicious combination with a deep, savory taste.
Easy One-Pot Meal: Everything cooks in one pot, which means less cleanup and more convenience.
Simple Pantry Ingredients: This recipe uses affordable ingredients that are easy to find at most grocery stores.
Customizable Spice Level: Make it mild for the whole family or add chili flakes and cayenne pepper for extra heat.
Perfect for Meal Prep: The flavors develop beautifully as the chili rests, making leftovers especially delicious.
Filling and Satisfying: The combination of beef and beans provides protein, while the vegetables and tomatoes add flavor, texture, and nutrients.
Ingredients
For the Chili Base
| Ingredient | Quantity |
| Ground beef | 500 g (about 1.1 lb) |
| Medium onion, chopped | 1 |
| Garlic cloves, minced | 2 |
| Green bell pepper, diced | 1 |
| Kidney beans or pinto beans, drained and rinsed | 1 can (about 400 g / 14 oz) |
| Crushed tomatoes or tomato sauce | 1 can (about 400 g / 14 oz) |
| Beef broth | ½ cup (120 ml) |
| Olive oil, if needed | 1 tablespoon |
For the Seasoning
| Ingredient | Quantity |
| Chili powder | 1 tablespoon |
| Ground cumin | 1 teaspoon |
| Smoked paprika | 1 teaspoon |
| Salt | To taste |
| Black pepper | To taste |
Optional Toppings
| Ingredient | Quantity |
| Fresh lime wedges | As needed |
| Avocado, diced | 1 |
| Shredded cheddar cheese | ½–1 cup |
| Fresh cilantro, chopped | 2 tablespoons |
| Sour cream or plain Greek yogurt | As desired |
| Sliced green onions | As desired |
| Fresh jalapeño, sliced | Optional |
Step-by-Step Instructions
Step 1: Brown the Ground Beef
Place a large, heavy-bottomed pot or Dutch oven over medium heat. Add the ground beef and cook for approximately 6–8 minutes, breaking it apart with a wooden spoon as it browns.
Continue cooking until the beef is no longer pink. If there is excessive fat in the pot, carefully drain some of it, leaving a little behind for flavor.
If your beef is very lean, add a small amount of olive oil if needed.
Step 2: Sauté the Vegetables
Add the chopped onion, minced garlic, and diced green bell pepper to the browned beef.
Cook for 4–5 minutes, stirring occasionally, until the onion begins to soften and the pepper becomes tender.
The garlic should smell fragrant without becoming browned or burnt.
Step 3: Add the Seasonings
Sprinkle the chili powder, ground cumin, smoked paprika, salt, and black pepper over the beef and vegetables.
Stir thoroughly and cook for about 30–60 seconds to release the aromas of the spices.
This step helps distribute the seasoning evenly throughout the chili.
Step 4: Add the Tomatoes, Broth, and Beans
Pour in the crushed tomatoes and beef broth. Add the drained and rinsed kidney beans, then stir everything together.
Scrape the bottom of the pot with your spoon to loosen any flavorful browned bits.
Bring the mixture to a gentle simmer.
Step 5: Simmer the Chili
Reduce the heat to low, partially cover the pot, and simmer for 20–30 minutes, stirring occasionally.
As the chili cooks, the sauce will thicken and the flavors will blend together.
If the chili becomes too thick, add a little extra beef broth or water. If it is too thin, simmer uncovered for several additional minutes until it reaches your preferred consistency.
Taste and adjust the salt, pepper, and chili powder before serving.
Step 6: Prepare the Toppings
While the chili simmers, dice the avocado, shred the cheddar cheese if necessary, chop the cilantro, and cut the lime into wedges.
Arrange the toppings in small bowls so everyone can customize their own serving.
Step 7: Serve and Enjoy
Ladle the hot chili con carne into serving bowls.
Top with shredded cheddar cheese, diced avocado, and a squeeze of fresh lime juice. Add cilantro, sour cream, or sliced jalapeños if desired.
Serve immediately with rice, cornbread, tortilla chips, or warm bread for a hearty and comforting meal.
Best Tips for Perfect Chili con Carne
Brown the Beef Properly: Allow the beef to develop a rich brown color before adding the vegetables. Browning adds depth and savory flavor.
Drain the Beans: Rinsing canned beans removes excess canning liquid and helps keep the chili’s flavor clean and balanced.
Toast the Spices: Cooking the spices briefly with the beef and vegetables helps release their aromas.
Simmer Gently: A gentle simmer allows the flavors to develop without making the bottom of the pot scorch.
Adjust the Thickness: Add broth for a thinner chili or simmer uncovered to reduce excess liquid.
Taste Before Serving: Different brands of broth, tomatoes, and chili powder contain varying amounts of salt and spice, so adjust the seasoning at the end.
Add Lime Just Before Eating: Fresh lime juice brightens the rich flavors of the beef and beans.
Let It Rest: Allowing the chili to rest for 5–10 minutes before serving helps the flavors settle and the sauce thicken slightly.
Best Ingredient Options
Ground Beef: Ground beef with approximately 85–90% lean meat offers a good balance of flavor and manageable fat content. Leaner beef also works well.
Kidney Beans: Red kidney beans are a classic choice, but pinto beans or black beans can be substituted.
Crushed Tomatoes: Canned crushed tomatoes create a thick, hearty sauce. Tomato sauce can be used for a smoother texture.
Beef Broth: Low-sodium beef broth adds savory depth while allowing you to control the salt.
Green Bell Pepper: Green pepper gives the chili a slightly earthy flavor. Red, yellow, or orange bell peppers provide a sweeter alternative.
Chili Powder: Use a mild chili powder for a family-friendly version or add cayenne pepper for extra heat. Remember that chili powder blends vary in intensity.
Smoked Paprika: Smoked paprika adds a subtle smoky flavor. Regular paprika can be used if smoked paprika is unavailable.
Cheddar Cheese: Sharp cheddar adds a rich, savory topping, while mild cheddar provides a softer flavor.
Recipe Variations
Spicy Beef Chili: Add ¼–½ teaspoon of cayenne pepper, extra chili powder, or diced jalapeños for a hotter version.
Slow Cooker Chili con Carne: Brown the beef and sauté the vegetables first. Transfer them to a slow cooker with the remaining ingredients and cook on LOW for approximately 4–6 hours. Follow your appliance’s instructions and check that the beef is fully cooked.
Smoky Chipotle Chili: Add a small amount of minced chipotle pepper in adobo sauce for a smoky, spicy flavor.
Extra-Bean Chili: Add another drained can of beans for a more bean-forward dish.
Vegetable-Packed Chili: Stir in diced carrots, zucchini, or corn for extra color and texture.
Cheesy Chili: Add a little shredded cheddar directly to individual bowls just before serving for a creamy, cheesy finish.
Low-Carbohydrate Option: Reduce or omit the beans and serve the chili with cauliflower rice or roasted vegetables. The nutritional content will change depending on the substitutions.
What to Serve With Chili con Carne
Steamed Rice: Fluffy white or brown rice is a classic side that absorbs the rich tomato sauce.
Cornbread: Slightly sweet cornbread complements the smoky, savory flavors of the chili.
Tortilla Chips: Crunchy tortilla chips are perfect for scooping up thick chili or adding texture on top.
Baked Potatoes: Spoon the chili over a baked potato for a hearty, satisfying dinner.
Fresh Green Salad: A simple salad with lettuce, cucumber, tomatoes, and lime dressing balances the richness of the beef.
Roasted Vegetables: Roasted zucchini, carrots, or broccoli add color and make the meal more varied.
Warm Bread: Crusty bread or dinner rolls are excellent for soaking up the sauce.
Grilled Corn: Sweet grilled corn pairs well with the chili’s smoky seasoning.
Make-Ahead Instructions
Chili con carne is an excellent make-ahead meal because the flavors often become even more developed after resting.
You can chop the onion, garlic, and bell pepper a day in advance and store them in the refrigerator in a sealed container.
You can also prepare the complete chili, allow it to cool appropriately, and refrigerate it for later. When ready to serve, reheat it gently on the stovetop, stirring occasionally, until it reaches 165°F (74°C).
If the sauce thickens too much during storage, add a splash of beef broth or water while reheating.
Storage
Allow leftover chili to cool slightly, then transfer it to shallow, airtight containers.
Refrigerate within 2 hours of cooking, or within 1 hour if the surrounding temperature is above 90°F (32°C).
Store the chili in the refrigerator for 3–4 days.
Keep toppings such as avocado, fresh cilantro, and sour cream separate until serving.
Reheating
Stovetop Method: Place the chili in a saucepan over medium-low heat. Stir occasionally and add a little broth or water if needed. Heat until the center reaches 165°F (74°C).
Microwave Method: Transfer a portion to a microwave-safe bowl and cover loosely. Heat in short intervals, stirring between intervals, until evenly heated to 165°F (74°C).
Oven Method: Place the chili in a covered oven-safe dish and heat at 325°F (165°C) until thoroughly heated. Stir before serving.
Avoid repeatedly reheating the entire batch. Reheat only the portion you plan to eat.
Freezing
Chili con carne freezes well, making it an excellent option for batch cooking and future meals.
Allow the chili to cool, then divide it into meal-sized portions and transfer it to freezer-safe containers or bags. Leave a little room for expansion if using rigid containers.
Label each container with the date and freeze.
For the best quality, use frozen chili within 2–3 months, although it may remain safe longer if continuously frozen at 0°F (-18°C).
Thaw in the refrigerator overnight when possible. Reheat thoroughly to 165°F (74°C), adding a little broth or water if necessary.
For the best texture, add fresh avocado, cheese, and other toppings after reheating rather than freezing them with the chili.
Common Mistakes to Avoid
Not Browning the Beef: Cooking the beef until nicely browned creates a deeper, richer flavor than simply simmering it in the sauce.
Adding Too Much Liquid: Too much broth can make the chili watery. Start with the recommended amount and add more only if needed.
Using Unrinsed Beans: Excess canning liquid may affect the texture and flavor of the finished dish. Drain and rinse the beans before adding them.
Burning the Garlic: Garlic cooks quickly and can become bitter if exposed to excessive heat. Add it with the vegetables and stir regularly.
Overdoing the Spice: Chili powder varies by brand. Start with the recommended amount and adjust after simmering.
Skipping the Simmer: The chili needs time for the ingredients to blend. Allow at least 20–30 minutes of gentle simmering.
Forgetting to Taste: Check the seasoning before serving and adjust the salt, pepper, and chili powder as necessary.
Adding Avocado Too Early: Avocado is best added immediately before serving because it can brown and soften during cooking or storage.
Nutrition Estimate
The following values are approximate estimates per serving, based on four servings and the main chili ingredients, excluding optional toppings.
| Nutrient | Estimated Amount per Serving |
| Calories | 400–500 kcal |
| Protein | 30–35 g |
| Total Fat | 18–25 g |
| Saturated Fat | 6–9 g |
| Carbohydrates | 25–35 g |
| Fiber | 7–10 g |
| Sugar | 6–10 g |
| Sodium | 500–900 mg |
Actual nutrition values vary depending on the fat content of the beef, type of beans, tomato product, broth, seasoning brand, and serving size. Cheese, avocado, and other toppings will add extra calories and nutrients.
Frequently Asked Questions
1. What is chili con carne?
Chili con carne is a hearty dish made primarily with chili-seasoned meat and a flavorful sauce. Many popular homemade versions include beans, tomatoes, and vegetables, although ingredients vary by regional tradition and personal preference.
2. Can I make chili con carne without beans?
Yes. You can omit the beans and increase the amount of ground beef or add extra vegetables. You may also need to adjust the liquid to achieve your preferred consistency.
3. How do I make chili con carne thicker?
Simmer the chili uncovered for several additional minutes, stirring occasionally. You can also mash a few of the beans and stir them into the sauce to help thicken it naturally.
4. Can I make this recipe ahead of time?
Absolutely. Cook the chili a day in advance and refrigerate it promptly. Reheat thoroughly before serving. The flavors often become more developed after resting overnight.
5. Is chili con carne spicy?
It depends on the chili powder and seasonings used. This recipe can be mild or moderately spicy. For a milder version, use a mild chili powder and omit cayenne pepper and jalapeños.
6. Can I use ground turkey instead of ground beef?
Yes. Ground turkey can replace the beef, although the flavor and fat content will differ. Cook it thoroughly and adjust the seasonings to taste.
7. How long does homemade chili last in the refrigerator?
Store it in an airtight container for 3–4 days in the refrigerator. Refrigerate promptly after cooking.
8. Can I freeze chili con carne?
Yes. Divide the cooled chili into freezer-safe portions and freeze for approximately 2–3 months for the best quality. Thaw safely and reheat to 165°F (74°C).
9. What toppings are best for chili con carne?
Popular toppings include shredded cheddar cheese, diced avocado, fresh cilantro, sour cream, sliced green onions, and fresh lime juice. Choose one or several according to your preference.
10. Can I cook chili con carne in a slow cooker?
Yes. Brown the beef and sauté the vegetables first for better flavor, then transfer everything to a slow cooker. Cook on LOW for approximately 4–6 hours, following your appliance’s instructions and ensuring the meat is fully cooked.
Final Thoughts
This Homemade Chili con Carne is a comforting, flavorful one-pot meal made with ground beef, beans, tomatoes, and warming spices. It is easy enough for a weeknight dinner yet satisfying enough to serve at family gatherings or casual get-togethers.
With simple ingredients, flexible seasonings, and plenty of delicious topping options, this recipe can easily become a regular favorite. Serve it over rice, alongside warm cornbread, or topped with cheddar cheese, creamy avocado, and fresh lime juice.
Prepare a big batch, save the leftovers, and enjoy a hearty homemade meal whenever you need something warm, filling, and delicious.
Food Safety Reminder: Cook ground beef thoroughly, prevent cross-contamination, refrigerate leftovers promptly, and reheat cooked chili to an internal temperature of 165°F (74°C).