
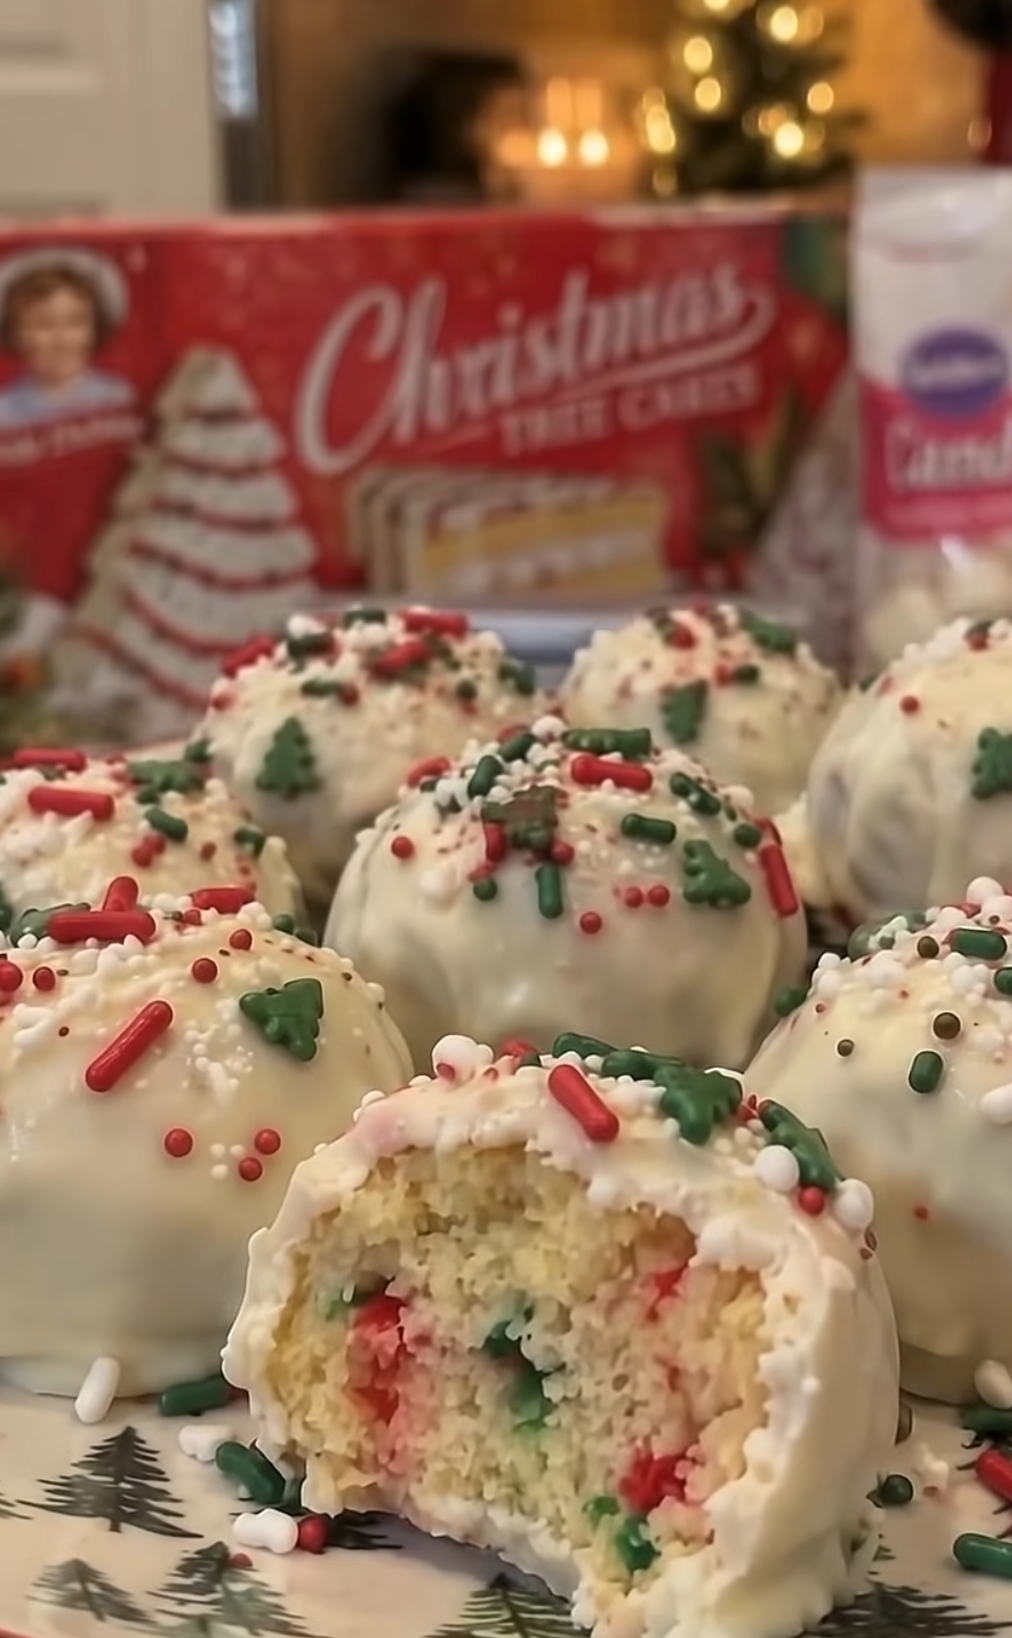
These festive Christmas Tree Cake Balls are an easy, no-bake holiday dessert made with soft snack cakes, creamy filling, and a smooth white chocolate coating. Decorated with red, green, and white sprinkles, these bite-sized treats are perfect for Christmas parties, holiday dessert tables, cookie exchanges, and homemade edible gifts.
With just a few simple ingredients and no oven required, this Christmas dessert recipe is ideal for beginners and busy holiday bakers. Each bite is sweet, creamy, and delicious, with a festive appearance that makes it a favorite for the holiday season.
Recipe Overview
| Details | Information |
| Prep Time | 20 minutes |
| Chilling Time | 45 minutes |
| Setting Time | 15 minutes |
| Total Time | 1 hour 20 minutes |
| Cooking Method | No-bake |
| Servings | 24–30 cake balls |
| Course | Dessert |
| Cuisine | American |
| Difficulty | Easy |
Why You’ll Love This Recipe
These Christmas Tree Cake Balls are incredibly easy to prepare because they use ready-made snack cakes instead of baking a cake from scratch. Their creamy center and sweet white chocolate shell create a delicious combination of textures, while the colorful sprinkles make every piece look festive and inviting.
They are also perfect for preparing ahead of time, making them a convenient choice for Christmas gatherings, holiday potlucks, and homemade dessert gift boxes.
Ingredients
| Ingredient | Quantity |
| Christmas tree snack cakes, such as Little Debbie | 2 boxes |
| Cream cheese, softened | 4–6 oz (115–170 g) |
| White chocolate melting wafers or white candy melts | 10–12 oz (285–340 g) |
| Red, green, and white Christmas sprinkles | 2–3 tablespoons |
| Vanilla extract, optional | ½ teaspoon |
Ingredient Notes: Start with 4 oz of cream cheese and add more only if needed. Depending on the softness of your snack cakes, you may not need the entire amount. White candy melts are particularly convenient because they melt smoothly and set firmly.
Step-by-Step Instructions
Step 1: Crumble the Snack Cakes
Unwrap the Christmas tree snack cakes and place them in a large mixing bowl. Use a fork or clean hands to crumble them into fine, even crumbs. Make sure there are no large pieces remaining so the cake balls hold together properly.
Step 2: Mix the Filling
Add the softened cream cheese gradually, starting with 4 oz (115 g). Mix thoroughly until the crumbs form a soft, cohesive mixture that can be rolled easily between your hands.
If the mixture is too dry, add a little more cream cheese. If it feels excessively sticky, refrigerate it for 10–15 minutes before shaping.
Step 3: Shape the Cake Balls
Scoop approximately 1 tablespoon of the mixture at a time and roll it between your palms to form smooth, evenly sized balls.
Place the balls on a baking sheet lined with parchment paper, leaving a little space between each one.
Refrigerate for 30 minutes, or freeze for approximately 15 minutes, until the balls are firm enough to dip.
Step 4: Melt the White Chocolate
Place the white chocolate melting wafers or candy melts in a microwave-safe bowl. Microwave in 30-second intervals, stirring thoroughly after each interval until the coating is completely smooth.
Avoid overheating the chocolate, as it can become thick or grainy. If necessary, follow the package instructions for thinning the coating.
Step 5: Coat the Cake Balls
Remove the chilled cake balls from the refrigerator. Dip each ball into the melted white chocolate using a fork or dipping tool, turning it gently until completely coated.
Lift the ball out and allow the excess coating to drip back into the bowl. Gently tap the fork against the bowl to remove excess chocolate.
Place each coated cake ball back onto the parchment-lined baking sheet.
Step 6: Add the Christmas Decorations
While the white chocolate coating is still wet, sprinkle each cake ball with red, green, and white Christmas sprinkles.
Work in small batches so the coating does not harden before you finish decorating.
Step 7: Let the Coating Set
Allow the cake balls to set at room temperature in a cool environment or refrigerate them for approximately 15 minutes until the coating is firm.
Once set, transfer them to an airtight container and refrigerate until ready to serve.
Best Tips for Perfect Christmas Tree Cake Balls
Use room-temperature cream cheese so it blends smoothly with the cake crumbs. Add it gradually to prevent the mixture from becoming too soft, and chill the shaped balls thoroughly before dipping. A firm center makes coating easier and helps each cake ball maintain its shape.
For a professional-looking finish, use good-quality white candy melts and allow excess coating to drip away before placing each ball on the parchment paper. Add sprinkles immediately for a neat, festive appearance.
Best Ingredient Options
White candy melts are easy to work with and create a firm shell, while white chocolate melting wafers provide a richer flavor. If you prefer a slightly less sweet filling, begin with the smaller amount of cream cheese and adjust the texture as needed.
If Christmas tree snack cakes are unavailable, use similar vanilla snack cakes with a creamy filling. The exact flavor and sweetness may vary, but the recipe will still work.
Recipe Variations
For a colorful holiday platter, drizzle the finished cake balls with melted red or green candy coating. You can also add a tiny pinch of peppermint extract to the filling for a festive mint flavor, or use gold and silver sprinkles for an elegant Christmas dessert.
For a different seasonal look, decorate the cake balls with crushed peppermint candies, edible glitter, or finely chopped nuts.
What to Serve With Christmas Tree Cake Balls
Serve these sweet treats with hot chocolate, coffee, tea, or a festive holiday latte. They also pair beautifully with Christmas cookies, brownies, fudge, and other bite-sized desserts on a holiday dessert board.
Make-Ahead Instructions
Prepare the cake balls up to 24 hours before serving. Shape them, place them in an airtight container, and refrigerate until you are ready to coat and decorate them.
You can also prepare the fully coated cake balls a day or two ahead. Keep them refrigerated and arrange them on a serving platter shortly before your holiday gathering.
Storage Instructions
Store the finished cake balls in an airtight container in the refrigerator for up to 5 days. Because the filling contains cream cheese, they should not be left at room temperature for more than 2 hours.
For the best texture and flavor, remove them from the refrigerator approximately 5–10 minutes before serving.
Reheating Instructions
These cake balls do not require reheating. Serve them chilled or let them sit briefly at room temperature to soften the filling slightly before eating.
Avoid microwaving them because the white chocolate coating may melt and the filling may become too soft.
Freezing Instructions
Arrange the finished cake balls in a single layer in a freezer-safe container, separating layers with parchment paper. Freeze for up to 2 months for the best quality.
Thaw them overnight in the refrigerator while still covered. Keeping the container closed during thawing helps reduce condensation on the chocolate coating.
Common Mistakes to Avoid
Adding too much cream cheese can make the mixture overly soft and difficult to shape. Always begin with a smaller amount and add more only when necessary.
Dipping warm or insufficiently chilled cake balls can cause them to fall apart in the melted coating. Chilling them until firm helps prevent this problem.
Overheating the white chocolate can make it thick and difficult to work with. Melt it slowly, stirring frequently, and decorate each cake ball before the coating sets.
Nutrition Estimate
The following values are approximate and will vary depending on the snack cakes, coating, and amount of cream cheese used.
| Nutrient | Estimated Amount per Cake Ball |
| Calories | 130–180 kcal |
| Carbohydrates | 15–23 g |
| Protein | 1–3 g |
| Total Fat | 7–11 g |
| Saturated Fat | 4–7 g |
| Sugar | 11–18 g |
| Sodium | 50–120 mg |
Frequently Asked Questions
Can I make Christmas Tree Cake Balls without cream cheese?
Yes. A small amount of vanilla frosting can be used instead. Add it gradually until the cake crumbs hold together when pressed. The finished dessert will generally be sweeter.
Why are my cake balls falling apart?
The mixture may be too dry, or the cake balls may not have been chilled long enough. Add a small amount of cream cheese if needed and refrigerate the shaped balls until firm before dipping.
Can I use regular white chocolate instead of candy melts?
Yes. White chocolate can be used, but it may require more careful melting and can produce a thinner or less stable coating. White chocolate melting wafers or candy melts are often easier for beginners.
Do Christmas Tree Cake Balls need to be refrigerated?
Yes. Since this recipe uses cream cheese, store the cake balls in an airtight container in the refrigerator.
Can I make these cake balls ahead of time?
Absolutely. You can prepare them 1–2 days before serving and keep them refrigerated. They are a convenient make-ahead dessert for Christmas parties and family celebrations.
Can I freeze Christmas Tree Cake Balls?
Yes. Freeze them in an airtight, freezer-safe container for up to 2 months for the best quality. Thaw overnight in the refrigerator before serving.
How do I prevent the chocolate coating from cracking?
Avoid extreme temperature changes. Chill the cake balls until firm but not frozen solid, and allow the melted coating to cool slightly if it is very hot before dipping.
Final Thoughts
Christmas Tree Cake Balls are a fun, festive, and delicious no-bake dessert that brings holiday cheer to any celebration. With a creamy cake center, smooth white chocolate coating, and colorful Christmas sprinkles, they look beautiful on dessert platters and make wonderful homemade holiday treats.
Whether you are preparing desserts for a Christmas party, creating edible gifts for friends, or making something special with your family, this easy recipe is a sweet addition to your holiday traditions. Prepare a batch ahead of time, keep it chilled, and enjoy these irresistible little bites throughout the Christmas season.