
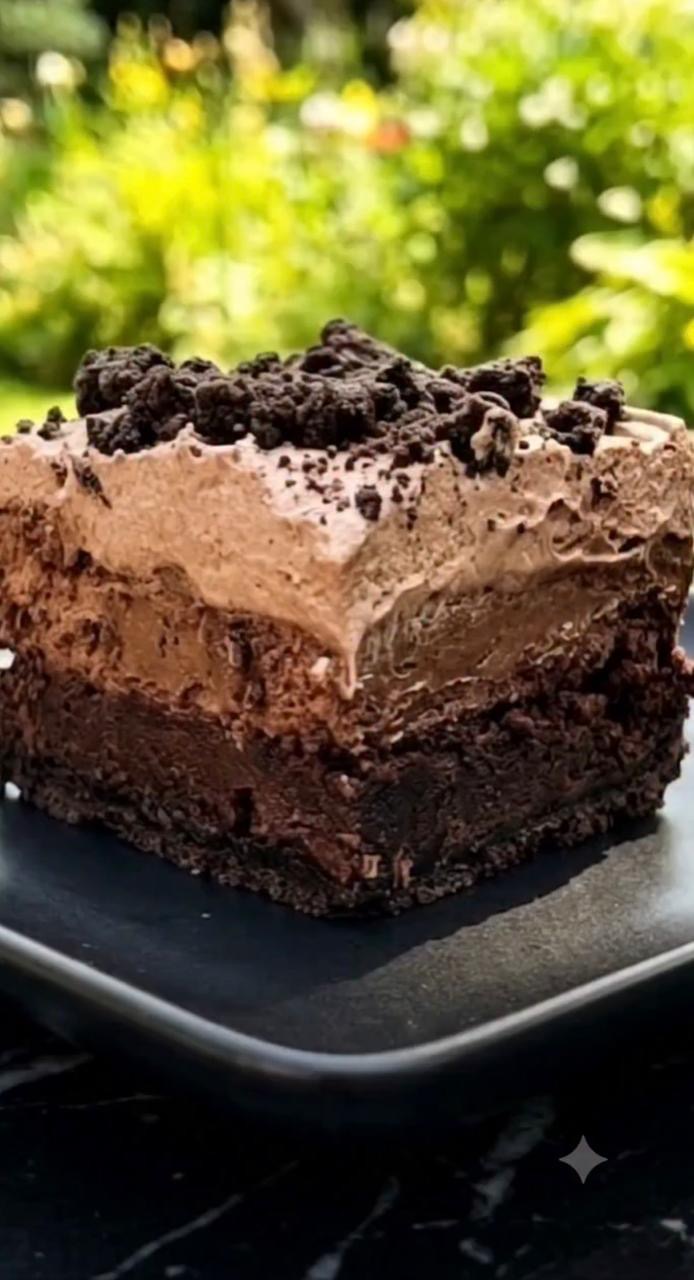
Triple Chocolate Layered Dessert: The Ultimate Fudgy Chocolate Treat
This Triple Chocolate Layered Dessert is an irresistible chocolate lover’s dream. It combines a dense, fudgy brownie base with a silky homemade chocolate pudding layer, fluffy chocolate whipped cream, and a generous topping of crushed chocolate cookies.
Every bite delivers multiple textures and intense chocolate flavor. The contrast between the rich brownie, creamy pudding, airy whipped topping, and crunchy cookie garnish makes this an impressive dessert for holidays, parties, birthdays, potlucks, or special family gatherings.
Recipe Overview
| Detail | Information |
| Prep Time | 30 minutes |
| Bake Time | 20–25 minutes |
| Chill Time | 3 hours |
| Total Time | About 4 hours |
| Yield | 9 servings |
| Pan Size | 8 × 8-inch square pan |
| Category | Dessert |
| Difficulty | Easy to Moderate |
| Main Flavor | Chocolate |
Why You’ll Love This Dessert
This decadent layered chocolate dessert looks impressive but is surprisingly straightforward to make.
The first layer is a rich, fudgy brownie that provides a firm chocolate foundation.
The second layer is a smooth stovetop chocolate pudding made with milk, cocoa powder, and cornstarch. It becomes wonderfully creamy and sets beautifully when chilled.
Finally, a light cocoa whipped cream layer balances the richness of the first two layers, while crushed chocolate cookies add a delicious crunchy finish.
The dessert can also be prepared a day ahead, making it especially convenient for entertaining.
Ingredients
Layer 1: Fudgy Brownie Base
| Ingredient | Amount | Notes |
| Unsalted butter | 1/2 cup (113 g) | Melted |
| Granulated sugar | 1 cup (200 g) | |
| Large eggs | 2 | Room temperature preferred |
| Vanilla powder | 1 tsp | Vanilla extract can be substituted |
| Unsweetened cocoa powder | 1/3 cup (30 g) | |
| All-purpose flour | 1/2 cup (63 g) | |
| Salt | 1/4 tsp |
Layer 2: Homemade Chocolate Pudding
| Ingredient | Amount | Notes |
| Whole milk | 2 1/2 cups (600 ml) | |
| Granulated sugar | 3/4 cup (150 g) | |
| Unsweetened cocoa powder | 1/3 cup (30 g) | |
| Cornstarch | 1/4 cup (30 g) | |
| Unsalted butter | 2 Tbsp (28 g) | Added at the end |
Layer 3: Chocolate Whipped Cream
| Ingredient | Amount | Notes |
| Heavy whipping cream | 1 1/2 cups (360 ml) | Very cold |
| Powdered sugar | 1/4 cup (30 g) | |
| Unsweetened cocoa powder | 2 Tbsp | Sifted if lumpy |
Garnish
| Ingredient | Amount |
| Chocolate sandwich cookies | 1 cup, crushed |
You can use chocolate sandwich cookies with or without the cream filling.
Step-by-Step Instructions
Part 1: Make the Brownie Base
1. Prepare the Oven
Preheat your oven to 350°F (175°C).
Line an 8 × 8-inch square baking pan with parchment paper, leaving some parchment hanging over the sides. This will make the finished dessert easier to remove.
2. Mix the Butter and Sugar
Place the melted butter and granulated sugar in a medium mixing bowl.
Whisk until smooth and well combined.
3. Add the Eggs and Vanilla
Add the eggs one at a time, whisking well after each addition.
Stir in the vanilla powder or vanilla extract.
Mix until the batter looks smooth and glossy.
4. Add the Dry Ingredients
Add the cocoa powder, flour, and salt.
Gently fold everything together using a spatula.
Stop mixing as soon as no obvious streaks of flour remain.
Do not overmix.
5. Bake the Brownie
Spread the brownie batter evenly into the prepared pan.
Bake for 20–25 minutes.
The edges should look set while the center remains slightly soft.
A toothpick inserted into the center should come out with a few moist crumbs rather than completely clean.
Allow the brownie base to cool completely in the pan.
Part 2: Make the Chocolate Pudding Layer
6. Combine the Dry Ingredients
Place the granulated sugar, cocoa powder, and cornstarch in a medium saucepan.
Whisk thoroughly to remove any lumps.
7. Add the Milk
Gradually whisk in the whole milk.
Continue whisking until the mixture is completely smooth.
8. Cook the Pudding
Place the saucepan over medium heat.
Cook while whisking constantly.
After approximately 5–7 minutes, the mixture should become noticeably thicker and begin bubbling gently.
Once thickened, continue cooking for about 1 additional minute while stirring.
Do not leave the saucepan unattended because the pudding can stick or scorch easily.
9. Add the Butter
Remove the saucepan from the heat.
Add the butter and stir until completely melted and incorporated.
The pudding should be smooth, glossy, and thick.
10. Add the Pudding Layer
Pour the warm chocolate pudding over the completely cooled brownie base.
Use a spatula to spread it into an even layer.
Allow it to cool for a few minutes, then cover the pan and refrigerate for at least 2 hours, or until the pudding is firmly set.
Part 3: Make the Chocolate Whipped Cream
11. Prepare the Cream
Place the chilled heavy cream in a large mixing bowl.
Add the powdered sugar and cocoa powder.
12. Whip
Using an electric mixer, beat on medium-high speed until the cream forms stiff peaks.
Be careful not to overbeat, as the cream can become grainy and eventually turn into butter.
13. Add the Whipped Cream Layer
Remove the chilled dessert from the refrigerator.
Gently spread the chocolate whipped cream evenly over the pudding layer.
Use an offset spatula to create a smooth surface.
Part 4: Add the Cookie Garnish
14. Crush the Cookies
Place the chocolate sandwich cookies in a sealed bag.
Crush them using a rolling pin or the bottom of a glass.
Aim for a combination of fine crumbs and slightly larger pieces for texture.
15. Garnish
Generously sprinkle the crushed cookies over the chocolate whipped cream.
Cover the surface evenly or concentrate the crumbs in the center, depending on your preferred presentation.
16. Final Chill
Refrigerate the completed dessert for at least 1 additional hour before slicing.
For the best results, chill it overnight.
How to Get Perfect Layers
The brownie base must be completely cool before adding the pudding.
If the brownie is warm, it can soften the pudding layer and make the layers less distinct.
Allow the pudding to set completely before spreading the whipped cream on top.
Use a gentle hand when spreading each layer to avoid disturbing the layer underneath.
For the cleanest presentation, refrigerate the finished dessert thoroughly before cutting.
Best Tips
Use Cold Cream
Heavy whipping cream should be very cold before whipping.
For even better results, chill the mixing bowl and beaters for 10–15 minutes before making the whipped topping.
Sift Cocoa Powder
Cocoa powder can contain small lumps.
Sifting it before adding it to the whipped cream or pudding makes the final texture smoother.
Don’t Overcook the Pudding
Cook until the pudding thickens and gently bubbles.
Overcooking can make it excessively thick or give it a slightly starchy texture.
Chill Thoroughly
The dessert needs enough refrigeration time for the pudding to set and the layers to stabilize.
Overnight chilling produces especially clean slices.
Best Ingredient Options
Chocolate cookies: Chocolate sandwich cookies, chocolate wafer cookies, or chocolate graham crackers can be used.
Vanilla: Vanilla powder can be replaced with 1 teaspoon vanilla extract.
Milk: Whole milk provides the richest pudding. Reduced-fat milk can work, but the texture may be slightly lighter.
Chocolate topping: For an even richer flavor, add 1–2 ounces of finely melted and cooled dark chocolate to the whipped cream.
Recipe Variations
Triple Chocolate Oreo Dessert
Use crushed chocolate sandwich cookies throughout the top and add a few cookie crumbs between the pudding and whipped cream layers.
Dark Chocolate Version
Replace part of the cocoa powder with Dutch-process or dark cocoa powder for a deeper chocolate flavor.
Chocolate Peanut Butter Version
Add a thin layer of creamy peanut butter between the brownie and pudding layers.
Mint Chocolate Dessert
Add a small amount of peppermint extract to the whipped cream and garnish with crushed chocolate-mint cookies.
Raspberry Chocolate Dessert
Add fresh raspberries between the pudding and whipped cream layers for a fruity contrast.
What to Serve With This Dessert
This dessert is rich enough to stand alone, but it pairs beautifully with:
- Fresh raspberries
- Strawberries
- Vanilla ice cream
- Fresh whipped cream
- Chocolate sauce
- Caramel sauce
- Espresso
- Coffee
- Fresh berries
A small serving with fresh berries is an especially nice way to balance the richness.
Make-Ahead Instructions
This is an excellent make-ahead dessert.
You can prepare the entire dessert 1 day in advance.
Cover the pan tightly and refrigerate overnight.
Add the cookie garnish shortly before serving if you prefer the crumbs to remain extra crunchy.
Storage
Cover leftovers tightly with plastic wrap or transfer individual portions to airtight containers.
Refrigerate for up to 4 days.
Because the dessert contains dairy and eggs, keep it refrigerated until ready to serve.
Reheating
This dessert should not be reheated.
Serve it chilled or allow individual portions to sit at room temperature for approximately 5–10 minutes before serving.
Freezing
The fully assembled dessert can be frozen, although the whipped cream may change slightly in texture after thawing.
For best results, freeze the brownie base separately and prepare the pudding and whipped cream fresh.
If freezing the complete dessert, cover it tightly and freeze for up to 1 month.
Thaw overnight in the refrigerator before serving.
Common Mistakes to Avoid
Adding Pudding to a Warm Brownie
Always allow the brownie to cool completely before adding the pudding.
Using Warm Cream
Warm cream will not whip properly.
Keep the cream refrigerated until you are ready to whip it.
Under-Setting the Pudding
Give the pudding enough time to chill and firm up before adding the whipped cream.
Overwhipping the Cream
Stop mixing as soon as stiff peaks form.
Cutting Without Chilling
A properly chilled dessert gives you much cleaner and more attractive layers.
Using a Dirty Knife
For beautiful slices, wipe your knife with a warm, damp towel after every cut.
Nutrition Estimate
Approximate values per serving, assuming 9 servings:
| Nutrient | Approximate Amount |
| Calories | 520 kcal |
| Protein | 7 g |
| Carbohydrates | 67 g |
| Fat | 27 g |
| Saturated Fat | 15 g |
| Fiber | 4 g |
| Sugar | 47 g |
| Sodium | 250 mg |
Nutrition information is an estimate and will vary according to the exact ingredients and cookie brand used.
Frequently Asked Questions
Can I make this dessert the day before?
Yes. In fact, overnight refrigeration is recommended because it gives the layers plenty of time to set.
Can I use store-bought chocolate pudding?
Yes, if you want to save time. However, homemade pudding provides a richer flavor and allows you to control the sweetness.
Why is my pudding not thickening?
Make sure the cornstarch is measured correctly and that the mixture reaches a gentle boil while being whisked continuously.
Can I use a different pan?
Yes. A 9-inch square pan or similar-sized rectangular dish can work. The thickness of the layers will change slightly depending on the pan size.
Can I use whipped topping instead of homemade whipped cream?
Yes. A prepared whipped topping can be substituted for the homemade chocolate whipped cream if desired.
Can I use milk chocolate instead of cocoa powder?
The pudding recipe is designed around cocoa powder. If using melted chocolate instead, the quantities and cooking method would need to be adjusted.
How do I get clean slices?
Chill the dessert thoroughly and use a sharp knife.
Wipe the blade clean with a warm, damp towel between each slice.
Final Thoughts
This Triple Chocolate Layered Dessert is the ultimate chocolate indulgence.
With its fudgy brownie foundation, silky chocolate pudding, airy cocoa whipped cream, and crunchy chocolate cookie topping, every layer contributes something special.
It is an impressive dessert for holidays, celebrations, dinner parties, potlucks, or whenever you want a truly decadent homemade chocolate treat.
For the most beautiful presentation, prepare it the day before, chill it overnight, and slice it carefully just before serving.