
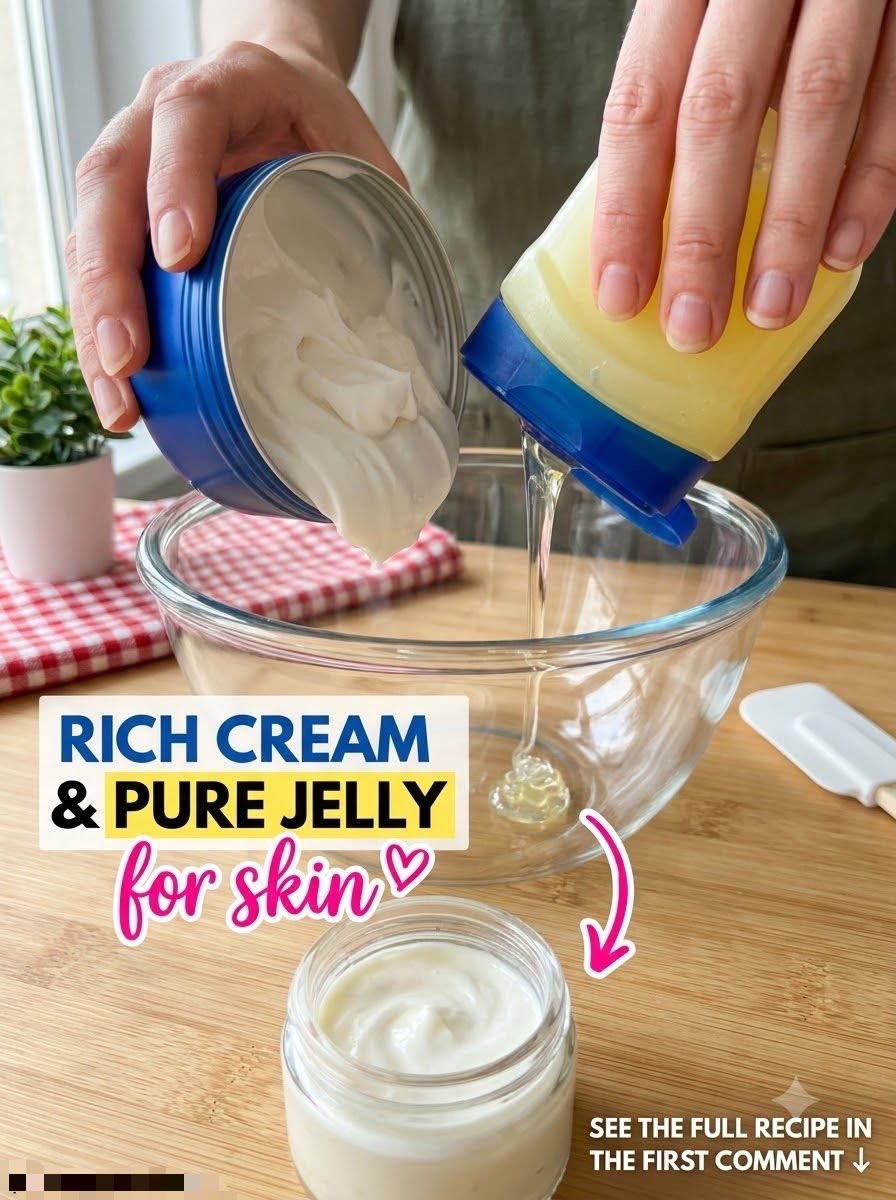
This simple DIY moisturizing balm combines a rich moisturizing cream with pure petroleum jelly to help soften dry skin and lock in moisture. Its thick, protective texture makes it especially useful for rough areas such as elbows, knees, heels, and hands.
Although this homemade mixture can help relieve dryness, it does not permanently remove wrinkles, reverse aging, or replace a properly formulated skincare product.
Recipe Overview
| Details | Information |
| Preparation Time | 5 minutes |
| Cooking Time | None |
| Total Time | 5 minutes |
| Yield | Approximately 2 tablespoons |
| Difficulty | Easy |
| Best For | Dry, rough skin |
| Storage | Follow the cream manufacturer’s storage instructions |
Why You’ll Love This Moisturizing Balm
This homemade moisturizing balm requires only a few ingredients and takes minutes to prepare. Petroleum jelly creates a protective barrier that helps reduce moisture loss, while a rich moisturizing cream provides additional emollients and humectants, depending on its formulation.
The thick texture makes it particularly suitable for areas that tend to become dry or rough during cold weather or after frequent handwashing.
Ingredients
| Ingredient | Quantity | Purpose |
| Rich moisturizing cream, such as NIVEA Creme | 1 tablespoon (15 g) | Helps soften and moisturize the skin |
| Pure petroleum jelly, such as Vaseline | 1 tablespoon (approximately 15 g) | Helps seal in moisture |
| Vitamin E oil (optional) | A few drops, if compatible with the cream | Optional skincare ingredient |
Important: Choose a cream intended for the area where you plan to apply the mixture. Avoid adding vitamin E oil unless you know it is suitable for your skin and compatible with the product.
Step-by-Step Instructions
Step 1: Prepare Your Equipment
Wash your hands and use a clean, completely dry mixing bowl and spatula. Choose a clean container with a lid for storage.
Step 2: Combine the Ingredients
Add 1 tablespoon of rich moisturizing cream and 1 tablespoon of pure petroleum jelly to the bowl.
Step 3: Mix Until Smooth
Stir gently with the spatula until the ingredients are evenly combined and form a thick, creamy balm. Avoid introducing water or other untested ingredients into the mixture.
Step 4: Transfer to a Container
Transfer the balm into a clean, dry container and close the lid securely.
Because this mixture has not been professionally tested for stability or microbial safety, the safest option is to prepare a small amount for immediate use rather than storing a large batch.
Best Tips for Best Results
Apply a small amount to clean skin while it is still slightly damp. This helps trap existing moisture and leaves the skin feeling softer.
Use a thin layer rather than applying a large quantity. Petroleum jelly is highly occlusive, so the mixture may feel greasy, especially on the face.
For particularly dry heels, apply the balm at bedtime and wear clean cotton socks. For dry hands, apply a small amount after washing your hands.
Best Ingredient Options
You can use a fragrance-free moisturizing cream if your skin is sensitive. If you are prone to irritation, choose products with simple formulations and avoid unnecessary fragrance or essential oils.
Pure petroleum jelly is generally well tolerated, but it may feel too heavy for some people, especially on acne-prone facial skin.
Recipe Variations
For dry hands: Use the original mixture sparingly after washing your hands.
For rough elbows and knees: Apply a thin layer in the evening to help reduce moisture loss.
For dry heels: Apply before bedtime and cover with cotton socks.
For sensitive skin: Choose a fragrance-free cream and leave out optional additives.
What to Use It With
For a simple skincare routine, use a gentle cleanser, a suitable moisturizer, and sunscreen during the day on exposed skin. At night, apply the balm to areas that need additional protection from dryness.
Make-Ahead Instructions
It is best to mix only the quantity you need. Combining commercial skincare products at home can change their consistency and may affect their preservation system.
Do not add water, fresh aloe vera, food ingredients, or herbal infusions to the mixture.
Storage
Keep the original cream and petroleum jelly in their respective containers whenever possible. If you mix them, use a clean, dry container and avoid dipping wet fingers into the product.
There is no validated shelf life for this homemade mixture. Discard it if its smell, color, or texture changes, or if contamination is suspected. Do not assume that the mixture remains safe for the same length of time as either original product.
Reheating
No heating is required. Do not microwave the mixture, as heating can alter the formulation and create hot spots.
Freezing
Freezing is not recommended because it may change the texture and consistency of the cream.
Common Mistakes to Avoid
Avoid applying a thick layer to acne-prone areas if it causes discomfort or breakouts. Do not use the mixture on infected skin, deep wounds, or irritated skin without appropriate medical advice.
Do not share the container with other people, and do not introduce water or unclean utensils into the mixture.
Always perform a small-area test before using a new skincare mixture more widely. Stop using it if redness, itching, swelling, or irritation occurs.
Nutrition and Skin Benefits Estimate
This is a topical skincare product, not a food recipe, so nutritional values do not apply.
| Skin benefit | What to expect |
| Moisture retention | Petroleum jelly helps reduce water loss |
| Softer skin | The cream and occlusive layer can improve the feel of dry skin |
| Rough areas | May help soften elbows, knees, hands, and heels |
| Wrinkle treatment | Does not permanently remove wrinkles |
| Skin brightening | No proven skin-lightening effect |
Frequently Asked Questions
1. Can I use this balm on my face?
Possibly, if both products are suitable for facial use and your skin tolerates them. The mixture may feel too heavy for oily or acne-prone skin.
2. Does this mixture remove wrinkles?
No. It may temporarily make fine lines caused by dryness appear less noticeable by improving skin hydration, but it does not erase wrinkles or reverse skin aging.
3. Can I use it every day?
It may be suitable for daily use on dry areas if you tolerate the ingredients. Stop if you experience irritation or worsening breakouts.
4. Can I add vitamin E oil?
It is optional and not necessary for the mixture to work as a basic moisturizer. Vitamin E can cause contact dermatitis in some people, so it is better to avoid it if you have sensitive skin or a history of reactions.
5. Can I use this balm around my eyes?
Avoid applying it close to the eyes or on the eyelids unless the products are specifically suitable for that area. Keep the mixture out of the eyes.
6. Is homemade moisturizing balm better than commercial products?
Not necessarily. A properly formulated commercial moisturizer has ingredients selected for compatibility, stability, and preservation. This homemade mixture is simply an inexpensive option for people who already tolerate both products.
Final Thoughts
This DIY ultra-moisturizing balm is a simple way to combine a rich cream with petroleum jelly to help protect dry skin and improve softness. It is most useful for rough areas such as hands, elbows, knees, and heels.
For the best results, apply a small amount to slightly damp skin and keep your skincare routine gentle and consistent.
Skincare disclaimer: This mixture may not be suitable for everyone. Test it on a small area first, and consult a dermatologist if you have persistent skin irritation, eczema, or another skin condition.