
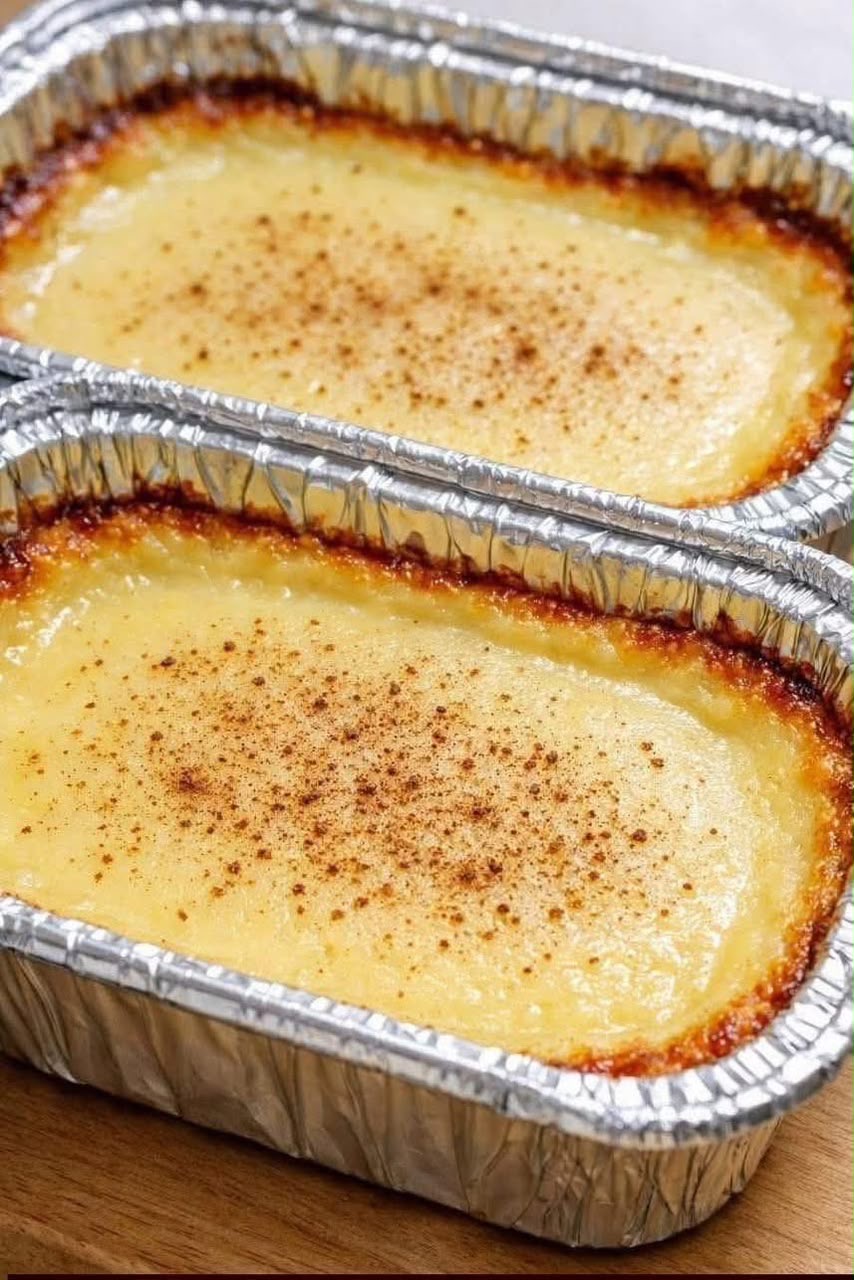
Baked Cassava Cake is a beloved Filipino dessert made with grated cassava, creamy coconut milk, sweetened condensed milk, and evaporated milk. Baked until rich and custardy with beautifully caramelized edges, this traditional-inspired treat has a soft, slightly chewy texture and a naturally sweet coconut flavor.
A light dusting of cinnamon adds a warm finishing touch, while an optional condensed milk glaze creates an extra glossy, caramelized topping. It is delicious served warm, chilled, or alongside a cup of coffee or tea.
Recipe Overview
| Details | Information |
| Prep Time | 15 minutes |
| Cook Time | 35–45 minutes |
| Cooling Time | 15–20 minutes |
| Total Time | About 1 hour |
| Yield | 2 loaf pans |
| Servings | 6–8 |
| Cuisine | Filipino |
| Category | Dessert |
| Cooking Method | Oven |
Why You’ll Love This Cassava Cake
This cassava cake is rich, creamy, sweet, and wonderfully satisfying without requiring complicated preparation.
The combination of grated cassava and coconut milk creates a soft, slightly chewy custard-like texture, while condensed milk adds sweetness and richness.
The edges become beautifully golden during baking, while the final broiling step creates a delicate caramelized finish.
It is also an excellent make-ahead dessert because the texture becomes firmer and easier to slice after cooling.
Ingredients
Cake Base
| Ingredient | Quantity |
| Grated cassava, thawed if frozen | 2 lbs (about 900 g) |
| Coconut milk | 1 can (13.5 oz / 400 ml) |
| Sweetened condensed milk | 1 can (14 oz / 395 g) |
| Evaporated milk | ½ cup |
| Large eggs | 2 |
| Melted butter | ¼ cup |
| Vanilla extract | 1 tsp |
Topping & Garnish
| Ingredient | Quantity |
| Ground cinnamon | ½ tsp |
| Extra condensed milk | 2 tbsp, optional |
Step-by-Step Instructions
1. Prepare the Oven and Pans
Preheat the oven to 350°F (175°C).
Lightly grease two aluminum loaf pans with butter or cooking spray.
Set the prepared pans aside.
2. Prepare the Cassava
If using frozen grated cassava, thaw it completely.
Place the grated cassava in a clean kitchen towel or fine-mesh strainer and gently squeeze out excess liquid.
Do not squeeze it completely dry. The cassava should retain some moisture to help create the proper soft and chewy texture.
3. Mix the Wet Ingredients
In a large mixing bowl, whisk together the eggs, coconut milk, sweetened condensed milk, evaporated milk, melted butter, and vanilla extract.
Whisk until the mixture is smooth and evenly combined.
4. Add the Cassava
Add the grated cassava to the wet mixture.
Stir thoroughly with a spatula or large spoon until the cassava is evenly distributed throughout the mixture.
Break up any large clumps as you mix.
5. Fill the Loaf Pans
Divide the cassava mixture evenly between the two prepared loaf pans.
Smooth the surfaces with a spatula.
Do not fill the pans completely to the top. Leave a little space to allow for expansion during baking.
6. Bake
Place the loaf pans in the preheated oven.
Bake for approximately 35–40 minutes, or until the center is set and the edges are golden brown.
The center should no longer look liquid or runny, although it should remain moist.
If the edges brown too quickly while the center still needs time to cook, loosely cover the pans with aluminum foil.
7. Add the Condensed Milk and Cinnamon
Remove the cakes from the oven.
If desired, lightly brush each cake with approximately 1 tablespoon of extra condensed milk.
Dust the tops lightly with ground cinnamon.
The condensed milk helps create a glossy, sweet surface that caramelizes beautifully under the broiler.
8. Broil the Tops
Turn the oven to HIGH BROIL.
Place the loaf pans under the broiler for approximately 2–3 minutes.
Watch the cakes carefully because condensed milk can caramelize very quickly.
Remove them as soon as the tops become lightly golden and caramelized.
9. Cool and Serve
Allow the cassava cakes to cool in their pans for at least 15–20 minutes.
For a softer dessert, serve slightly warm.
For a firmer, more set texture, allow the cakes to cool completely or refrigerate them before slicing.
Cut into portions and serve.
Best Tips for Perfect Cassava Cake
Use completely thawed cassava when using frozen grated cassava. Excess water from thawing can affect the final consistency.
Gently squeeze out excess liquid, but do not remove all the moisture. Cassava needs some moisture to produce its characteristic soft and chewy texture.
Use full-fat coconut milk for the richest coconut flavor and creamiest result.
Avoid overbaking. The center should be set while remaining moist and tender.
Watch the broiler carefully. The condensed milk topping can turn from golden to burnt very quickly.
Let the cake cool before slicing if you want cleaner, more defined pieces.
Best Ingredient Options
Fresh cassava: Fresh cassava can be used instead of frozen. Peel it thoroughly, remove any tough central fibers, and grate it finely.
Frozen grated cassava: This is a convenient option and works particularly well for this recipe.
Coconut milk: Full-fat coconut milk gives the richest flavor and creamiest texture.
Evaporated milk: Evaporated milk adds richness without making the batter excessively heavy.
Butter: Unsalted butter is ideal, although salted butter can also be used.
Recipe Variations
For extra coconut flavor, add ½ cup of finely shredded coconut to the cassava mixture.
For a more pronounced coconut topping, sprinkle shredded coconut over the surface before the final broiling step.
For a richer finish, brush the top with condensed milk before broiling as directed.
For additional warmth, add a small pinch of nutmeg to the batter or combine a little nutmeg with the cinnamon garnish.
For an indulgent dessert, serve each slice with whipped cream or vanilla ice cream.
What to Serve With Cassava Cake
Cassava cake pairs beautifully with freshly brewed coffee. The slightly bitter coffee balances the sweetness of the dessert.
Black tea or milk tea also makes an excellent pairing.
For a richer dessert, serve a warm slice with a scoop of vanilla ice cream.
Fresh tropical fruit can provide a refreshing contrast to the creamy, sweet cassava cake.
Make-Ahead Instructions
Cassava cake is an excellent make-ahead dessert.
Bake the cake several hours before serving and allow it to cool completely.
For a firmer texture, refrigerate it for several hours or overnight.
If preparing ahead, allow the cake to cool before covering it tightly and placing it in the refrigerator.
Storage
Allow the cassava cake to cool completely.
Cover the loaf pans tightly with plastic wrap or transfer individual slices to an airtight container.
Store in the refrigerator for up to 4–5 days.
Because this dessert contains eggs and dairy, keep it refrigerated after cooling.
Reheating
For a warm serving, place an individual slice in the microwave and heat for approximately 15–30 seconds.
You can also warm slices in a low-temperature oven until heated through.
Avoid excessive heating because the cassava can become firmer and chewier when overheated.
Freezing
Cassava cake can be frozen for longer storage.
Allow the cake to cool completely, then cut it into individual portions.
Wrap each portion tightly in plastic wrap or freezer-safe wrapping and place in a freezer-safe container or bag.
Freeze for up to 2–3 months for the best quality.
Thaw overnight in the refrigerator before serving.
Common Mistakes to Avoid
Using Excessively Wet Cassava
Too much liquid can make the cake overly soft or prevent the center from setting properly. Gently squeeze out excess moisture before adding the cassava.
Removing Too Much Moisture
Cassava should not be squeezed completely dry. Some moisture is important for the characteristic soft and chewy texture.
Overbaking
Baking too long can make the cake dense and dry. Remove it once the center is set and the edges are golden.
Broiling Too Long
The condensed milk topping caramelizes quickly. Keep a close eye on the cakes during the final 2–3 minutes.
Cutting Immediately
Allow the cake to cool and set before slicing. This produces cleaner pieces and improves the texture.
Nutrition Estimate
Nutrition values are approximate and vary depending on the specific brands and portion sizes.
| Nutrient | Estimated Amount per Serving |
| Calories | 350–400 kcal |
| Protein | 6–7 g |
| Fat | 14–17 g |
| Carbohydrates | 50–55 g |
| Sugar | 25–30 g |
| Fiber | 2–3 g |
| Sodium | 150–220 mg |
Frequently Asked Questions
Can I use fresh cassava instead of frozen?
Yes. Fresh cassava works very well. Peel it thoroughly, remove any tough central fiber if present, and grate it finely.
Do I need to squeeze the cassava?
Yes, gently removing excess liquid is recommended, especially when using thawed frozen cassava. However, do not squeeze it completely dry.
Can I skip the condensed milk topping?
Absolutely. The topping is optional. The cake will still be rich and delicious without the additional condensed milk.
Why is my cassava cake too soft?
It may need additional baking time, or the cassava may have contained more moisture than expected. The cake will also firm considerably as it cools.
Can I refrigerate cassava cake?
Yes. Refrigeration helps the cake become firmer and makes it easier to slice.
Can I serve cassava cake cold?
Yes. Cassava cake is delicious both warm and chilled. Chilling gives it a firmer, chewier texture.
How do I know when the cake is fully baked?
The center should be set rather than liquid, and the edges should be lightly golden. A slight softness in the center is fine because the cake continues to set as it cools.
Final Thoughts
Baked Cassava Cake is a rich and comforting Filipino-inspired dessert featuring grated cassava, creamy coconut milk, condensed milk, evaporated milk, and butter.
Its soft, custardy interior, slightly chewy texture, golden edges, and delicate caramelized topping make it a memorable homemade dessert.
Serve it warm for a softer texture or chilled for firmer slices. Either way, this cassava cake is perfect for family gatherings, celebrations, afternoon coffee, or whenever you’re craving a sweet tropical treat.