
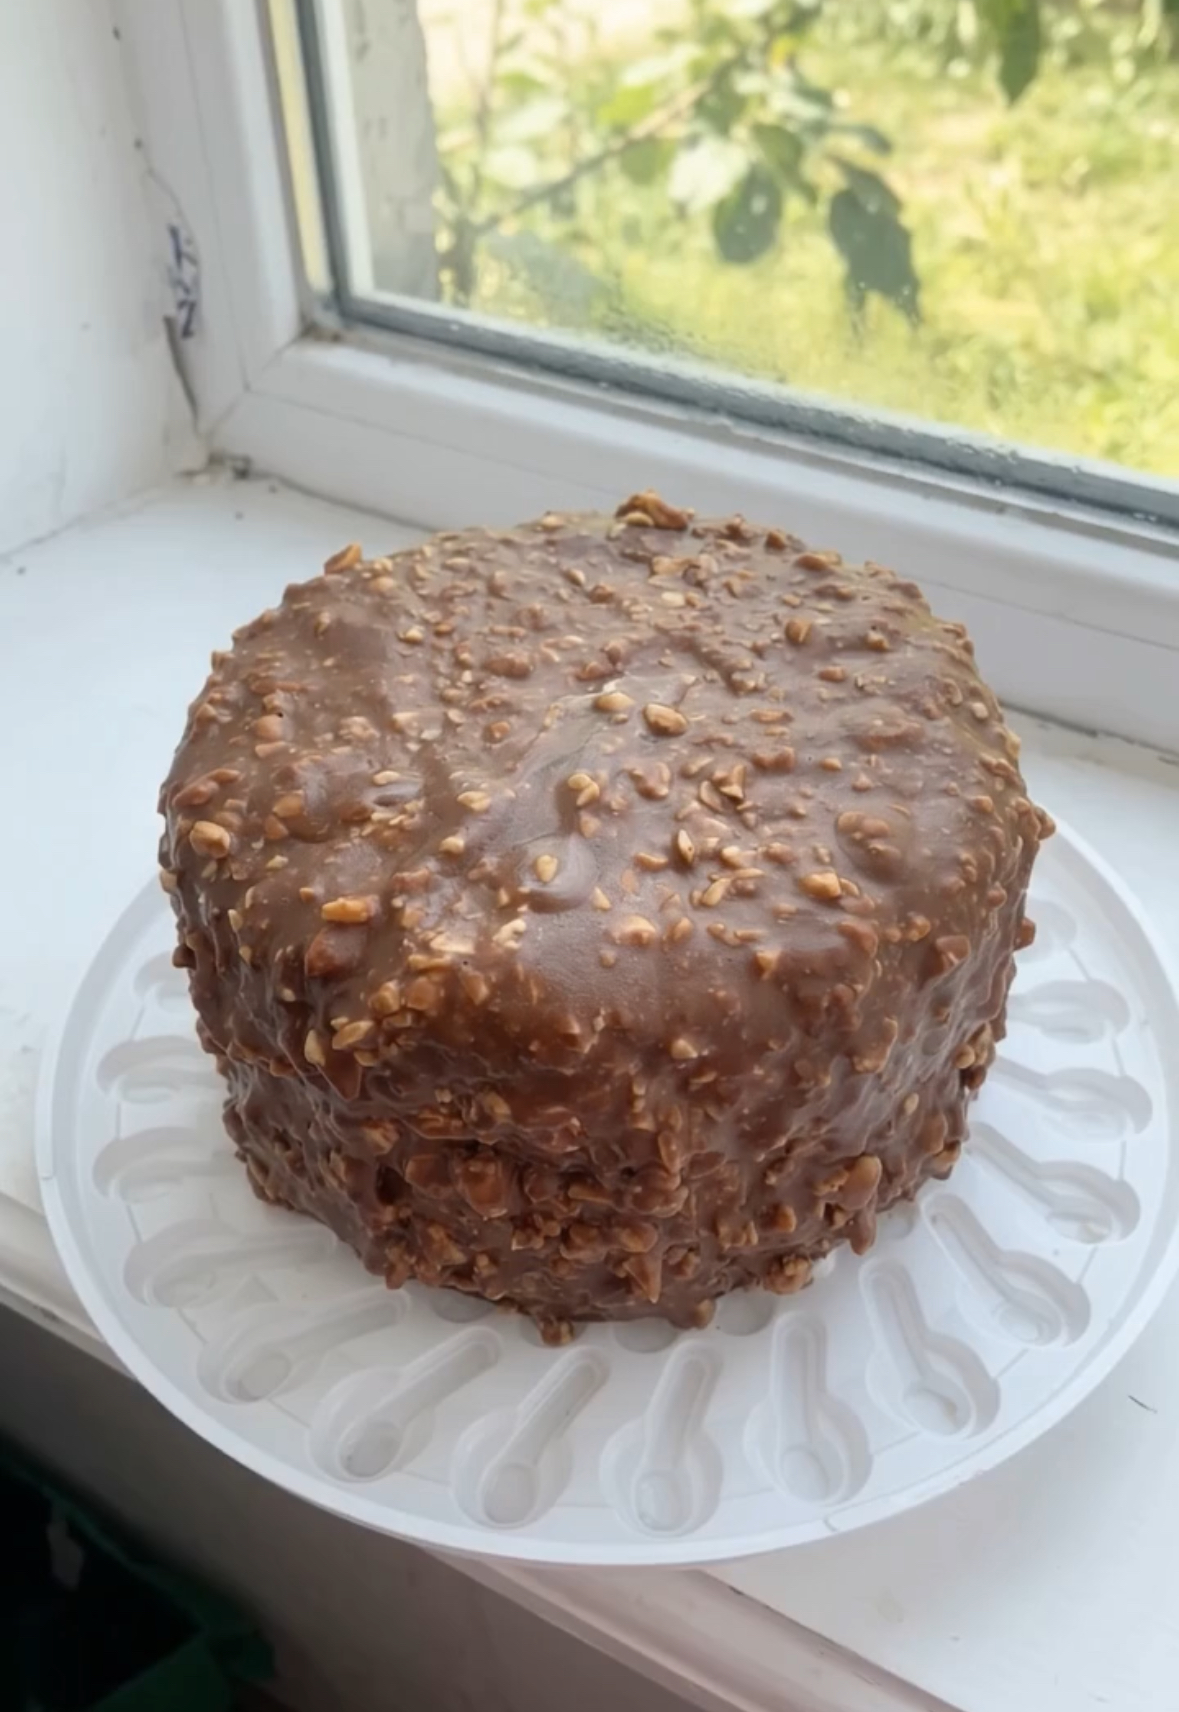
🍫 Chocolate Hazelnut “Ferrero Rocher” Cake
Introduction
If you love the combination of rich chocolate and crunchy roasted hazelnuts, this Chocolate Hazelnut Ferrero Rocher Cake is the ultimate dessert to make at home.
This impressive layer cake features moist, deeply chocolatey cake, a silky hazelnut buttercream filling, and a glossy Rocher-style chocolate glaze loaded with roasted nuts. Every slice delivers the perfect combination of soft cake, creamy filling, rich chocolate, and irresistible crunch.
It looks elegant enough for birthdays, holidays, dinner parties, and special celebrations, yet the recipe is straightforward enough for a weekend baking project.
Recipe Overview
| Category | Details |
| Prep Time | 35 minutes |
| Baking Time | 30–35 minutes |
| Chilling Time | 30–45 minutes |
| Total Time | About 2 hours |
| Servings | 10–12 slices |
| Cake Pans | 2 × 8-inch (20 cm) round pans |
| Oven Temperature | 180°C / 350°F |
| Difficulty | Intermediate |
Why You’ll Love This Recipe
This cake is incredibly moist thanks to the combination of whole milk, vegetable oil, eggs, and hot water.
The hazelnut filling adds a rich, creamy layer that pairs beautifully with the intense chocolate cake.
The signature Rocher coating takes the cake to another level. Melted chocolate combines with roasted chopped hazelnuts to create a crunchy, luxurious shell around the cake.
It is also an excellent make-ahead dessert because the cake layers and frosting can be prepared in advance.
Ingredients
For the Chocolate Cake
| Ingredient | Amount |
| All-purpose flour | 250 g |
| Granulated sugar | 350 g |
| Unsweetened cocoa powder | 85 g |
| Baking powder | 1½ tsp |
| Baking soda | 1½ tsp |
| Salt | 1 tsp |
| Large eggs | 2 |
| Whole milk | 240 ml |
| Vegetable oil | 120 ml |
| Vanilla extract | 2 tsp |
| Boiling water | 240 ml |
For the Hazelnut Filling
| Ingredient | Amount |
| Unsalted butter, softened | 225 g |
| Powdered sugar | 250 g |
| Chocolate-hazelnut spread | 200 g |
| Heavy cream | 2 tbsp |
| Vanilla extract | 1 tsp |
| Salt | Pinch |
For the Rocher Glaze
| Ingredient | Amount |
| Milk or dark chocolate, chopped | 300 g |
| Neutral vegetable oil | 60 ml |
| Roasted hazelnuts, finely chopped | 100 g |
Tip: Hazelnuts give the most authentic Ferrero Rocher-style flavor, but roasted peanuts can also be used for a more budget-friendly version.
Step-by-Step Instructions
1. Prepare the Cake Pans
Preheat your oven to 180°C / 350°F.
Grease two 8-inch (20 cm) round cake pans and line the bottoms with parchment paper.
Lightly grease the parchment as well.
Set the pans aside.
2. Mix the Dry Ingredients
In a large mixing bowl, whisk together the flour, cocoa powder, sugar, baking powder, baking soda, and salt.
Make sure there are no large lumps of cocoa powder remaining.
3. Add the Wet Ingredients
Add the eggs, whole milk, vegetable oil, and vanilla extract to the dry ingredients.
Whisk until everything is combined and the batter is smooth.
Do not overmix.
4. Add the Boiling Water
Slowly pour in the 240 ml of boiling water, whisking continuously.
The batter will become very thin and liquid-like. This is completely normal.
The hot water helps bloom the cocoa powder and creates an especially moist chocolate cake.
5. Bake
Divide the batter evenly between the prepared cake pans.
Bake for approximately 30–35 minutes, or until a toothpick inserted into the center comes out clean or with only a few moist crumbs.
Do not overbake the cakes, as this can make them dry.
Allow the cakes to cool in their pans for about 10–15 minutes.
Then carefully transfer them to a wire rack and allow them to cool completely.
6. Make the Hazelnut Buttercream
Place the softened butter in a large mixing bowl.
Beat for approximately 3–4 minutes until pale, smooth, and creamy.
Gradually add the powdered sugar while mixing on low speed.
Add the chocolate-hazelnut spread, heavy cream, vanilla extract, and a small pinch of salt.
Increase the mixer speed to medium-high and beat for another 2–3 minutes, until the frosting is light and fluffy.
7. Level the Cakes
Once the cake layers are completely cool, use a serrated knife to carefully level the tops if they have domed.
This will make the finished cake more stable and give you cleaner layers.
8. Assemble the Cake
Place the first cake layer on a cake board or serving plate.
Spread a generous layer of hazelnut buttercream evenly over the top.
Place the second cake layer on top.
Press very gently to ensure the layers are aligned.
Cover the top and sides with a thin layer of the remaining buttercream.
This crumb coat helps create a smooth surface and prevents cake crumbs from mixing into the chocolate glaze.
Refrigerate the assembled cake for at least 30 minutes.
9. Prepare the Rocher Glaze
Place the chopped chocolate in a microwave-safe bowl.
Heat in 30-second intervals, stirring thoroughly after each interval until completely melted and smooth.
Alternatively, melt the chocolate gently over a double boiler.
Stir in the vegetable oil until the mixture becomes glossy and fluid.
Allow the chocolate mixture to cool slightly.
It should be warm and pourable, but not extremely hot.
Finally, fold in the finely chopped roasted hazelnuts.
10. Coat the Cake
Remove the chilled cake from the refrigerator and place it on a wire rack positioned over a baking sheet.
Slowly pour the Rocher glaze over the center of the cake.
Use a spatula to gently encourage the chocolate toward the edges so it naturally drips down the sides.
Try to work relatively quickly because the cold cake will cause the chocolate coating to set.
Allow the glaze to firm up completely before moving or slicing the cake.
For an especially clean finish, refrigerate the cake for another 20–30 minutes after coating.
Best Tips for Success
Use room-temperature eggs and milk for a smoother cake batter.
Do not worry if the chocolate cake batter looks unusually thin. The boiling water is intentional and helps produce a moist, tender crumb.
Make sure the cake layers are completely cold before adding the buttercream.
The assembled cake should be well chilled before applying the Rocher coating. This helps the chocolate set against the cake.
Use finely chopped roasted hazelnuts for the best texture. Very large pieces can make the glaze difficult to pour evenly.
Do not pour extremely hot chocolate glaze over the cake because it can soften or melt the buttercream underneath.
Best Ingredient Options
Chocolate
Milk chocolate gives the cake a sweeter, more classic Ferrero Rocher-style flavor.
Dark chocolate creates a richer and slightly less sweet dessert.
You can also combine milk and dark chocolate for a balanced flavor.
Hazelnuts
For the best flavor, use roasted hazelnuts and remove as much of the loose skin as possible before chopping.
Chocolate-Hazelnut Spread
A traditional chocolate-hazelnut spread works beautifully, but any good-quality hazelnut cocoa spread can be used.
Recipe Variations
Mini Ferrero Rocher Cakes
Bake the cake in a sheet pan and use a round cookie cutter to create individual mini cakes.
Layer them with hazelnut buttercream and finish each one with Rocher glaze.
Extra Hazelnut Crunch
Add a thin layer of finely chopped roasted hazelnuts between the cake and buttercream.
This creates even more texture.
Dark Chocolate Version
Use dark chocolate in the cake glaze and choose a darker chocolate-hazelnut spread for a more sophisticated dessert.
Nut-Free Version
For a nut-free variation, replace the hazelnut spread with a chocolate spread and omit the chopped nuts from the glaze. Keep in mind that it will no longer have the traditional Ferrero Rocher flavor.
What to Serve With This Cake
This rich chocolate dessert pairs wonderfully with a cup of hot coffee or espresso.
For a lighter contrast, serve each slice with fresh strawberries or raspberries.
A small scoop of vanilla ice cream also works beautifully alongside the warm chocolate and hazelnut flavors.
Make-Ahead Instructions
The chocolate cake layers can be baked 1–2 days in advance.
Once completely cooled, wrap each layer tightly in plastic wrap and store them at room temperature for one day or refrigerate for longer storage.
The hazelnut buttercream can also be prepared ahead of time and refrigerated in an airtight container.
Before using it, allow the frosting to soften at room temperature and beat it briefly until smooth.
Storage
Store the finished cake covered in the refrigerator for up to 4–5 days.
Because the cake contains buttercream and cream, it should not be left at room temperature for extended periods.
For the best texture, remove the cake from the refrigerator approximately 20–30 minutes before serving.
Reheating
This cake does not need to be reheated.
Allow refrigerated slices to sit at room temperature before serving so the buttercream becomes creamy and the chocolate coating is easier to cut.
Freezing
The baked cake layers can be frozen for up to 2–3 months when tightly wrapped.
For best results, freeze the cake layers without the Rocher glaze.
Thaw overnight in the refrigerator before assembling.
The completely assembled cake can also be frozen, but the chocolate coating may develop a slightly different texture after thawing.
Common Mistakes to Avoid
Overbaking the cake: Check the cake around the 30-minute mark. Overbaking can remove the moisture that makes this cake special.
Adding hot glaze: Very hot chocolate can melt the buttercream. Let the glaze cool slightly before coating.
Skipping the chilling step: A chilled cake is much easier to coat and gives you a cleaner Rocher finish.
Using unsifted cocoa with large lumps: Whisk or sift the dry ingredients thoroughly before adding the wet ingredients.
Cutting immediately: Allow the chocolate coating to set before slicing so the layers remain neat.
Nutrition Estimate
Approximate per serving, assuming 12 slices.
| Nutrient | Estimated Amount |
| Calories | 650–700 kcal |
| Carbohydrates | 75–85 g |
| Protein | 7–9 g |
| Fat | 35–40 g |
| Saturated Fat | 15–18 g |
| Sugar | 55–60 g |
| Fiber | 4–5 g |
| Sodium | 350–450 mg |
Nutrition values are estimates and vary depending on the specific brands and ingredients used.
Frequently Asked Questions
Can I use a different cake pan size?
Yes. You can use 9-inch cake pans, but the layers will be slightly thinner and the baking time may need to be reduced.
Can I make this cake without a stand mixer?
Absolutely. A hand mixer works very well for the buttercream.
Why is my cake batter so thin?
The boiling water makes the batter much thinner than traditional cake batter. This is intentional and helps create a moist chocolate crumb.
Can I use peanuts instead of hazelnuts?
Yes. Roasted peanuts make an excellent alternative and provide a delicious crunchy chocolate-peanut flavor.
How do I get clean slices?
Chill the cake thoroughly, then use a sharp knife warmed under hot water and dried completely before each cut.
Can I make the cake one day ahead?
Yes. In fact, making it the day before serving can make the process easier. Keep the finished cake refrigerated and allow it to sit at room temperature briefly before serving.
Final Thoughts
This Chocolate Hazelnut “Ferrero Rocher” Cake is the perfect choice when you want a homemade dessert that looks impressive and tastes incredibly indulgent.
With its moist chocolate layers, creamy hazelnut buttercream, and crunchy chocolate Rocher coating, every bite delivers the flavors that make chocolate and hazelnut such a classic combination.
Whether you’re preparing it for a birthday, holiday celebration, dinner party, or simply craving an impressive homemade chocolate cake, this recipe is sure to become a favorite.