
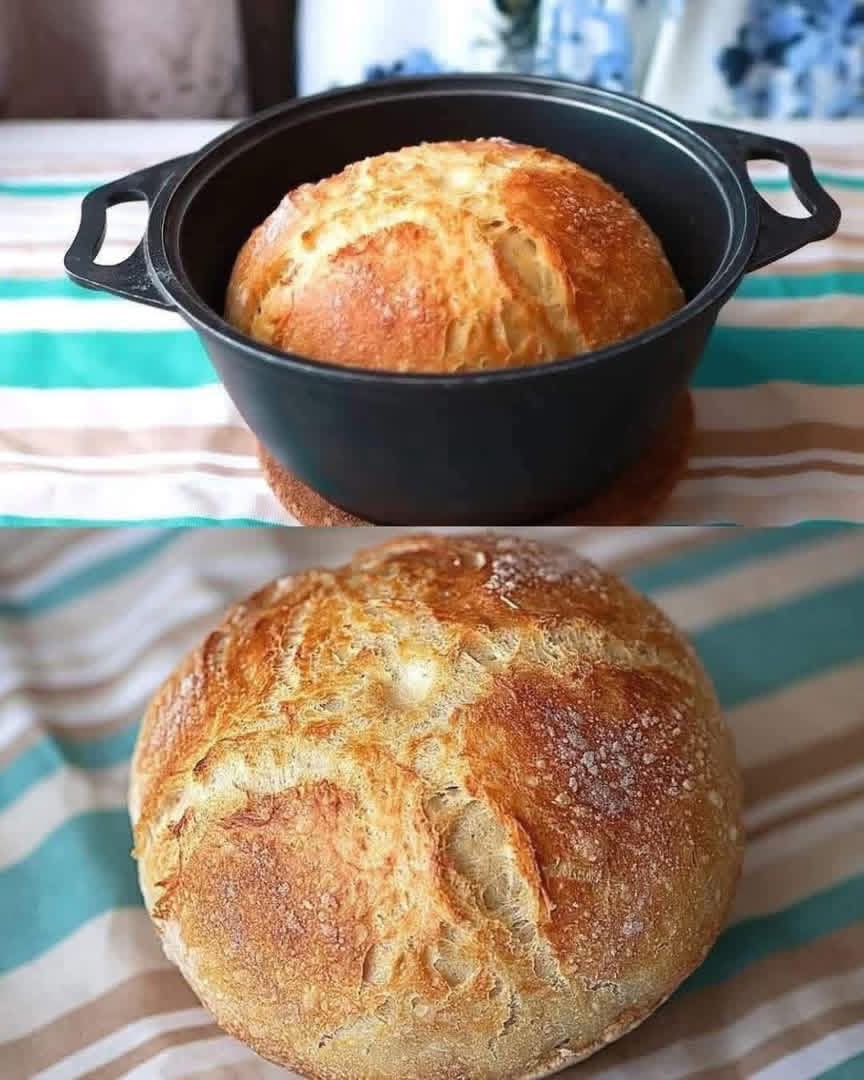
This homemade No-Knead Dutch Oven Bread is one of the easiest ways to make bakery-style bread at home. With just four basic ingredients—flour, water, salt, and yeast—you can create a rustic loaf with a beautifully crisp crust and a soft, airy interior.
The secret is the long fermentation. Instead of spending time kneading the dough, you simply mix the ingredients and let the yeast slowly develop the dough over several hours. Baking it in a preheated Dutch oven traps steam around the bread, helping create that signature golden, crunchy crust.
Recipe Overview
| Category | Details |
| Recipe | No-Knead Dutch Oven Bread |
| Prep Time | 10 minutes |
| Resting Time | 12–18 hours |
| Cook Time | 40–45 minutes |
| Total Time | About 13–19 hours |
| Yield | 1 loaf |
| Servings | 8–10 slices |
| Difficulty | Easy |
| Baking Temperature | 230°C / 450°F |
Why You’ll Love This Recipe
This bread requires almost no hands-on work. There is no traditional kneading, no complicated equipment, and no advanced bread-making technique required.
The long resting period gives the dough plenty of time to develop flavor and structure naturally. While the dough rests, the yeast slowly works its way through the flour, creating bubbles that give the finished loaf a light and rustic texture.
The Dutch oven is another key to the recipe. Its heavy lid traps steam during the first part of baking, allowing the bread to rise beautifully while developing a crisp crust.
It is an excellent recipe for beginners who want homemade artisan-style bread without spending hours in the kitchen.
Ingredients
For the Bread Dough
| Ingredient | Amount |
| All-purpose or bread flour, T55 or T65 | 400 g |
| Lukewarm water | 310 ml |
| Fine salt | 8 g |
| Dry active yeast | 2 g |
| OR fresh yeast | 6 g |
You will also need a little extra flour for shaping the dough and parchment paper for transferring the loaf into the Dutch oven.
Step-by-Step Instructions
1. Mix the Dough
Add the flour, salt, and dry yeast to a large mixing bowl.
Pour in the lukewarm water and stir everything together with a wooden spoon or sturdy spatula.
Mix just until all of the flour has been incorporated and you have a sticky, rough-looking dough.
Do not knead the dough. It should be soft, wet, and quite sticky at this stage.
2. Let the Dough Rise
Cover the bowl tightly with plastic wrap or a clean kitchen towel.
Leave the dough at room temperature for 12 to 18 hours.
During this long fermentation, the dough will become noticeably larger and develop many small bubbles on the surface.
For the best results, allow the dough to rest somewhere that is not excessively hot or cold.
3. Shape the Loaf
Generously flour your work surface.
Carefully transfer the dough onto the floured surface. Because the dough is quite wet and sticky, use a dough scraper if necessary.
Lightly flour your hands and gently fold the outer edges of the dough toward the center.
Continue folding until you can form the dough into a loose round ball.
Avoid excessive handling. The goal is simply to create a reasonably neat shape while preserving the air bubbles developed during fermentation.
4. Preheat the Dutch Oven
Place a heavy cast-iron Dutch oven with its lid inside the oven.
Preheat the oven to 230°C / 450°F and allow the Dutch oven to heat for approximately 30 minutes.
The preheated pot is important because it gives the dough an immediate burst of heat when it goes into the oven.
5. Transfer the Dough
Carefully remove the extremely hot Dutch oven from the oven.
Place the shaped dough on a sheet of parchment paper.
Using the parchment paper as a sling, carefully transfer the dough into the hot Dutch oven.
Be extremely careful during this step because both the pot and lid will be very hot.
Put the lid on the Dutch oven.
6. Bake Covered
Return the Dutch oven to the oven.
Bake the bread covered for 30 minutes at 230°C / 450°F.
The trapped steam will help the loaf expand and develop a crisp, thin crust.
7. Finish Baking Uncovered
Carefully remove the lid.
Continue baking for another 10 to 15 minutes, or until the bread has developed a deep golden-brown crust.
If you prefer a darker and crunchier crust, you can leave it in the oven for a few additional minutes, keeping a close eye on it.
8. Cool Before Slicing
Carefully remove the bread from the Dutch oven and place it on a wire rack.
Allow it to cool completely before slicing.
Although it can be tempting to cut into the bread immediately, allowing it to cool helps the interior finish setting and prevents the crumb from becoming gummy.
Once cooled, slice and serve.
Best Tips for Perfect No-Knead Bread
Use a kitchen scale whenever possible. Measuring flour by weight gives you much more consistent results than measuring it with cups, especially for a high-hydration dough like this one.
Do not add too much flour during shaping. The dough is naturally sticky because it contains a relatively high amount of water. Adding excessive flour can make the finished bread heavier and drier.
The temperature of the water matters. Lukewarm water encourages the yeast to become active without exposing it to excessive heat.
The long fermentation is essential. The dough needs enough time to develop bubbles, flavor, and structure. If your kitchen is particularly cool, the dough may need more time.
Always preheat the Dutch oven thoroughly. A hot Dutch oven helps produce strong oven spring and a beautifully crisp crust.
Be careful when handling the pot. Cast-iron Dutch ovens become extremely hot, including the handles and lid. Always use proper oven mitts or heat-resistant gloves.
Best Ingredient Options
For the flour, T55 or T65 flour works very well. Bread flour can also be used and may give the loaf a slightly chewier structure.
For a more rustic flavor, replace a portion of the white flour with whole wheat flour. Start by replacing about 50–75 g of the white flour with whole wheat flour.
Fine sea salt is an excellent choice because it dissolves easily throughout the dough.
Active dry yeast or instant dry yeast can be used. If using fresh yeast, crumble it into the flour or dissolve it into the lukewarm water before mixing.
Recipe Variations
Whole Wheat No-Knead Bread
Replace part of the white flour with whole wheat flour for a more rustic loaf with a deeper flavor and slightly denser crumb.
Seeded Artisan Bread
Add sunflower seeds, pumpkin seeds, sesame seeds, or flaxseeds to the dough for extra texture and flavor.
Herb Bread
Add finely chopped rosemary, thyme, or dried Italian herbs to the dough before mixing.
Garlic Herb Bread
For a savory variation, add roasted garlic and a small amount of dried herbs to the dough.
Rustic Multigrain Bread
Replace a portion of the flour with a multigrain flour blend. Depending on the flour used, you may need a small adjustment to the water.
What to Serve With No-Knead Bread
This homemade bread is delicious served warm with butter, olive oil, or your favorite spread.
It pairs beautifully with soups and stews because the crisp crust is perfect for dipping into flavorful broth.
You can also use slices for sandwiches, toast, bruschetta, breakfast toast, or simple open-faced sandwiches.
For a Mediterranean-style serving idea, drizzle toasted slices with extra-virgin olive oil and add tomatoes, herbs, and a pinch of salt.
Make-Ahead Instructions
The dough is naturally designed for make-ahead preparation because it requires a long fermentation.
You can mix the dough in the evening and leave it covered overnight. The next day, shape it and bake it when convenient.
If your kitchen is warm and you need to slow the fermentation, you can place the covered dough in the refrigerator after some initial fermentation. Allow it to come closer to room temperature before shaping and baking.
Storage
Allow the bread to cool completely before storing it.
Keep the loaf at room temperature in a bread bag, paper bag, or loosely covered container for up to 2–3 days.
Avoid storing freshly baked bread in the refrigerator unless necessary, as refrigeration can cause bread to become stale more quickly.
Reheating
To refresh the crust, place the bread in a preheated 180°C / 350°F oven for approximately 8–10 minutes.
Individual slices can be toasted in a toaster or skillet.
For a softer slice, you can briefly warm it in the microwave, although this will not restore the crisp crust.
Freezing
This bread freezes very well.
Allow the loaf to cool completely, then wrap it tightly in plastic wrap or freezer-safe packaging.
For convenience, you can also slice the bread before freezing. Place parchment paper between slices if needed so they are easy to separate.
Frozen bread is best used within approximately 2–3 months for the best quality.
Thaw at room temperature, then refresh the loaf in a hot oven for several minutes to bring back some of its crisp texture.
Common Mistakes to Avoid
Adding too much flour is one of the most common mistakes. The dough should be noticeably sticky rather than firm like traditional kneaded bread dough.
Using water that is too hot can negatively affect the yeast. Lukewarm water is all that is needed.
Do not rush the first rise. The long fermentation is what makes this recipe work without kneading.
Do not skip preheating the Dutch oven. Starting with a cold pot can reduce the initial rise and affect the crust.
Avoid opening the Dutch oven repeatedly during the covered baking stage. Keeping the lid closed helps maintain the steam needed for good oven spring.
Do not slice the bread immediately after baking. Letting it cool completely gives the crumb time to set.
Nutrition Estimate
The following values are approximate and will vary depending on the flour and ingredients used.
| Nutrient | Approximate Amount Per Serving |
| Calories | 175 kcal |
| Carbohydrates | 36 g |
| Protein | 5 g |
| Fat | 1 g |
| Saturated Fat | 0.2 g |
| Fiber | 1–2 g |
| Sodium | 300 mg |
Frequently Asked Questions
Can I make this bread without a Dutch oven?
Yes. A Dutch oven gives the best steam-trapping environment, but you can bake the dough on a preheated baking sheet or baking stone. Adding steam to the oven can help create a crispier crust.
Why is my dough so sticky?
This recipe uses a relatively high amount of water compared with the flour, so the dough is supposed to be sticky. Use lightly floured hands and a floured work surface when shaping.
Can I let the dough rise for more than 18 hours?
A longer fermentation may be possible depending on room temperature and yeast quantity, but over-fermentation can cause the dough to weaken and collapse. For consistent results, staying within the recommended 12–18-hour range is a good starting point.
Can I use instant yeast?
Yes. Instant dry yeast works well in this recipe.
Can I use fresh yeast?
Yes. Use approximately 6 g of fresh yeast in place of the 2 g of dry yeast.
How do I know when the bread is done?
The loaf should have a deep golden-brown crust and sound hollow when tapped on the bottom. If you use an instant-read thermometer, the center of the loaf should generally reach around 95–99°C / 203–210°F.
Why didn’t my bread rise much?
Several factors can affect the rise, including inactive yeast, a cool room, insufficient fermentation time, or excessive handling during shaping. Make sure your yeast is active and give the dough enough time to develop visible bubbles.
Can I use whole wheat flour?
Yes, but replacing all of the white flour with whole wheat flour can produce a denser loaf. For an easier transition, replace only part of the flour with whole wheat flour.
Final Thoughts
This Easy No-Knead Dutch Oven Bread is a simple and rewarding way to make homemade artisan-style bread with minimal effort. The combination of a long fermentation, wet dough, and hot covered Dutch oven creates a loaf with a crisp golden crust and a soft, airy center.
Once you master the basic recipe, you can experiment with whole wheat flour, seeds, herbs, roasted garlic, and other flavorful additions to create your own favorite homemade loaf.