
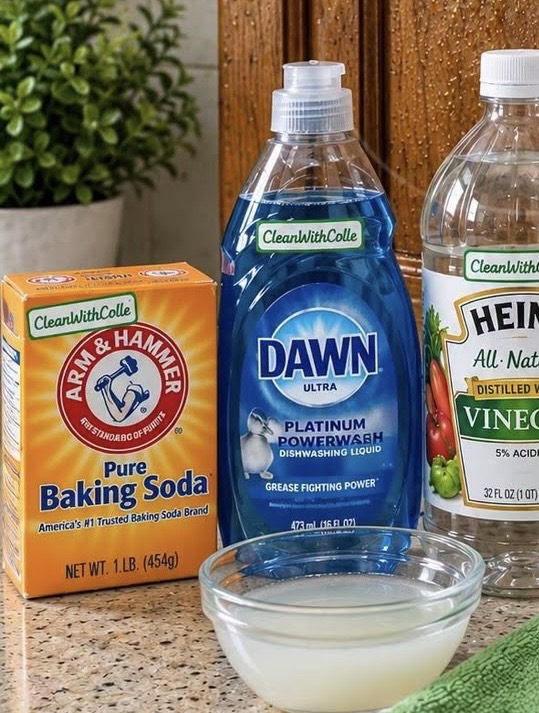
Grease, cooking splashes, and sticky residue can quickly build up on kitchen cabinets, especially around handles, stovetops, and frequently used cupboard doors. This homemade kitchen cabinet cleaner combines dish soap, warm water, and simple household ingredients to help remove everyday grime and leave cabinet surfaces looking fresh and clean.
The solution is easy to prepare and requires only a few inexpensive ingredients. With a microfiber cloth and a little gentle scrubbing, you can tackle greasy fingerprints and routine kitchen buildup without relying on a heavily fragranced commercial cleaner.
However, kitchen cabinets come in many finishes, including painted wood, natural wood, laminate, and veneer. Always test the cleaner on a small, hidden area first, and avoid using vinegar or baking soda on delicate or manufacturer-restricted surfaces.
Recipe Overview
| Details | Information |
| Preparation Time | 5 minutes |
| Cleaning Time | 5–15 minutes |
| Total Time | 10–20 minutes |
| Difficulty | Easy |
| Best For | Everyday kitchen grease and grime |
| Application | Wipe-on cleaning |
| Storage | Best prepared fresh |
Why You’ll Love This Homemade Cabinet Cleaner
Budget-friendly cleaning: The ingredients are commonly available in supermarkets and can be used for a variety of appropriate household cleaning tasks.
Helps remove greasy residue: Dish soap is designed to loosen oils and grease, making it useful for cleaning many washable cabinet surfaces.
Simple preparation: No special equipment is required beyond a bowl, measuring utensils, and a microfiber cloth.
Easy to rinse: Wiping the surface afterward with a clean, damp cloth helps remove leftover cleaning solution.
Suitable for routine maintenance: When compatible with the cabinet finish, gentle cleaning can help prevent grease from accumulating over time.
Ingredients
For the Homemade Kitchen Cabinet Cleaner
| Ingredient | Quantity |
| Baking soda | 2 tablespoons |
| Dish soap | 1 tablespoon |
| White vinegar | 1 cup (240 ml) |
| Warm water | 1 cup (240 ml) |
Equipment Needed
| Item | Purpose |
| Mixing bowl | For preparing the solution |
| Measuring spoons and cup | For measuring ingredients |
| Microfiber cloth | For gently cleaning cabinet surfaces |
| Clean cloth | For rinsing and drying |
Step-by-Step Instructions
Step 1: Prepare the Cleaning Solution
Pour the warm water into a bowl and add the dish soap. Stir gently to distribute the soap.
If you are cleaning a compatible, durable surface, add the baking soda slowly, followed by the white vinegar. The mixture may fizz as the vinegar reacts with the baking soda.
Allow the fizzing to settle before using the solution. Never prepare this mixture in a sealed container, because the reaction releases carbon dioxide gas.
Important: Baking soda and vinegar react with one another and largely neutralize each other. Combining them does not create a uniquely powerful degreaser. For routine cabinet cleaning, warm water and dish soap alone are often the better choice.
Step 2: Test a Hidden Area
Before cleaning the entire cabinet, apply a small amount of the solution to an inconspicuous spot.
Wipe gently and check the area for changes in color, shine, texture, or finish.
Allow the test area to dry completely before deciding whether the product is suitable.
Avoid the vinegar-and-baking-soda mixture on natural or unfinished wood, waxed surfaces, delicate painted finishes, and any material whose manufacturer advises against acidic or abrasive cleaners.
Step 3: Dampen the Microfiber Cloth
Dip a microfiber cloth into the cleaning solution and wring it out thoroughly.
The cloth should be damp rather than dripping wet. Excess moisture can seep into cabinet joints, edges, and seams, potentially damaging wood, veneer, or particleboard.
For many cabinet finishes, a separate bowl of warm water with a few drops of dish soap is sufficient.
Step 4: Clean the Cabinet Doors
Wipe the cabinet doors gently using small, circular or straight strokes, following the direction of the wood grain when applicable.
Pay extra attention to areas around handles, knobs, and cabinet edges, where grease and fingerprints often accumulate.
For stubborn buildup, hold the damp cloth against the area briefly to soften the residue before wiping again. Avoid aggressive scrubbing or using a rough scouring pad, which may scratch the finish.
Step 5: Wipe Away Residue
Use a second clean cloth dampened with plain water to remove any remaining soap or cleaning solution.
Wring the cloth out well and avoid saturating the cabinet surface.
If residue remains, repeat the rinse with a fresh section of the cloth rather than applying more cleaning chemicals.
Step 6: Dry the Cabinets
Immediately dry the cleaned surfaces with a soft, dry microfiber cloth.
Pay particular attention to cabinet edges, corners, seams, and areas around handles.
Proper drying helps prevent moisture damage and reduces streaks, especially on wood veneer and painted cabinets.
Step 7: Check the Finished Surface
Inspect the cabinets once they are dry. If a greasy patch remains, use a small amount of dish soap diluted in warm water, provided the finish is compatible.
For heavily soiled cabinets, several gentle cleaning passes are safer than one aggressive scrub.
Best Tips for Cleaning Greasy Kitchen Cabinets
Start with the gentlest cleaner. Warm water and a few drops of dish soap are often enough to remove ordinary cooking grease.
Use a microfiber cloth. Its soft fibers help lift dirt without the harsh abrasion of many scouring pads.
Clean regularly. Wiping cabinet doors weekly or as needed can prevent grease from becoming difficult to remove.
Avoid excessive moisture. Water can penetrate seams and damage wood-based cabinet materials, so always wring out the cloth thoroughly.
Work from top to bottom. Cleaning upper cabinets first helps prevent dirty water from dripping onto surfaces you have already cleaned.
Dry immediately. Leaving moisture on cabinet doors can cause streaks, swelling, or finish damage.
Follow manufacturer instructions. Some painted, laminated, waxed, or specialty finishes require specific cleaners and may not tolerate vinegar or abrasive powders.
Best Ingredient Options
Dish soap: A mild, grease-cutting dishwashing liquid is generally the most useful ingredient for routine cabinet cleaning. Use only a small amount to reduce residue.
Warm water: Warm water helps loosen everyday grime. It should not be hot enough to damage delicate finishes.
Baking soda: Baking soda can provide mild abrasion when used appropriately, but its particles may dull or scratch some surfaces. Avoid rubbing it directly onto delicate finishes.
White vinegar: Vinegar is acidic and may be suitable for certain durable, acid-resistant surfaces, but it is not appropriate for every cabinet material. It is unnecessary for routine grease removal when dish soap works well.
Cleaning Variations
Simple Dish Soap Degreaser
Mix 2 cups (480 ml) of warm water with 1 teaspoon of mild dish soap. Dampen a microfiber cloth, wipe the cabinet surface gently, rinse with a separate cloth, and dry immediately.
This is the preferred starting point for most washable cabinet finishes.
Extra-Greasy Cabinet Cleaning
For stubborn grease on a compatible, washable surface, use a slightly stronger dish-soap solution. Apply it with a damp cloth and repeat gentle passes as needed rather than scrubbing aggressively.
Laminate Cabinet Cleaner
Use warm water and a small amount of mild dish soap on a soft cloth. Avoid abrasive powders and strong acidic products unless the cabinet manufacturer confirms they are suitable.
Painted Cabinet Cleaner
Use a barely damp microfiber cloth with diluted mild dish soap. Test first, avoid vigorous rubbing, and dry the surface promptly to protect the paint.
Natural Wood Cabinet Cleaner
Use a cleaner specifically recommended for the wood’s finish. Avoid soaking the wood or applying vinegar, baking soda, or other unapproved products, especially on waxed or unfinished surfaces.
What to Use Alongside Your Cabinet Cleaner
A clean microfiber cloth is ideal for everyday grease and fingerprints.
A second cloth reserved for rinsing helps remove cleaning residue without spreading dirt.
A soft detailing brush can help loosen crumbs around cabinet handles and decorative edges, provided the brush is gentle enough for the finish.
For cabinet hardware, follow the manufacturer’s instructions because certain metal finishes can be damaged by acidic cleaners or abrasive products.
Make-Ahead Instructions
For the best results, prepare only the amount of cleaning solution you need for the current cleaning session.
If you prefer to keep a cleaning product ready for regular use, prepare a simple mixture of warm water and a small amount of dish soap immediately before cleaning rather than storing a homemade mixture containing several reactive ingredients.
Always use a clean bowl and cloth to avoid transferring grease back onto the cabinets.
Storage Instructions
The baking soda, vinegar, water, and dish-soap mixture is best prepared fresh.
Do not store a freshly mixed vinegar-and-baking-soda solution in a sealed bottle because the reaction releases gas and may build pressure.
Discard leftover mixture after cleaning and rinse the bowl thoroughly.
If you want to store a ready-to-use cleaner, choose a suitable commercial product formulated for your specific cabinet finish and follow its label instructions.
Rinsing and Drying Instructions
After cleaning, wipe the cabinet with a clean cloth lightly dampened with plain water to remove soap residue.
Follow immediately with a dry microfiber cloth.
Do not leave water standing on the surface or allow it to collect around cabinet seams, handles, or exposed edges.
Safety Precautions
Never mix vinegar with chlorine bleach. This combination can release toxic chlorine gas.
Do not mix household cleaning products unless their labels explicitly indicate that they are compatible.
Keep homemade cleaners away from children and pets, and avoid splashing the solution into your eyes.
Wear household cleaning gloves if your skin is sensitive to detergents.
Ensure the kitchen is reasonably ventilated while cleaning, and follow the cabinet manufacturer’s recommendations for compatible cleaning products.
Common Mistakes to Avoid
Using vinegar on every surface. Acidic cleaners can damage certain finishes, natural stone nearby, and some metals. Check compatibility first.
Assuming fizzing means stronger cleaning power. The bubbles result from a chemical reaction between baking soda and vinegar; they do not mean the mixture is a more effective degreaser.
Using too much baking soda. Its abrasive particles can dull or scratch some cabinet finishes.
Soaking the cabinets. Excess water can damage wood, veneer, and particleboard, particularly around edges and seams.
Scrubbing too hard. Forceful rubbing may remove paint, dull a finish, or leave visible marks.
Skipping the rinse. Leftover dish soap can leave streaks or a sticky film that attracts dust.
Forgetting to dry the surface. Drying promptly helps protect the cabinet material and prevents watermarks.
Storing the reactive mixture in a sealed container. Gas released by the vinegar-and-baking-soda reaction can cause pressure to build up.
Frequently Asked Questions
Does this homemade cleaner remove kitchen grease?
Dish soap diluted in warm water is effective for many everyday greasy residues. For best results, use a soft cloth, clean in gentle passes, rinse away the residue, and dry the surface.
Is vinegar and baking soda stronger than dish soap alone?
Not necessarily. Vinegar and baking soda react with each other, reducing their individual chemical effects. For routine cabinet degreasing, mild dish soap and warm water are usually a more practical option.
Can I use this cleaner on wooden cabinets?
Do not assume that the full mixture is safe for every wood finish. Natural wood, waxed wood, and some painted or specialty finishes can be sensitive to moisture, acids, or abrasion. Use a manufacturer-approved cleaner and test any product on a hidden spot first.
Can I use it on white kitchen cabinets?
It depends on the finish rather than the color. White painted cabinets may be sensitive to abrasion and strong cleaners. Start with diluted dish soap and warm water, test first, and dry thoroughly.
How often should I clean my kitchen cabinets?
Wipe frequently touched areas and spots near the stove whenever grease or fingerprints appear. A more thorough cleaning every few weeks may be sufficient for many kitchens, depending on cooking habits and ventilation.
Can I store the homemade mixture in a spray bottle?
It is better not to store the vinegar-and-baking-soda mixture in a sealed bottle because it releases carbon dioxide gas. If you want a spray cleaner, use a simple dish-soap-and-water solution prepared in a suitable container, clearly labeled and kept out of children’s reach.
What is the safest way to remove stubborn grease?
Begin with warm water and mild dish soap. Allow the damp cloth to sit against the greasy spot briefly, then wipe gently and repeat if necessary. Avoid harsh scrubbing and unapproved solvents.
Final Thoughts
Cleaning greasy kitchen cabinets does not have to involve expensive products or complicated methods. For most routine cabinet maintenance, warm water, a small amount of mild dish soap, and a soft microfiber cloth provide a practical place to start.
Although baking soda and white vinegar are popular household cleaning ingredients, combining them does not automatically create a stronger degreaser. Choosing a cleaner that suits your cabinet material, testing it in an inconspicuous area, and drying the surface promptly are the most important steps toward clean, well-maintained kitchen cabinets.
With regular gentle cleaning, you can keep your kitchen looking fresher while protecting the finish of your cabinets for years to come.