
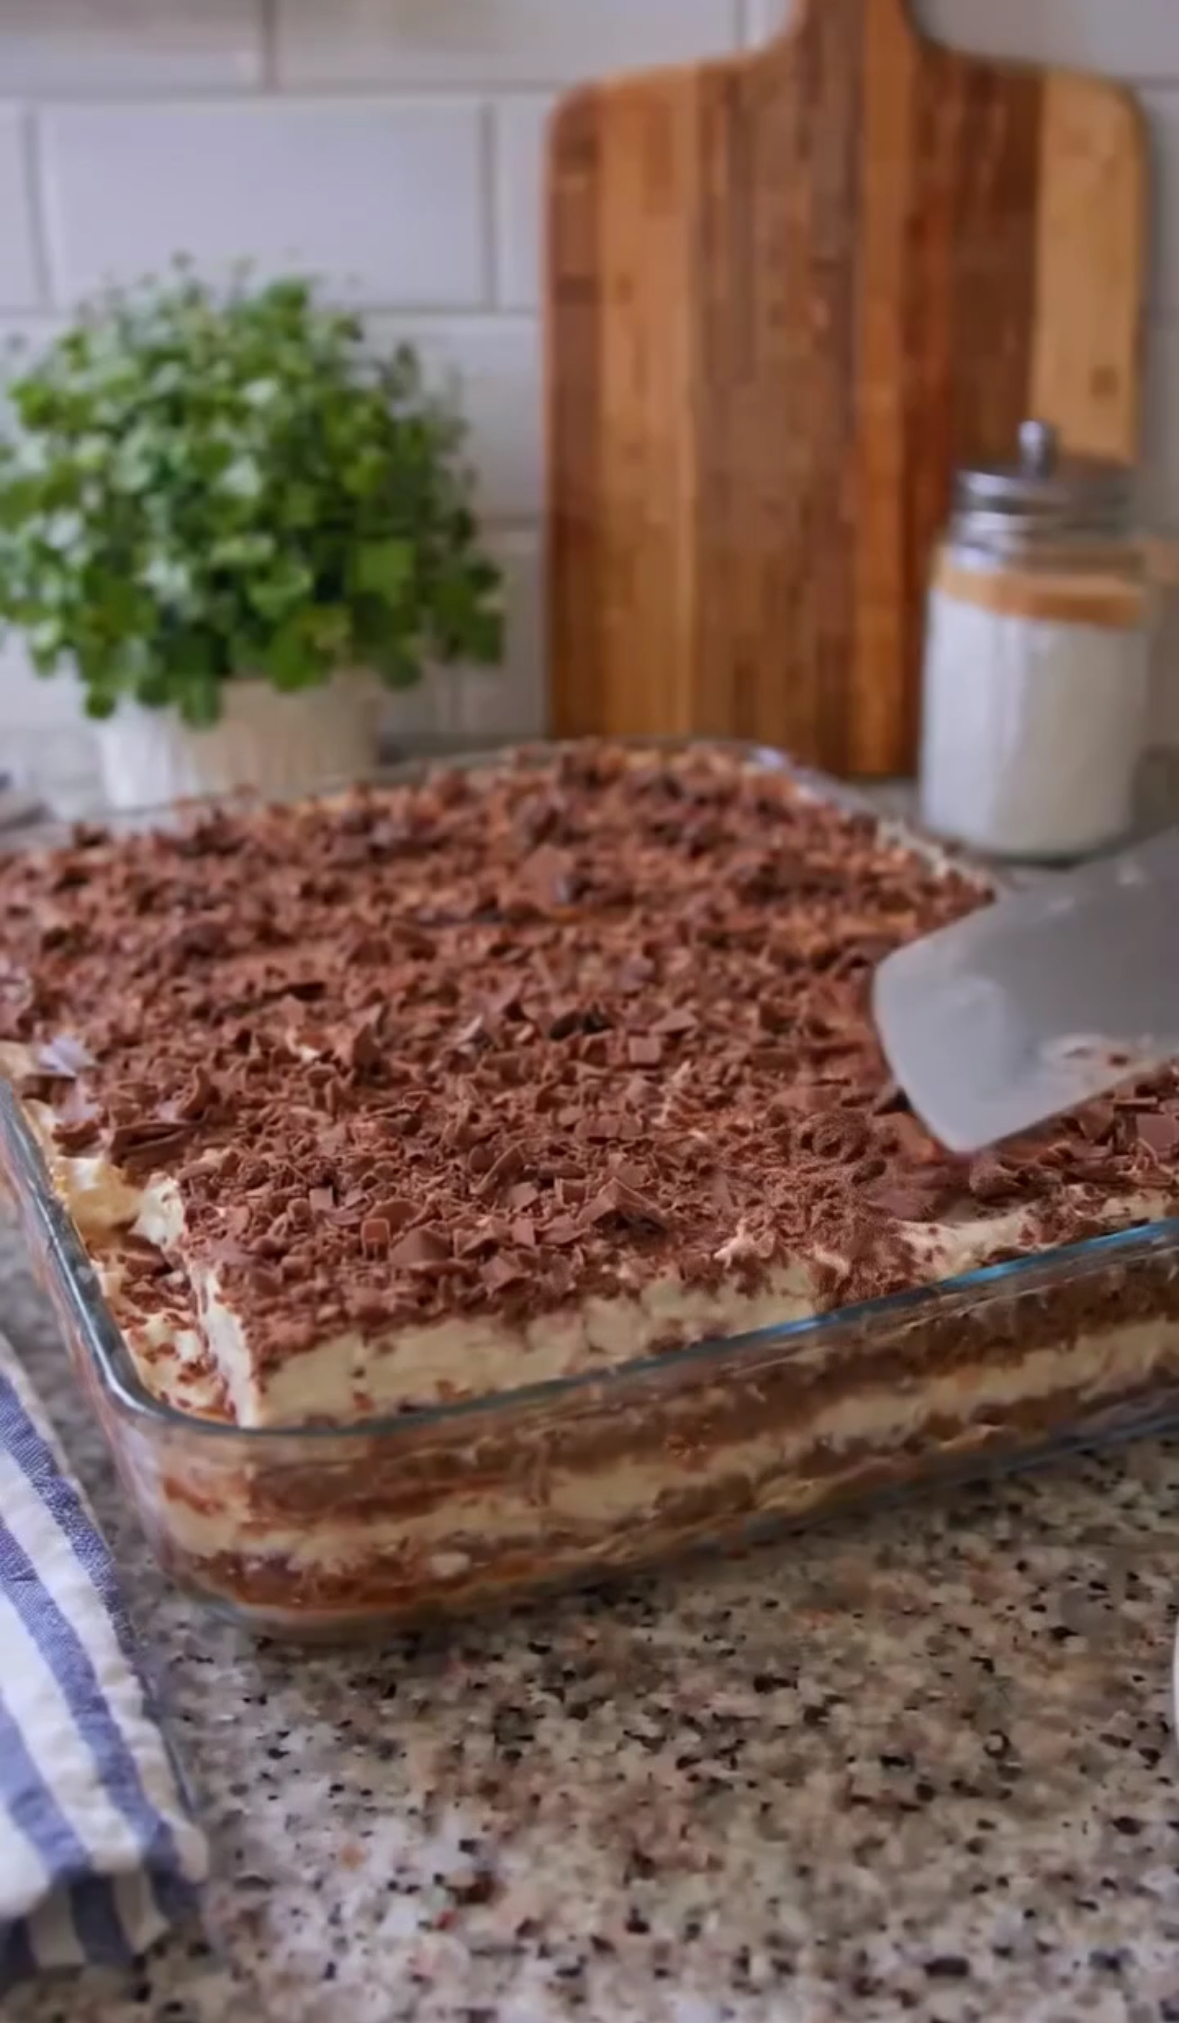
Je If you love the combination of rich chocolate, smooth coffee, and fluffy cream, this No-Bake Chocolate & Coffee Icebox Cake is the perfect dessert to try! Made with layers of coffee-dipped biscuits and a light, creamy filling, this easy refrigerator cake delivers delicious flavor without requiring an oven.
The cream cheese or mascarpone filling creates a silky texture, while freshly brewed coffee adds a deep, aromatic flavor that pairs beautifully with chocolate shavings. After a few hours in the refrigerator, the biscuits soften into delicate, cake-like layers that make every slice irresistible.
Whether you’re preparing a dessert for a family gathering, a weekend treat, or a special occasion, this no-bake chocolate coffee cake is simple to assemble and elegant enough to serve to guests.
Recipe Overview
| Detail | Information |
| Prep Time | 20 minutes |
| Cooking Time | None |
| Chilling Time | At least 4 hours |
| Total Time | Approximately 4 hours 20 minutes |
| Servings | 9–12 |
| Cuisine | European-inspired |
| Course | Dessert |
| Cooking Method | No-bake, refrigerator-set |
| Difficulty | Easy |
| Recommended Dish | 8-inch (20 cm) square or similar rectangular dish |
Why You’ll Love This Recipe
No oven required: This chilled dessert comes together with simple mixing and layering, making it ideal when you want something sweet without baking.
Rich chocolate and coffee flavor: Coffee-soaked biscuits and chocolate shavings create a delicious combination with a tiramisu-inspired feel.
Light and creamy filling: Whipped cream blended with cream cheese or mascarpone gives the dessert a smooth, fluffy texture.
Perfect for entertaining: The layered appearance makes this cake look beautiful when sliced and served on a dessert platter.
Make-ahead friendly: Preparing the cake the night before gives the biscuits time to soften and allows the flavors to blend.
Easy to customize: Use chocolate biscuits, graham crackers, or ladyfingers, and choose your favorite chocolate for the topping.
Ingredients
For the Biscuit Layers
| Ingredient | Quantity |
| Chocolate biscuits, graham crackers, or ladyfingers | 1–2 packs, as needed |
| Strong brewed coffee or espresso | 1 cup (240 ml) |
| Sugar for the coffee | To taste, optional |
Choose enough biscuits to cover your dish in several layers. The exact quantity depends on their size and the dimensions of your baking dish.
For the Cream Filling
| Ingredient | Quantity |
| Heavy whipping cream, cold | 1 cup (240 ml) |
| Cream cheese or mascarpone, softened | 8 oz (225 g) |
| Powdered sugar | 1/2 cup (approximately 60 g) |
| Vanilla extract | 1 teaspoon |
| Sweetened condensed milk | 1/2 cup (approximately 150 g), optional |
For the Topping
| Ingredient | Quantity |
| Dark or milk chocolate shavings | 1/2 cup |
| Unsweetened cocoa powder | Optional, for dusting |
Ingredient note: Mascarpone creates a delicate, rich flavor, while cream cheese adds a slight tanginess. If using sweetened condensed milk, taste the filling before adding extra sugar, as the condensed milk already contributes sweetness.
Step-by-Step Instructions
Step 1: Prepare the Coffee
Brew one cup of strong coffee or espresso and pour it into a shallow bowl.
If you prefer a sweeter dessert, stir in a little sugar while the coffee is still warm.
Allow the coffee to cool until it is lukewarm or at room temperature before assembling the cake. Very hot coffee can soften the biscuits too quickly and may affect the cream if it is transferred onto the filling.
Step 2: Whip the Heavy Cream
Pour the cold heavy whipping cream into a large, clean mixing bowl.
Using an electric mixer, beat the cream until stiff peaks form. This usually takes a few minutes, depending on the mixer and the temperature of the cream.
When you lift the beaters, the whipped cream should hold its shape without looking grainy.
Set aside in the refrigerator while you prepare the remaining filling.
Step 3: Prepare the Cream Cheese Filling
In a separate bowl, beat the softened cream cheese or mascarpone until smooth and creamy.
Add the powdered sugar and vanilla extract. Beat again until everything is evenly combined.
If you want a richer, sweeter filling, add the optional condensed milk and mix until smooth.
Scrape down the sides of the bowl as needed to remove any lumps.
Step 4: Fold in the Whipped Cream
Add the whipped cream to the cream cheese mixture in two or three additions.
Using a spatula, gently fold the mixtures together until the filling is uniform, light, and fluffy.
Avoid vigorous mixing, which can deflate the whipped cream and make the filling less airy.
Refrigerate the mixture briefly if it becomes too soft to spread easily.
Step 5: Prepare the First Biscuit Layer
Choose a square or rectangular glass baking dish.
Dip each biscuit or ladyfinger quickly into the cooled coffee. A brief dip is usually enough; do not leave the biscuits submerged, as they will continue softening while the cake chills.
Arrange the coffee-dipped biscuits in a single layer across the bottom of the dish. Break a few biscuits if necessary to fill small gaps.
Step 6: Spread the Cream Filling
Spoon approximately one-third of the cream mixture over the biscuit layer.
Use a spatula to spread it evenly from edge to edge.
Try to keep the cream layer relatively level so the finished cake has neat, distinct layers.
Step 7: Repeat the Layers
Add another layer of briefly coffee-dipped biscuits, followed by another portion of cream.
Continue layering the biscuits and filling until you use the ingredients, finishing with a smooth layer of cream on top.
Depending on your dish and the size of your biscuits, you may have two or three biscuit layers. Aim for even layers rather than forcing a specific number.
Step 8: Add the Chocolate Topping
Sprinkle the shaved dark or milk chocolate generously over the top.
For a more elegant finish, add a light dusting of unsweetened cocoa powder.
You can also use finely grated chocolate or a mixture of dark and milk chocolate for a balanced flavor.
Step 9: Cover and Refrigerate
Cover the dish tightly with plastic wrap or a suitable lid.
Refrigerate for at least 4 hours, preferably overnight.
This chilling period allows the biscuits to soften, the filling to firm up, and the coffee and chocolate flavors to blend.
For the cleanest slices, an overnight chill is highly recommended.
Step 10: Slice and Serve
Remove the cake from the refrigerator when you are ready to serve it.
Use a sharp knife to cut it into 9–12 squares. For cleaner cuts, wipe the knife between slices.
Serve cold, with extra chocolate shavings or a light dusting of cocoa powder if desired.
Enjoy this creamy, chocolatey dessert straight from the refrigerator!
Best Tips for a Perfect Icebox Cake
Use cold whipping cream. Cold cream whips more efficiently and helps the filling hold its shape.
Soften the cream cheese properly. Let cream cheese sit briefly at room temperature before mixing so it blends smoothly without lumps. Keep the whipped cream cold.
Dip the biscuits quickly. A short dip helps them absorb coffee without becoming mushy. Thin biscuits need less time than thick ones.
Let the coffee cool. Coffee that is too hot can make the biscuits overly soft before the cake has time to set.
Fold the cream gently. Using a spatula instead of vigorous mixing helps preserve the airy texture of the whipped cream.
Chill long enough. Four hours is the minimum, but overnight refrigeration generally produces better texture and cleaner slices.
Use good-quality chocolate. Dark chocolate balances the sweetness of the cream, while milk chocolate creates a sweeter topping.
Best Ingredient Options
Chocolate biscuits: Add extra chocolate flavor and create a darker, more indulgent dessert.
Graham crackers: Offer a slightly sweet, mildly toasted flavor and work well with the creamy filling.
Ladyfingers: Absorb coffee easily and create a texture similar to classic tiramisu.
Mascarpone: Gives the filling a rich, delicate, creamy texture.
Cream cheese: Provides a tangier flavor and is often easier to find in grocery stores.
Dark chocolate: Adds a deeper cocoa flavor and balances the sweet filling.
Milk chocolate: Creates a sweeter, gentler chocolate topping.
Strong espresso: Delivers a more pronounced coffee flavor, especially when paired with dark chocolate.
Recipe Variations
Chocolate Espresso Icebox Cake: Use strong espresso instead of regular coffee and top with dark chocolate curls for an intense coffee flavor.
Mocha Icebox Cake: Add 1–2 tablespoons of unsweetened cocoa powder to the cream cheese mixture and mix until smooth.
Chocolate Hazelnut Cake: Spread a thin layer of chocolate-hazelnut spread between selected layers for extra richness.
Vanilla Biscuit Icebox Cake: Replace chocolate biscuits with plain vanilla biscuits for a lighter contrast with the coffee filling.
Caramel Chocolate Cake: Drizzle a small amount of caramel sauce between the layers or over the top just before serving.
Decaf Coffee Version: Use decaffeinated coffee for a similar flavor with less caffeine.
Berry Chocolate Icebox Cake: Add a thin layer of sliced strawberries or raspberries between the cream layers. Pat the fruit dry first to help prevent excess moisture.
What to Serve With Chocolate & Coffee Icebox Cake
Fresh berries: Strawberries, raspberries, and blueberries add a refreshing contrast to the rich cream.
Freshly brewed coffee: A cup of coffee complements the dessert’s coffee-soaked biscuit layers.
Hot chocolate: A cozy pairing for chocolate lovers, particularly during colder months.
Vanilla ice cream: Adds a cool, creamy accompaniment, although the cake is already rich on its own.
Fresh fruit salad: Provides a light, refreshing side for a dessert table.
Chocolate-dipped strawberries: Make an attractive addition for special occasions and celebrations.
Make-Ahead Instructions
This dessert is especially convenient to prepare ahead.
Assemble the cake the evening before serving, cover it tightly, and refrigerate overnight. The longer chilling period helps the biscuits soften evenly and allows the filling to firm up.
You can also prepare the cream filling shortly before assembly, but the completed cake should be refrigerated until serving.
Keep the chocolate topping simple if preparing well in advance, then add any delicate decorations or fresh fruit just before serving.
Storage Instructions
Keep the cake covered in the refrigerator because the filling contains cream and dairy products.
Store it at 40°F (4°C) or below and enjoy it within approximately 3 days for the best quality.
Always return leftover portions to the refrigerator promptly, and avoid leaving the dessert at room temperature for extended periods.
Reheating Instructions
This is a chilled, no-bake dessert, so reheating is not necessary.
Serve it directly from the refrigerator. If it feels too firm immediately after chilling, allow it to stand at room temperature for approximately 5–10 minutes before slicing or serving.
Do not warm the cake in the oven or microwave, as the whipped cream filling may lose its structure.
Freezing Instructions
You can freeze this cake, although the filling may change texture slightly after thawing.
Cover the dish tightly or transfer individual portions to freezer-safe containers. Freeze for up to approximately 1 month for best quality.
Thaw the cake in the refrigerator until soft enough to slice and serve. Do not thaw it for several hours at room temperature.
For the smoothest cream texture, refrigeration rather than freezing is the preferred storage method.
Common Mistakes to Avoid
Soaking the biscuits for too long: Oversaturated biscuits can become mushy and make the cake difficult to slice. Dip them briefly and let the refrigerator finish softening them.
Using warm coffee: Hot coffee can cause the biscuits to break apart too quickly. Allow it to cool before assembly.
Underwhipping the cream: Cream that is too soft may produce a filling that does not hold its shape. Beat it to stiff peaks before folding.
Overmixing the filling: Vigorous mixing can deflate the whipped cream and reduce the light texture.
Skipping the chilling period: The cake needs enough time to set. Cutting it too early can result in messy, unstable slices.
Adding too much condensed milk: It can make the filling overly sweet or loose. Use the optional quantity carefully and adjust the powdered sugar to taste.
Storing the cake uncovered: The cream can absorb refrigerator odors and dry out. Always cover the dish properly.
Nutrition Estimate
The following values are approximate per serving, assuming 12 servings and including biscuits, coffee, cream, cream cheese, powdered sugar, and chocolate. The optional condensed milk may increase the calories and sugar.
| Nutrient | Approximate Amount |
| Calories | 300–380 kcal |
| Protein | 4–6 g |
| Total Fat | 19–25 g |
| Saturated Fat | 11–15 g |
| Carbohydrates | 27–38 g |
| Sugars | 16–24 g |
| Fiber | 1–3 g |
Actual nutrition values depend on the biscuit type, chocolate, dairy products, portion size, and whether condensed milk is included.
Frequently Asked Questions
Can I make this cake without cream cheese?
Yes. Mascarpone is an excellent alternative and creates a smooth, rich filling. You can also use a suitable thick dessert cream cheese alternative, provided it holds its shape when mixed with whipped cream.
Can I make the cake without condensed milk?
Absolutely. Condensed milk is optional. The cream cheese or mascarpone, whipped cream, powdered sugar, and vanilla already create a creamy filling.
Which biscuits work best?
Chocolate biscuits give the cake a stronger chocolate flavor, while graham crackers provide a milder sweetness. Ladyfingers are ideal if you prefer a texture similar to tiramisu.
How long does the cake need to chill?
Chill for at least 4 hours, although overnight refrigeration is recommended for a firmer filling and softer biscuit layers.
Can I make this dessert without coffee?
Yes. Substitute cooled milk or hot chocolate that has been cooled to room temperature. The flavor will be sweeter and less coffee-forward.
Why is my icebox cake too soft?
The biscuits may have absorbed too much coffee, the whipped cream may not have been whipped sufficiently, or the cake may not have chilled long enough. Briefly dip the biscuits and refrigerate the assembled cake overnight whenever possible.
Can I make this recipe caffeine-free?
Yes. Use decaffeinated coffee or replace the coffee with cooled milk. Keep in mind that decaffeinated coffee still contains small amounts of caffeine.
Can I use low-fat cream cheese?
You can, but the filling may be less rich and may not hold its shape as well. For the best texture, use full-fat cream cheese or mascarpone and properly whipped heavy cream.
Is this cake suitable for preparing the day before?
Yes. In fact, making it the day before is one of the best ways to achieve a soft biscuit texture and a well-set filling.
Can I freeze individual slices?
Yes. Wrap each slice or store it in a freezer-safe container. Thaw overnight in the refrigerator before serving, keeping in mind that the cream texture may change slightly.
Final Thoughts
No-Bake Chocolate & Coffee Icebox Cake is an easy, elegant dessert that combines coffee-soaked biscuits, fluffy cream filling, and rich chocolate shavings without the need for an oven.
With just a few simple ingredients and some refrigeration time, you can create a dessert that is perfect for family gatherings, celebrations, or a sweet treat after dinner.
For the best results, dip the biscuits quickly, fold the cream gently, and allow the cake to chill overnight. Slice it into neat squares, add a little extra chocolate on top, and enjoy every creamy, coffee-infused bite.