
Introduction
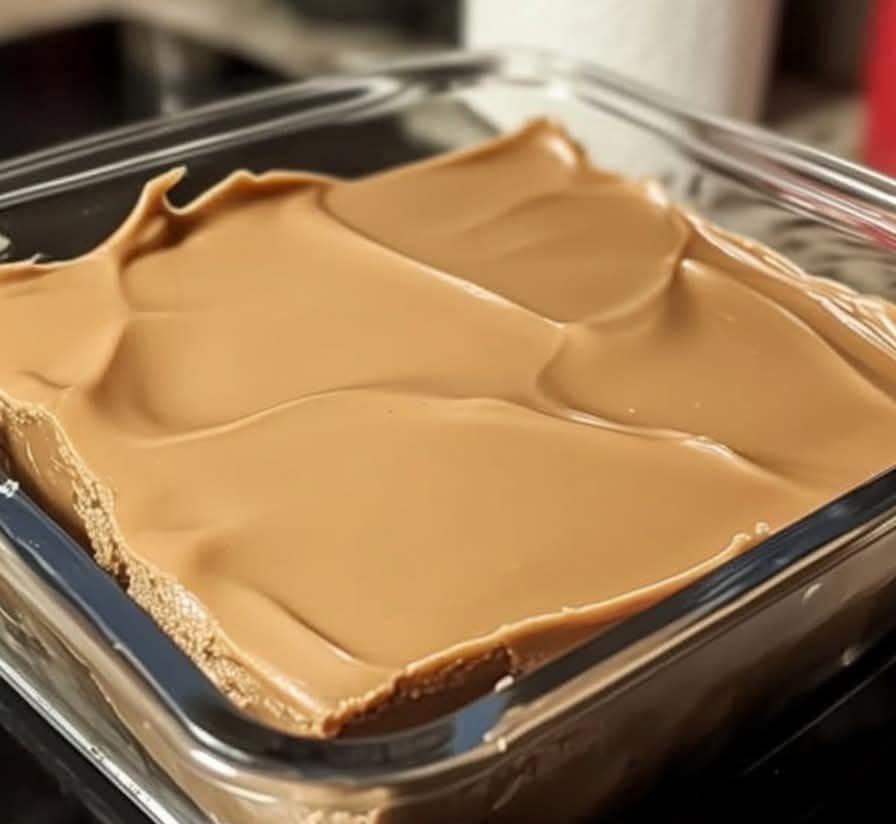
This creamy Peanut Butter Fudge is an incredibly easy no-bake dessert made with just three simple ingredients.
It has a smooth, rich texture and a delicious combination of sweet condensed milk, creamy peanut butter, and vanilla.
No oven is required, making this an excellent quick dessert recipe for beginners, busy families, holiday treats, and homemade gifts.
The finished fudge can be cut into neat little squares and served straight from the refrigerator.
Recipe Overview
| Details | Information |
| Prep Time | 10 minutes |
| Cooking Time | 2–3 minutes |
| Chilling Time | Minimum 2 hours |
| Total Time | About 2 hours 15 minutes |
| Servings | 16 squares |
| Difficulty | Very Easy |
| Method | No-Bake / Microwave |
| Pan Size | 8 × 8 inches (20 × 20 cm) |
Why You’ll Love This Recipe
This peanut butter fudge is one of the easiest homemade desserts you can prepare.
It requires only three main ingredients and minimal kitchen equipment.
The microwave method makes the preparation especially quick and convenient.
After chilling, the mixture transforms into a firm but creamy fudge with a smooth, melt-in-your-mouth texture.
It is an excellent choice when you want an easy dessert without spending hours in the kitchen.
Ingredients
For the Fudge
| Ingredient | Amount |
| Creamy peanut butter | 2 cups (about 500 g) |
| Sweetened condensed milk | 1 can, 14 oz (397 g) |
| Vanilla extract | 1 teaspoon |
For the Pan
| Ingredient | Amount |
| Parchment paper | Enough to line the pan |
| Cooking spray or neutral oil | Optional |
Step-by-Step Instructions
Prepare the Baking Dish
Line an 8 × 8-inch (20 × 20 cm) square glass baking dish with parchment paper.
Leave some parchment paper hanging over two sides of the dish.
This overhang will make it much easier to lift the chilled fudge out later.
If necessary, lightly grease the bottom of the dish to help the parchment stay in place.
Combine the Peanut Butter and Condensed Milk
Place the creamy peanut butter and sweetened condensed milk in a microwave-safe bowl.
Microwave for 30 seconds.
Remove the bowl and stir thoroughly.
Continue heating in 30-second intervals, stirring after each interval, until the mixture becomes warm, smooth, and easy to combine.
The exact heating time depends on the power of your microwave.
Do not overheat the mixture.
Add the Vanilla
Add the vanilla extract to the warm peanut butter mixture.
Stir until completely incorporated.
The mixture should look smooth, glossy, and thick.
Transfer to the Dish
Immediately pour the mixture into the prepared baking dish.
Use a spatula to spread it evenly.
Smooth the surface gently.
For an attractive homemade appearance, create soft swirls across the top with the back of the spatula.
Chill the Fudge
Place the dish in the refrigerator.
Chill for at least 2 hours, or until the fudge is completely firm.
For the cleanest slices, you can allow it to chill for several additional hours.
Cut and Serve
Once firm, carefully lift the fudge from the dish using the parchment paper overhang.
Place it on a cutting board.
Use a sharp knife to cut the fudge into approximately 16 squares.
For cleaner cuts, wipe the knife between slices.
Best Tips
Use creamy peanut butter for the smoothest possible texture.
Avoid heating the mixture for long periods in the microwave.
Always stir between heating intervals.
Work fairly quickly once the vanilla has been added because the mixture will become thicker as it cools.
Use parchment paper to make removing the fudge much easier.
Allow the fudge to become completely firm before cutting.
For especially clean cuts, slightly warm the knife before slicing.
Best Ingredient Options
Peanut Butter
Creamy peanut butter produces the smoothest fudge.
Natural peanut butter can sometimes have a separated layer of oil, which may affect the final consistency.
If using natural peanut butter, stir it extremely well before measuring.
Sweetened Condensed Milk
Use sweetened condensed milk, not evaporated milk.
Sweetened condensed milk provides sweetness and contributes to the texture of the fudge.
Vanilla Extract
Pure vanilla extract adds a warm, aromatic flavor that complements the peanut butter.
A small amount is enough to enhance the overall taste.
Recipe Variations
Chocolate Peanut Butter Fudge
Add melted chocolate to the mixture or create a thin chocolate layer over the top.
Dark, milk, or semi-sweet chocolate all pair beautifully with peanut butter.
Chocolate Chip Fudge
Fold approximately ½ cup of chocolate chips into the mixture just before transferring it to the baking dish.
Crunchy Peanut Butter Fudge
Use crunchy peanut butter instead of creamy peanut butter.
You can also add chopped roasted peanuts for additional texture.
Caramel Peanut Butter Fudge
Drizzle caramel sauce over the surface before chilling.
Use a knife or toothpick to gently swirl the caramel through the top.
Chocolate-Caramel Fudge
Add a layer of melted chocolate followed by a light caramel drizzle.
This creates a rich dessert with multiple layers of flavor.
Sea Salt Peanut Butter Fudge
Sprinkle a small amount of flaky sea salt over the surface before refrigerating.
The sweet-and-salty combination creates a delicious contrast.
What to Serve With
Serve peanut butter fudge alongside freshly brewed coffee.
It also pairs beautifully with tea, hot chocolate, or a cold glass of milk.
For a more indulgent dessert, serve a few fudge squares with vanilla ice cream.
You can also arrange the squares on a dessert platter for parties, holidays, birthdays, or family gatherings.
Make-Ahead Instructions
This fudge is perfect for making ahead.
Prepare it the day before serving and allow it to chill overnight.
Once completely firm, cut it into squares and place the pieces in an airtight container.
This makes it especially convenient for holiday baking, parties, dessert tables, and homemade food gifts.
Storage
Store the fudge in an airtight container.
Place parchment paper between layers to prevent the pieces from sticking together.
For the best quality, refrigerate the fudge and consume it within approximately 1–2 weeks.
Allow individual pieces to sit at room temperature for a few minutes before serving if you prefer a softer texture.
Reheating
This fudge does not need to be reheated.
It is best served chilled or slightly softened at room temperature.
Avoid microwaving the finished fudge because excessive heat can change its texture.
Freezing
Peanut butter fudge can be frozen successfully.
Cut the fudge into individual squares before freezing.
Wrap the pieces individually or separate layers with parchment paper.
Place them in a freezer-safe container or airtight freezer bag.
For the best quality, use within approximately 2–3 months.
Thaw the fudge in the refrigerator before serving.
Common Mistakes to Avoid
Using the Wrong Type of Milk
Sweetened condensed milk is required for this recipe.
Do not substitute evaporated milk.
Overheating the Mixture
Heating the ingredients for too long can negatively affect the texture.
Use short 30-second microwave intervals and stir frequently.
Not Mixing Thoroughly
The peanut butter and condensed milk should form a completely smooth and uniform mixture.
Cutting the Fudge Too Early
If the fudge has not chilled sufficiently, it may be soft and difficult to cut.
Allow it to become completely firm.
Using a Pan That Is Too Large
A larger pan will create a thinner layer of fudge.
An 8 × 8-inch pan produces thick, satisfying squares.
Leaving the Fudge Uncovered
Store the finished fudge in an airtight container to prevent it from absorbing refrigerator odors and drying out.
Nutrition Estimate
| Nutrient | Approximate Amount per Square |
| Calories | 190–210 kcal |
| Protein | 5–6 g |
| Carbohydrates | 18–21 g |
| Fat | 11–13 g |
| Saturated Fat | 3–4 g |
| Sugar | 16–18 g |
| Fiber | 1–2 g |
| Sodium | 100–140 mg |
Nutrition information is an estimate and will vary depending on the brands used and the size of each serving.
Frequently Asked Questions
Can I make this fudge without a microwave?
Yes.
Place the peanut butter and sweetened condensed milk in a saucepan over very low heat.
Stir continuously until the mixture becomes smooth and combined.
Do not allow it to boil.
How long does peanut butter fudge take to set?
The fudge generally needs at least 2 hours in the refrigerator.
For firmer and cleaner slices, chilling it longer is perfectly fine.
Can I use crunchy peanut butter?
Yes.
Crunchy peanut butter creates a different texture with small pieces of peanuts throughout the fudge.
Why didn’t my fudge become firm?
The consistency can be affected by using different ingredients or changing the proportions.
Make sure you use sweetened condensed milk and the recommended amount of peanut butter.
Adequate chilling time is also important.
Can I add chocolate?
Absolutely.
Chocolate and peanut butter are a classic combination.
You can add chocolate chips, melted chocolate, or a chocolate topping.
Can I use a different pan?
Yes.
You can use a rectangular pan or individual silicone molds.
Keep in mind that the thickness of the fudge will change depending on the size of the pan.
Can I keep the fudge at room temperature?
The fudge can be served at room temperature, but refrigeration is recommended for longer storage and a firmer texture.
Final Thoughts
This 3-Ingredient Peanut Butter Fudge is an incredibly simple homemade dessert with a rich, creamy texture.
With just a few minutes of preparation and some refrigerator time, you can create delicious fudge squares without using an oven.
It is perfect for holiday desserts, parties, family gatherings, homemade gifts, and quick sweet treats.
For an extra-special version, add chocolate, caramel, roasted peanuts, or a sprinkle of flaky sea salt.