
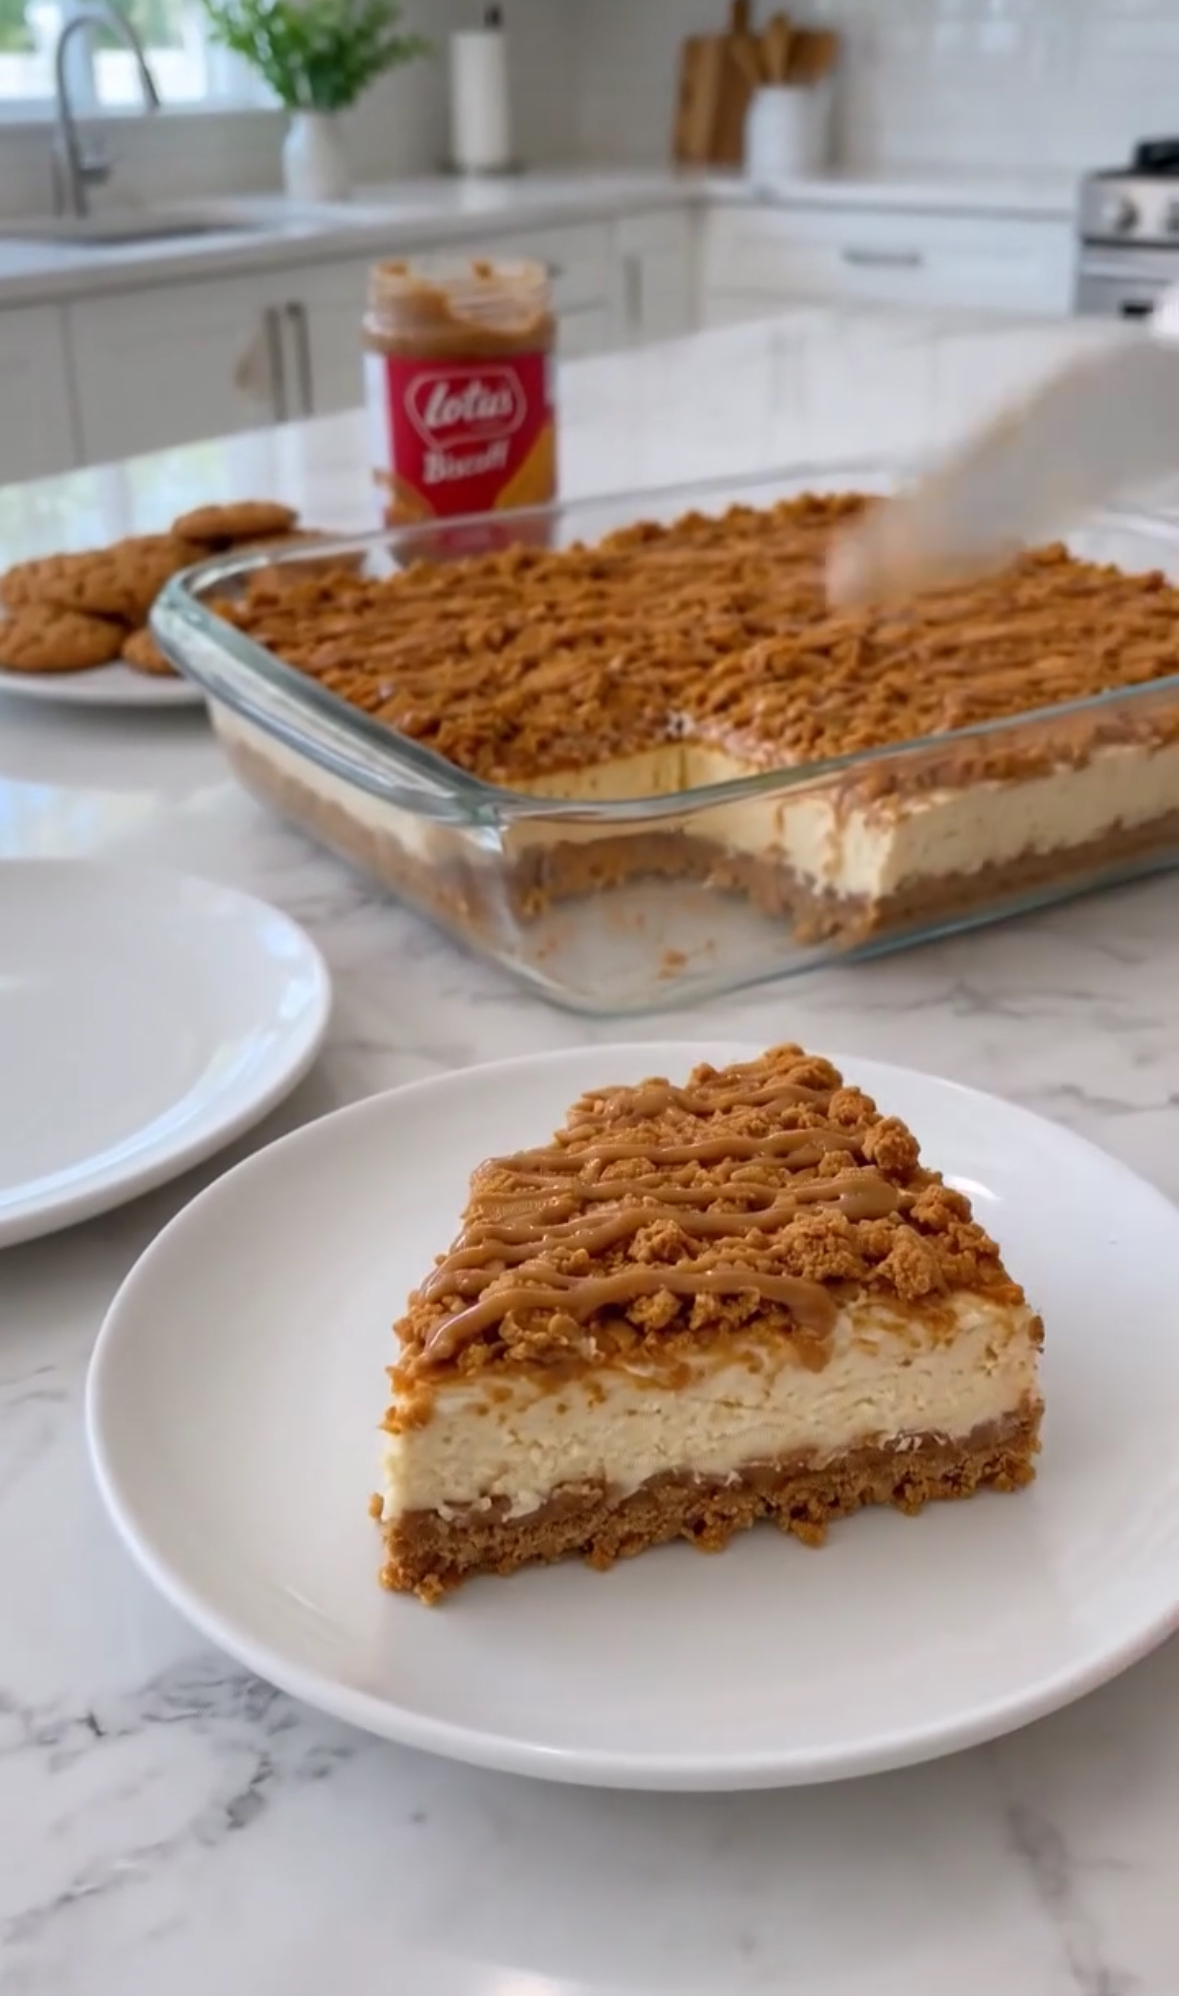
This No-Bake Lotus Biscoff Cheesecake is a creamy, indulgent dessert featuring a buttery Biscoff cookie crust, a smooth cheesecake filling, and a generous layer of melted cookie butter on top. Every bite combines the caramelized flavor of Lotus Biscoff cookies with a rich, velvety cream cheese filling.
Best of all, this easy Biscoff cheesecake requires no oven. It is perfect for birthdays, family gatherings, holidays, or whenever you want an impressive dessert without complicated baking.
Recipe Overview
| Details | Information |
| Preparation Time | 30 minutes |
| Cooking Time | 0 minutes |
| Chilling Time | At least 4–6 hours |
| Total Time | Approximately 4 hours 30 minutes |
| Servings | 10–12 slices |
| Difficulty | Easy |
| Dessert Type | No-Bake Cheesecake |
| Main Ingredients | Biscoff cookies, cream cheese, cookie butter, whipping cream |
| Pan Size | 8–9-inch (20–23 cm) springform pan |
Why You’ll Love This Recipe
This no-bake cheesecake delivers the irresistible caramelized flavor of Lotus Biscoff in every layer. The crunchy cookie crust provides the perfect contrast to the light, creamy filling, while the melted Biscoff topping adds a beautiful glossy finish. It is easy to prepare ahead of time, requires no baking, and makes an elegant dessert for any occasion.
Ingredients
For the Biscoff Cookie Crust
| Ingredient | Quantity |
| Lotus Biscoff cookies | 250 g (approximately 2 cups finely crushed) |
| Unsalted butter, melted | 75 g (1/3 cup) |
For the Cheesecake Filling
| Ingredient | Quantity |
| Full-fat cream cheese, softened | 680 g (24 oz) |
| Granulated sugar | 100 g (1/2 cup) |
| Smooth Lotus Biscoff spread | 250 g (approximately 1 cup) |
| Vanilla extract | 1 teaspoon |
| Heavy whipping cream, cold | 240 ml (1 cup) |
For the Topping
| Ingredient | Quantity |
| Lotus Biscoff spread | 150 g (approximately 1/2 cup) |
| Crushed Biscoff cookies | 2–3 tablespoons, optional |
Step-by-Step Instructions
Step 1: Prepare the Cookie Crust
Place the Lotus Biscoff cookies in a food processor and pulse until they form fine crumbs. If you do not have a food processor, place the cookies in a sealed bag and crush them with a rolling pin.
Transfer the crumbs to a mixing bowl and pour in the melted butter. Stir until the mixture resembles damp sand and the crumbs are evenly coated.
Press the mixture firmly into the bottom of an 8–9-inch springform pan, creating an even layer. Use the bottom of a flat glass or measuring cup to compact the crust.
Refrigerate for 20–30 minutes while preparing the filling.
Step 2: Beat the Cream Cheese
Place the softened cream cheese and granulated sugar in a large mixing bowl. Beat with an electric mixer on medium speed until the mixture is smooth, creamy, and free of lumps.
Scrape down the sides of the bowl as needed to ensure everything is evenly combined.
Step 3: Add the Biscoff Spread
Add 250 g of smooth Lotus Biscoff spread and the vanilla extract to the cream cheese mixture.
Beat again until the filling is completely smooth and has a uniform caramel color. Avoid overmixing once the ingredients are combined.
Step 4: Whip the Heavy Cream
Pour the cold heavy whipping cream into a separate chilled bowl. Using a clean electric mixer, whip until stiff peaks form.
When you lift the beaters, the whipped cream should hold its shape without collapsing. Be careful not to overwhip, as the cream can become grainy.
Step 5: Fold the Whipped Cream Into the Filling
Add the whipped cream to the Biscoff cream cheese mixture in two or three additions.
Using a flexible spatula, gently fold the ingredients together until the filling is smooth, fluffy, and evenly combined. Avoid vigorous stirring, which can deflate the whipped cream.
Step 6: Assemble the Cheesecake
Remove the chilled crust from the refrigerator. Spoon the cheesecake filling over the crust and spread it evenly with a spatula.
Smooth the surface, gently tap the pan on the counter to release large air pockets, and cover the pan.
Step 7: Add the Biscoff Topping
Place approximately 150 g of Biscoff spread in a microwave-safe bowl. Microwave in short 10–15-second intervals, stirring between each interval, until the spread is smooth and pourable.
Let it cool slightly so it is warm rather than hot. Pour it over the chilled cheesecake filling and gently spread it toward the edges.
Sprinkle crushed Biscoff cookies around the top or in the center for an attractive finish.
Step 8: Chill Until Firm
Refrigerate the cheesecake for at least 4–6 hours, preferably overnight. This allows the filling to firm up and makes slicing easier.
For the cleanest slices, carefully release the springform pan and use a sharp knife warmed in hot water and wiped dry between cuts.
Serve chilled and enjoy every creamy, caramelized bite!
Best Tips
Use full-fat cream cheese for a rich, stable filling, and make sure it is softened before mixing to prevent lumps. The whipping cream must be cold to achieve the best volume. Press the cookie crust firmly into the pan, and allow enough chilling time before serving. For neat slices, wipe the knife clean after every cut.
Best Ingredient Options
Smooth Biscoff spread creates a silky filling, while crunchy Biscoff spread adds extra cookie pieces and texture. Full-fat block cream cheese is ideal for a firm cheesecake. If using salted butter instead of unsalted butter, the crust may have a slightly saltier flavor. For the best results, use heavy whipping cream with approximately 35% fat or more.
Recipe Variations
For a chocolate Biscoff cheesecake, drizzle melted dark chocolate over the topping. For extra crunch, fold a small amount of crushed Biscoff cookies into the filling just before assembling. You can also make individual cheesecakes in dessert glasses or muffin cups for easy serving at parties.
What to Serve With
Serve this rich cheesecake with fresh strawberries, raspberries, or sliced bananas for a fruity contrast. A cup of coffee, cappuccino, or black tea pairs beautifully with its caramelized cookie flavor. Because the dessert is rich and sweet, small slices are often enough to satisfy a dessert craving.
Make-Ahead Instructions
This cheesecake is ideal for preparing ahead. Assemble it the day before serving and leave it covered in the refrigerator overnight. Add the final cookie garnish shortly before serving to help preserve its texture and appearance.
Storage
Store leftover cheesecake in an airtight container or cover the springform pan tightly. Keep it refrigerated at 4°C (40°F) or below and consume within 3–4 days. Do not leave cream cheese and whipped cream desserts at room temperature for more than 2 hours.
Reheating
This cheesecake should be served cold and does not need reheating. Allow each slice to sit at room temperature for approximately 5–10 minutes before serving if you prefer a slightly softer texture.
Freezing
You can freeze the cheesecake without compromising much of its flavor. For the best results, freeze it until firm, then wrap individual slices tightly and place them in a freezer-safe container. Freeze for up to 2 months for best quality.
Thaw slices overnight in the refrigerator before serving. The texture of the topping may change slightly after freezing and thawing.
Common Mistakes to Avoid
Using cream cheese straight from the refrigerator can create a lumpy filling. Whipping warm cream may prevent it from reaching stiff peaks, while overmixing after adding the whipped cream can make the filling less airy. Cutting the cheesecake before it has fully chilled may cause it to collapse, and adding very hot Biscoff spread can soften the surface of the filling.
Nutrition Estimate
Approximate values per serving, assuming 12 slices.
| Nutrient | Amount |
| Calories | 480–550 kcal |
| Protein | 5–7 g |
| Carbohydrates | 35–45 g |
| Total Fat | 35–42 g |
| Saturated Fat | 18–23 g |
| Sugar | 25–32 g |
| Sodium | 250–400 mg |
Nutrition values are estimates and vary depending on the brands used, serving size, and exact ingredient quantities.
Frequently Asked Questions
Can I make this Biscoff cheesecake without an oven?
Yes! This recipe is completely no-bake. The crust sets in the refrigerator, and the filling becomes firm after several hours of chilling.
How long does the cheesecake need to chill?
Allow at least 4–6 hours, although overnight chilling is best for a firmer filling and cleaner slices.
Can I use crunchy Biscoff spread?
Yes. Crunchy spread adds small cookie pieces to the filling and creates a slightly different texture. Smooth spread is best for an evenly creamy result.
Why is my no-bake cheesecake too soft?
It may not have chilled long enough, the cream may not have been whipped to stiff peaks, or the filling may have been overmixed. Make sure to use full-fat cream cheese and sufficiently cold whipping cream.
Can I make this cheesecake in advance?
Absolutely. Preparing it the day before serving gives it plenty of time to set and makes entertaining easier.
Can I make individual Biscoff cheesecakes?
Yes. Divide the crust and filling among small dessert glasses or muffin cups. Chill until firm and add the topping just before serving. Individual portions may set faster, depending on their size.
Can I use a regular cake pan?
Yes, but a springform pan makes removing the cheesecake much easier. If using a regular pan, line the bottom and sides with parchment paper to help lift it out.
Final Thoughts
This No-Bake Lotus Biscoff Cheesecake is a delicious combination of buttery cookie crumbs, fluffy cream cheese filling, and a glossy cookie butter topping. With no oven required and simple preparation steps, it is an excellent make-ahead dessert for celebrations, dinner parties, or a special weekend treat.
For the best results, use quality ingredients, chill the cheesecake overnight, and garnish with extra Biscoff cookie crumbs just before serving. One slice is all it takes to understand why this creamy Biscoff dessert is such a favorite!